
I. Introduction
In the field of industrial automation, the Zhengshun Servo ZS100 series is widely applied in core scenarios such as CNC machine tools, industrial robots, packaging machinery, and textile equipment due to its high precision, rapid response, and wide speed – regulation range. However, during long – term operation, the ERR45 fault (motor over – temperature) is one of the most common alarms in the ZS100 series. According to the fault statistics of a servo manufacturer in 2023, ERR45 accounts for 18% of all faults. If not handled promptly, it may lead to motor winding burnout, bearing seizure, and even equipment shutdown and production interruption, causing significant losses to enterprises.
Based on the technical documents of the ZS100 series, on – site maintenance experience, and fault cases, this article systematically analyzes the solution logic of the ERR45 fault from the perspectives of fault definition, detection principle, cause analysis, troubleshooting steps, and preventive measures, providing an actionable reference plan for engineering technicians.
II. Definition and Detection Principle of ERR45 Fault
1. Fault Definition
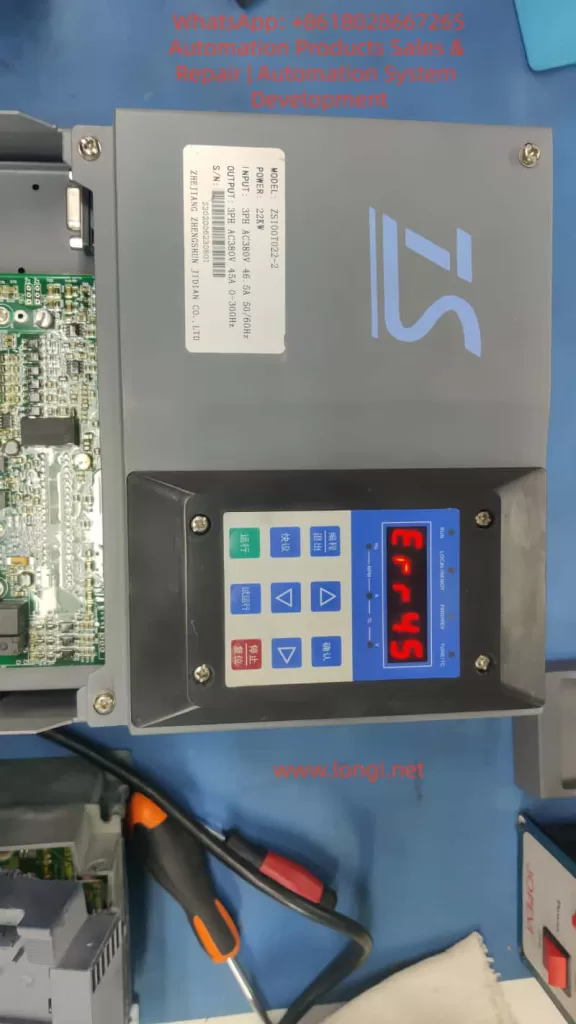
ERR45 is a protection alarm for abnormal motor temperature in the Zhengshun Servo ZS100 series drive. The trigger condition is that the motor temperature exceeds the threshold set by the drive (the default threshold is 130°C – 150°C, depending on the motor insulation class). When the temperature exceeds the threshold, the drive immediately cuts off the output, the panel displays “ERR45”, and locks the fault state (which can only be restarted after reset).
2. Temperature Detection Principle
The ZS100 series collects temperature signals through a built – in temperature sensor in the motor. There are two common types of sensors:
- PTC Thermistor (Positive Temperature Coefficient): At 25°C, its resistance is approximately 100Ω – 500Ω. As the temperature rises, the resistance increases sharply (the Curie point is about 120°C – 150°C). When it exceeds the Curie point, the resistance suddenly jumps to infinity, triggering protection.
- PT100 Platinum Resistor (Linear Characteristics): At 0°C, its resistance is 100Ω, with a temperature coefficient of about 0.00385Ω/Ω/°C and high precision (±0.1°C), suitable for high – precision temperature detection.
The temperature detection process of the drive is as follows:
- The sensor converts the temperature signal into a resistance value.
- The signal conditioning circuit (amplification and filtering) converts the resistance value into a voltage signal.
- The AD conversion chip (such as a 12 – bit AD) converts the voltage signal into a digital quantity.
- The internal algorithm of the drive converts the digital quantity into a temperature value (for example, the temperature calculation formula for PT100: T=R0×αRt−R0, where Rt is the current resistance, R0 is the resistance at 0°C, and α is the temperature coefficient).
- The comparator compares the calculated temperature with the set threshold. If it exceeds the threshold, the ERR45 alarm is triggered.
III. In – Depth Cause Analysis of ERR45 Fault
The essence of ERR45 is that “the motor temperature exceeds the protection threshold”, but the reasons for the temperature rise need to be analyzed from six dimensions: the motor side, the fan side, the wiring side, the drive side, the load side, and the environmental side, as follows:
(I) Motor Side: Real Overheating or Sensor Fault
1. Real Overheating (Abnormal Motor Temperature)
- Overload Operation: When the load torque exceeds the rated torque of the motor (for example, the rated torque of the ZS100 – 22kW motor is 70N·m, and if the load reaches 80N·m, it is overloaded), the current increases (exceeding the rated current), and the winding heating increases.
- Long – term High – load Operation: The motor runs continuously for 24 hours, and the heat dissipation cannot keep up, causing the temperature to accumulate and exceed the threshold.
- Poor Heat Dissipation: Dust accumulation on the motor heat sink, coverage by debris (such as oil stains from cutting fluid splashing), or a high ambient temperature (workshop temperature > 40°C) reduce the heat dissipation efficiency.
- Motor Faults:
- Winding Short – circuit: The insulation of the winding ages (the insulation life is halved for every 10°C increase in temperature), resulting in an inter – phase short – circuit, a sudden increase in current, and increased heating.
- Bearing Damage: The bearing grease fails (carbonization due to high temperature) or the ball bearings wear, causing friction between the rotor and the stator and generating a large amount of heat.
- Rotor Jamming: Foreign objects (such as iron filings) enter the motor, or the bearing seizes, preventing the rotor from rotating. The current increases sharply (up to 5 – 10 times the rated current), causing instant overheating.
2. Sensor Fault (False Temperature Alarm)
- Sensor Damage: The PTC thermistor breaks down (resistance is 0Ω), or the PT100 platinum resistor is open – circuit (resistance is infinite).
- Improper Sensor Installation: It is not tightly attached to the motor winding (for example, installed on the heat sink instead of near the winding), causing the detected temperature to be lower than the actual winding temperature.
- Sensor Type Mismatch: The drive parameters are set to “PT100”, but a PTC sensor is actually used, resulting in incorrect temperature calculation.
(II) Fan Side: Heat Dissipation Failure
The ZS100 series motor is usually equipped with a forced air – cooling fan (voltage AC220V, speed 1500rpm). Fan failure is a common cause of ERR45:
- Fan Does Not Rotate: The fan motor is damaged (winding burnout), or there is a power supply fault (loose wiring, fuse blowout).
- Insufficient Fan Speed: Dust accumulation on the fan blades (such as in a workshop with a lot of dust) or bearing wear (high rotational resistance) reduce the air volume (the normal air volume is about 0.5m³/min. If it drops to 0.2m³/min, heat dissipation fails).
- Incorrect Fan Direction: The fan rotates in reverse (such as due to incorrect wiring phase sequence), causing air to be blown out from the inside of the motor instead of being drawn in, completely losing the heat dissipation effect.
(III) Wiring Side: Signal Transmission Fault
Wiring problems of the temperature sensor can prevent the drive from correctly collecting the temperature signal:
- Broken Wire: The wire breaks due to long – term vibration (for example, the motor junction box is not fixed), or is squeezed by mechanical parts (such as the machine tool protective door clamping the wire).
- Poor Contact: The wiring terminals are oxidized (for example, copper terminals develop green rust), or the screws are loose, increasing the resistance (for example, the contact resistance increases from 0.1Ω to 10Ω), causing abnormal AD conversion values.
- Polarity Error: The PT100 sensor requires “three – wire” wiring (to compensate for wire resistance). If it is connected as “two – wire”, the detected temperature value will be higher (for example, the actual temperature is 100°C, but the detected temperature is 120°C).
(IV) Drive Side: Detection Circuit Fault
If the motor, fan, and wiring are all normal, a fault in the drive’s temperature detection circuit should be suspected:
- AD Conversion Chip Damage: For example, if the ADS1115 chip fails, the conversion of the resistance value to the temperature value is incorrect (for example, the actual temperature is 100°C, but it is displayed as 150°C).
- Comparator Fault: For example, if the LM393 comparator is damaged, the threshold judgment is incorrect (for example, the threshold is set to 140°C, but the comparator triggers the alarm at 120°C).
- Parameter Setting Errors:
- The temperature threshold is set too low (for example, for an F – class insulation motor, the threshold is set to 120°C, while the actual allowable temperature is 155°C).
- The sensor type is set incorrectly (for example, PTC is actually used, but the parameter is set to PT100).
- The filtering time is set too short (for example, 10ms), causing temperature signal fluctuations and false alarms.
(V) Load Side: Mechanical Transmission Abnormalities
Mechanical load problems can indirectly cause motor overheating:
- Transmission Jamming: Poor lubrication of the lead screw (lack of oil) or bearing damage (ball bearing seizure) requires the motor to overcome greater resistance, increasing the current.
- Excessive Load: For example, the feeding mechanism of packaging machinery is jammed, causing the motor torque to exceed the rated value.
- Coupling Misalignment: The radial deviation between the motor shaft and the load shaft is > 0.05mm, and the axial deviation is > 0.03mm, causing the motor shaft to bear additional radial forces and increasing friction heating.
(VI) Environmental Side: Deterioration of Heat Dissipation Conditions
- High Workshop Temperature: In summer, if the workshop temperature exceeds 40°C, the motor’s heat dissipation capacity decreases (the heat dissipation efficiency is inversely proportional to the ambient temperature).
- Poor Ventilation: There are obstacles (such as shelves and equipment) around the motor, preventing the hot air from being discharged.
- Heat Source Interference: There are heaters, high – frequency welding machines, and other heat sources near the motor, increasing the ambient temperature.
IV. Systematic Troubleshooting Steps for ERR45 Fault
When troubleshooting ERR45, the principle of “from simple to complex and from external to internal” should be followed to avoid blind disassembly. The following is a standardized troubleshooting process:
Step 1: Reset the Fault and Confirm Whether It is a False Alarm
Operation: Press the “reset” key on the drive panel (or power off and restart). If the fault disappears, it may be due to occasional interference (such as power supply fluctuations or instantaneous abnormal sensor signals). If the fault recurs, further troubleshooting is required.
Step 2: Check the Temperature Sensor Wiring (Easiest to Check)
Tools: Multimeter (resistance range), screwdriver.
Operation:
- Turn off the drive power and wait for 5 minutes (for capacitor discharge).
- Remove the motor junction box and find the temperature sensor terminals (marked as “TH” or “TEMP”).
- For a PTC sensor (two wires): Measure the resistance between the two ends. At 25°C, it should be 100Ω – 500Ω (depending on the model). If the resistance is infinite (broken wire) or 0Ω (short – circuit), replace the wire or sensor.
- For a PT100 sensor (three wires): Measure the resistance between the “A – B” wires (about 100Ω at 25°C). The resistances between “A – C” and “B – C” wires should be equal (to compensate for wire resistance). If the resistances are abnormal, check the wiring or sensor.
- Check whether the terminals are oxidized or loose. Polish them with sandpaper or tighten them again.
Step 3: Check the Motor Fan (Key Heat – Dissipation Component)
Tools: Multimeter (voltage range), tachometer (or the “Tachometer” mobile app), compressed air.
Operation:
- Power on and start the motor (run at low speed), and observe whether the fan rotates.
- If the fan does not rotate: Measure the fan power supply voltage (should be AC220V). If there is no voltage, check the drive’s fan output terminals or wiring. If there is voltage, it means the fan motor is damaged and needs to be replaced.
- If the fan rotates: Use a tachometer to measure the speed (normal 1500rpm ± 10%). If the speed is insufficient, clean the blade dust with compressed air or lubricate the bearing (add a drop of engine oil).
- Check the fan direction: Feel the airflow with your hand. Air should be drawn in from the outside of the motor (blown from the heat sink to the inside of the motor). If it rotates in reverse, adjust the wiring phase sequence.
Step 4: Detect the Actual Motor Temperature (Determine Whether It is Overheated)
Tools: Infrared thermometer (such as FLUKE TiS75), megohmmeter (500V).
Operation:
- Run the motor until the fault is triggered (or simulate the load), and use an infrared thermometer to measure the motor housing (normal ≤ 80°C), heat sink (normal ≤ 100°C), and winding (measured through the junction box, normal ≤ 130°C, F – class insulation allows 155°C).
- If the temperature exceeds the threshold, it means the motor is really overheated, and the load or the motor itself needs to be checked.
- After shutdown, use a megohmmeter to measure the winding insulation resistance (between phases and to the ground). It should be > 10MΩ normally. If it is < 1MΩ, it means the winding is damp or the insulation is aged, and the motor needs to be dried or replaced.
Step 5: Troubleshoot the Load and Mechanical Transmission (Indirect Causes)
Tools: Torque sensor, dial indicator, lubricating grease.
Operation:
- Use a torque sensor to measure the load torque (for example, the rated torque of the ZS100 – 22kW motor is 70N·m. If it exceeds 80N·m, it is overloaded). Adjust the load (such as reducing the feeding amount or repairing the jammed lead screw).
- Use a dial indicator to measure the coupling alignment: the radial deviation should be ≤ 0.05mm, and the axial deviation should be ≤ 0.03mm. If it exceeds the standard, re – adjust the coupling.
- Check the lubrication of mechanical transmission components: whether the lead screw and bearings are short of oil. Add lubricating grease (such as lithium – based grease).
- Manually rotate the motor shaft (power off): if it is jammed, it means there is a problem with the bearing or rotor, and the motor needs to be disassembled for inspection.
Step 6: Check the Drive’s Temperature Detection Circuit (Last Step)
Tools: Oscilloscope, multimeter, replacement sensor.
Operation:
- If all the above steps are normal, disassemble the drive and find the temperature detection circuit (usually on the control board, marked as “TEMP IN”).
- Use an oscilloscope to measure the sensor signal waveform: the resistance change of the PTC sensor should be proportional to the temperature, and the voltage signal of the PT100 should change linearly.
- Replace the temperature sensor (use a new sensor of the same model). If the fault disappears, it means the original sensor is damaged.
- If the fault still exists, check the power supply voltage (should be 5V) and output signal of the AD conversion chip (such as ADS1115) for normality, or replace the control board.
Step 7: Improve the Environment and Heat Dissipation (Prevent Recurrence)
Tools: Thermometer, ventilation equipment, compressed air.
Operation:
- Measure the workshop temperature. If it is > 40°C, install an air conditioner or industrial fan (aimed at the motor heat sink).
- Clean the debris around the motor (such as cutting fluid buckets and tools) to ensure a clear heat dissipation channel.
- Apply thermal conductive silicone grease (such as Shin – Etsu 7921) on the motor heat sink to improve heat dissipation efficiency.
- For motors that run under long – term high – load conditions, add an external heat sink (such as an air – cooled heat sink).
V. Analysis of Typical Cases
Case 1: False Alarm Due to Wiring Breakage
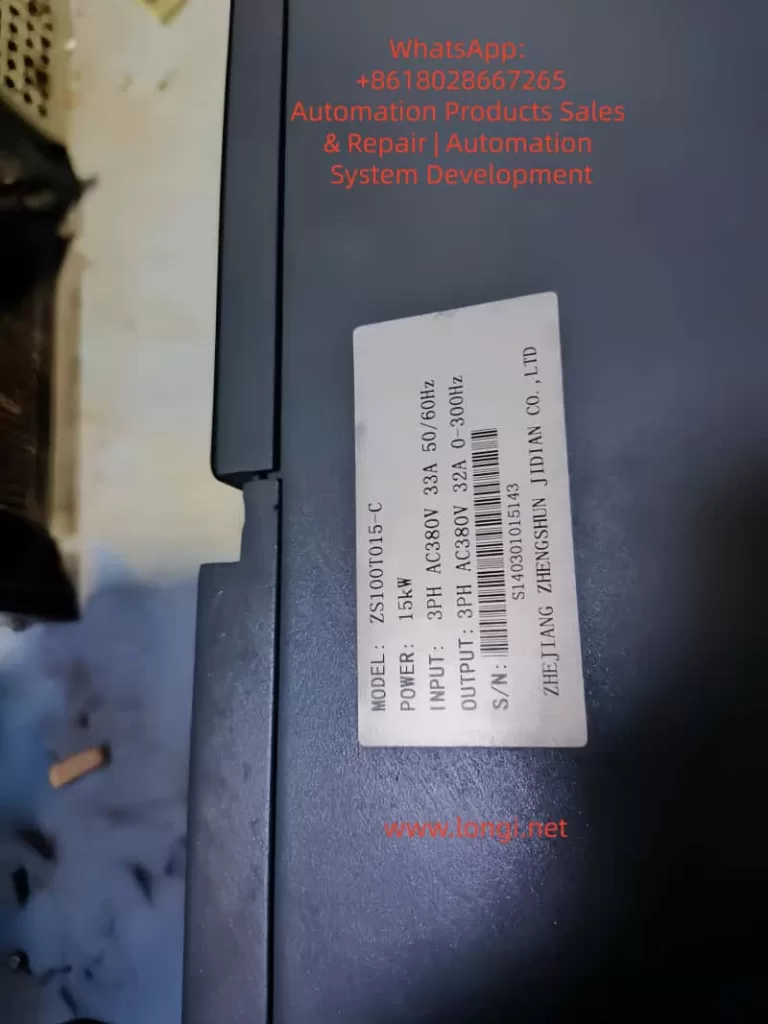
Fault Phenomenon: A ZS100 – 15kW servo motor on a CNC lathe suddenly reported ERR45 during operation and could not be started after reset.
Troubleshooting Process:
- Check the temperature sensor wiring and find that one wire of the PTC sensor is broken at the junction box (due to long – term vibration, the wire – terminal welding joint is detached).
- Re – weld the wire and perform insulation treatment (wrap it with heat – shrinkable tubing).
- Power on for testing, and the fault disappears. The motor returns to normal.
Cause: The wire breakage interrupts the sensor signal, and the drive misjudges it as “infinite temperature”, triggering ERR45.
Lesson: The motor junction box should be firmly fixed to prevent wire breakage due to vibration.
Case 2: Overheating Due to Fan Dust Accumulation
Fault Phenomenon: A ZS100 – 7.5kW servo motor on a packaging machine frequently reported ERR45 (1 – 2 times a day). It could continue to run after reset, but the frequency gradually increased.
Troubleshooting Process:
- Check the fan and find that the blades are covered with dust (the workshop is a flour mill with a lot of dust), and the speed is only 800rpm (normal 1500rpm).
- Clean the fan blades with compressed air and add lubricating grease to the bearing.
- Run for 24 hours, and the fault does not recur.
Cause: Dust accumulation on the fan reduces the speed and heat dissipation capacity, causing the motor temperature to gradually rise to the threshold.
Lesson: In dusty environments, the fan should be cleaned regularly, preferably once a month.
Case 3: Real Overheating Due to Load Overload
Fault Phenomenon: A ZS100 – 22kW joint motor on an industrial robot reported ERR45. The infrared thermometer showed that the motor temperature reached 160°C (exceeding the 155°C allowed for F – class insulation).
Troubleshooting Process:
- Check the load and find that the lubrication of the robot’s lead screw is poor, causing the torque to increase from 70N·m to 90N·m (overload).
- Disassemble the lead screw, clean the old lubricating grease, and add new lithium – based grease.
- Adjust the load (reduce the grasping weight of the robot arm). After operation, the torque returns to 70N·m, and the temperature drops to 110°C.
Cause: Load overload increases the motor current (from 46.5A to 55A), increasing the winding heating and exceeding the temperature threshold.
Lesson: The load torque should be monitored regularly to avoid long – term overload operation.
VI. Preventive Measures for ERR45 Fault
1. Regular Maintenance Plan (Key)
| Maintenance Cycle | Maintenance Content |
|---|---|
| Monthly | Check the fan operation and clean the dust; measure the sensor resistance (PTC: 100Ω – 500Ω, PT100: 100Ω); check whether the wiring terminals are loose. |
| Quarterly | Measure the motor winding insulation resistance (> 10MΩ); check the lubrication of mechanical transmission (add grease to the lead screw and bearings); check the coupling alignment (deviation ≤ 0.05mm). |
| Semi – annually | Clean the dust on the motor heat sink; calibrate the temperature sensor (compare with a standard thermometer); check the drive’s cooling fan (clean the heat sink). |
| Annually | Replace the motor lubricating grease (except for sealed bearings); replace the temperature sensor (if it has been used for more than 3 years); check the drive’s temperature detection circuit (measure the waveform with an oscilloscope). |
2. Parameter Setting Optimization
- Temperature Threshold: Set it according to the motor insulation class (set it to 140°C for F – class and 160°C for H – class) to avoid false alarms due to a too – low threshold or loss of protection due to a too – high threshold.
- Sensor Type: Ensure that the drive parameters are consistent with the actual sensor (set PTC as “PTC” and PT100 as “PT100”).
- Filtering Time: Set it to 100ms – 500ms (avoid false alarms due to signal fluctuations), but not too long (such as > 1s, which will delay protection).
3. Environmental Improvement
- Control the workshop temperature within 25°C – 35°C (install an air conditioner or industrial fan).
- Prohibit stacking debris within 1 meter around the motor to ensure a clear heat dissipation channel.
- For high – temperature environments (such as foundry workshops), add a water – cooled heat sink to the motor (instead of air – cooling).
4. Load Monitoring
- Install a torque sensor or current sensor to monitor the motor load in real – time (alarm when the torque exceeds 110% of the rated value).
- Set overload protection (set the “overload current threshold” in the drive parameters, such as 120% of the rated current. When it is exceeded, cut off the output).
- Avoid frequent start – stop (for example, starting more than 5 times per minute will cause heat accumulation in the motor).
VII. Conclusion
The ERR45 fault is a “temperature protection signal” for the ZS100 series servo system, and its core logic is that “the motor temperature exceeds the safety threshold”. When troubleshooting, start with simple components such as wiring and fans, and gradually delve into the motor, load, and drive. Use tools (multimeter, infrared thermometer, oscilloscope) to quickly locate the fault point.
The key to preventing ERR45 is regular maintenance (cleaning the fan and checking the wiring), optimizing parameters (correctly setting the temperature threshold), improving the environment (controlling the workshop temperature), and monitoring the load (avoiding overload). Engineering technicians should master the detection principle and troubleshooting process of the fault to solve problems in a timely manner and ensure the stable operation of the equipment.
For ZS100 series users, it is recommended to establish a fault record (record the fault time, phenomenon, troubleshooting process, and solution), and take preventive measures in advance (such as cleaning the fan before summer) through data statistical analysis (such as the high – incidence season and equipment of ERR45).