
Introduction
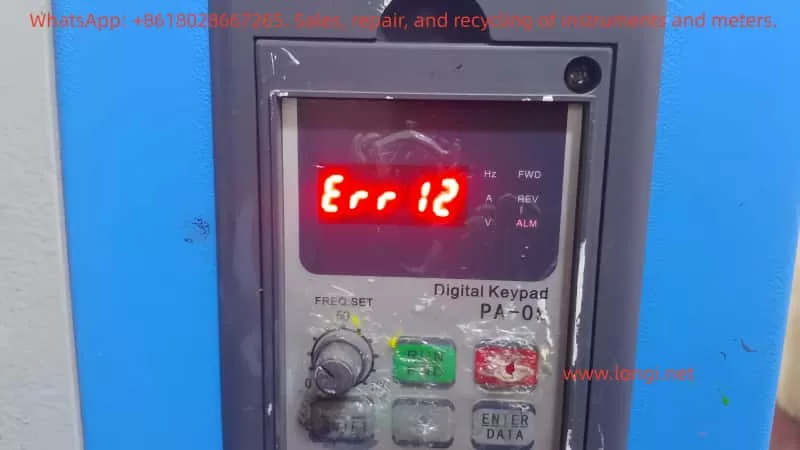
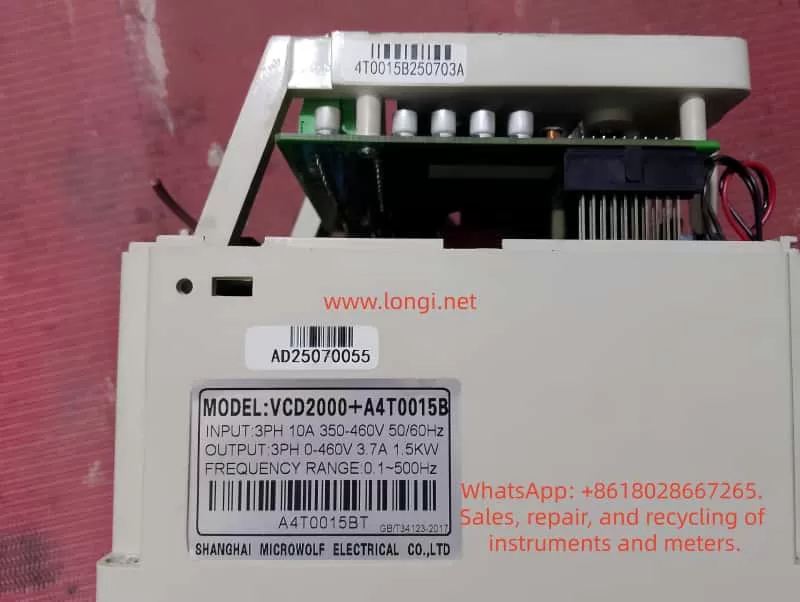
The Anda (Shanghai Weilang Electric) VCD-2000 series inverter, as a domestic mid-to-high-end vector control inverter, is widely used in industrial automation due to its stable performance, rich functions, and cost-effectiveness. This series supports full vector control (VEC.1 mode) and is suitable for machine tools, fans and pumps, textiles, constant pressure water supply, and other applications. However, in actual operation, the ERR12 (or displayed as E-12) fault code occurs frequently, becoming one of the most common alarms for users.
ERR12 is essentially Inverter Module Protection. Upon detecting an abnormality in the IGBT module, the inverter immediately blocks the PWM output and trips. If handled improperly, this fault can cause equipment downtime, production interruptions, or even damage to power devices. This article takes the VCD-2000 series as the object, combining the official manual fault diagnosis table, vector control parameter group (PA group), and field actual cases, to systematically sort out the causes, diagnosis process, exclusion methods, and prevention strategies of ERR12. The content is based on principle analysis, parameter optimization, and engineering practice, aiming to help electrical engineers and technicians quickly locate and completely solve the fault.
The Essential Meaning of ERR12 Fault
In the VCD-2000 series, ERR12 corresponds to the E-12 code in Chapter 7 “Fault Diagnosis and Handling” of the manual, and the fault type is clearly defined as Inverter Module Protection. The inverter monitors the operating status of the inverter bridge (IGBT module) in real-time through built-in current sensors, voltage detection circuits, and temperature sensors. Once any of the following abnormalities is detected, protection is triggered immediately:
- Instantaneous overcurrent (output current peak exceeds the hardware protection threshold, usually 200%-300% of the rated current)
- Module overheating
- Drive undervoltage or abnormality
- Output short circuit / ground fault
- Control board communication or logic abnormality
Different from general overcurrent protection (E-01/E-02), ERR12 focuses more on the safety of the power module itself and belongs to the highest priority protection at the hardware level. After triggering, the inverter panel displays “Err 12”, and the relay outputs a fault signal. Manual reset (STOP key or external reset terminal) is required to restart.
The design purpose of this protection mechanism is to prevent IGBT from being damaged due to overstress. As the core power device of the inverter, IGBT works in a high-frequency switching state (typical carrier frequency 2-15kHz). Any current spike, voltage spike, or poor heat dissipation can cause breakdown or thermal failure.
Detailed Explanation of Possible Causes of ERR12
According to the VCD-2000 manual fault code table, the main causes of ERR12 can be summarized into 8 categories, each with a deep mechanism:
- Instantaneous overcurrent of the inverter
The most common cause (accounting for about 40%). When the motor starts, the load changes suddenly, or during heavy-load acceleration, the output current peak exceeds the protection threshold. In vector control mode, if the motor parameter self-learning is inaccurate (PA.00 not executed or PA.01~PA.11 settings are wrong), it will cause excessive current loop regulation and generate spike current.
Typical scenarios: Direct start of heavy-load fans/pumps, belt slipping then suddenly gripping, winder tension mutation. - Output three-phase short circuit or ground short circuit
Aging of cable insulation, decrease of motor winding insulation to ground, water ingress in the junction box, or burn-off of contactor contacts cause phase-to-phase or ground short circuits. If the UV/W phases on the output side of the inverter are short-circuited simultaneously, or the ground resistance of a single phase is below the specified value (usually <5MΩ), it will trigger the fault. - Air duct blockage or fan damage
In environments with high dust (common in textile, mining, injection molding workshops), the heat dissipation duct is blocked by lint or metal chips, causing the IGBT module junction temperature to rise rapidly. Fan bearing wear, blade breakage, or capacitor aging will also result in insufficient air volume. The manual clearly states that derating is required when the ambient temperature exceeds 40°C. - Excessive ambient temperature
Temperature inside the control cabinet >45°C, air inlet blocked, or poor sealing of the cabinet body leading to heat accumulation. High temperatures in summer combined with the inverter’s own heat generation (efficiency is about 96%-98%, a 1.5kW model generates about 60-80W of heat at full load) can easily exceed the standard. - Loose control board wiring or plugs
Transportation vibration and thermal expansion/contraction during long-term operation cause poor contact between the flat cables and drive optocoupler plugs connecting the control board and power board. The VCD-2000 uses a split structure; if the pins connecting the power board and control board loosen, the drive signal will be distorted, causing IGBT mis-conduction and direct short circuit. - Abnormal current waveform caused by output phase loss, etc.
One phase of the output cable is broken, one phase of the motor winding is open, or the contactor has poor contact in one phase, causing severe imbalance in the three-phase current. Vector control has extremely high requirements for current waveform; an imbalance >10% can trigger protection. - Auxiliary power supply damage, drive voltage undervoltage
The internal switching power supply of the inverter (+15V/-15V/+5V, etc.) ages or is overloaded, causing the IGBT drive voltage to drop below 12V (typical requirement is 15V±10%). At this time, the IGBT operates in the amplification region rather than the saturation region, increasing the on-state voltage drop and heat generation sharply. - Control board abnormality
CPU crash, EEPROM parameter corruption, or hardware failure (very rare, but possible in aging models). In this case, ERR12 may be falsely reported even without external abnormalities.
Systematic Fault Diagnosis Process
Following the principle of “safety first, from surface to deep, step-by-step investigation,” the following 10-step diagnosis method is recommended (usually takes 15-60 minutes):
Step 1: Safety Confirmation
Cut off the main power, wait for the DC bus voltage to drop to <36V (measure with a multimeter at P-N terminals), and wear insulating gloves. Hang a “Do Not Energize” warning sign.
Step 2: Initial Reset and Observation
Power on again and observe if the fault reappears immediately. If ERR12 appears immediately after reset, it is mostly permanent hardware damage; if it appears after running for a while, it is mostly an overheating or parameter issue.
Step 3: Check External Wiring
- Measure the three-phase winding resistance of the motor (balanced three phases, error <2%)
- Measure the insulation resistance to ground (>5MΩ, use a 500V megohmmeter)
- Check if the output cable is damaged, bitten by rats, or has oil stains
- Confirm that the contactor/thermal relay is not stuck
Step 4: Check Cooling System
- Clean the air duct and filter (blow with compressed air)
- Feel if the fan is rotating and if there is abnormal noise
- Measure the ambient temperature and inverter radiator temperature (normal <60°C)
Step 5: Motor Parameter Self-Learning Verification
This is the key for vector control models!
- Execute PA.00=1 (dynamic self-learning, requires no load) or PA.00=2 (static self-learning)
- Confirm PA.01~PA.11 match the motor nameplate exactly (especially PA.03 rated current, PA.07/PA.08 stator/rotor resistance)
- After self-learning, run at no load and observe if the output current stabilizes within 10% of the rated current
Step 6: Current Waveform Detection
Use an oscilloscope or clamp meter (true RMS) to monitor the U/V/W three-phase currents. The normal waveform should be a PWM modulated wave close to a sine wave, with imbalance <5%. Abnormal waveforms (spikes, DC components) directly point to short circuits or phase loss.
Step 7: Drive Voltage Detection
Open the cover (after power off), measure the +15V/-15V voltage on the IGBT driver board. If the deviation is >10%, replace the auxiliary power board.
Step 8: Control Board Plug Check
Gently plug and unplug all flat cables and multi-pin sockets, checking for oxidation or bent pins. Clean contacts with alcohol cotton.
Step 9: Parameter Protection Function Verification
- Check Group P5 (protection related parameters): overcurrent protection coefficient, carrier frequency (P0.15 is recommended to be reduced to 2-6kHz for heavy loads)
- Confirm no false alarms (e.g., whether P5.00 overvoltage protection value is set too low)
Step 10: Hardware Replacement Verification
If all above are normal, replace in order: fan → auxiliary power board → IGBT module (requires professional tool crimping) → whole control board.
Targeted Exclusion Methods and Parameter Optimization
1. Handling Overcurrent Faults
- Extend acceleration time (change P0.11/P0.12 from 10s to 30-60s)
- Enable torque boost limit (reduce PA.15 appropriately)
- Switch to V/F control mode for testing (P0.00=0); if no alarm is reported, confirm it is a vector parameter issue
- Increase inverter capacity for heavy-load applications (recommended sizing margin of 1.2-1.5 times)
2. Handling Short Circuits / Ground Faults
Replace cables, rewind motor windings, or replace the motor. Installing an output reactor (3%-5%) can effectively suppress dv/dt and ground leakage current.
3. Cooling System Optimization
- Install an air conditioner or exhaust fan in the cabinet to control intake air temperature <35°C
- Clean the filter regularly (every 3 months)
- Reduce carrier frequency in high-temperature environments (P0.15=2kHz), which can reduce switching losses by more than 30%
4. Auxiliary Power and Drive Circuit
The auxiliary power board has a high failure rate; it is recommended to replace it preventively every 2-3 years for aging models. Replace drive optocouplers (commonly PC817 or TLP series) in batches after aging.
5. Vector Control Specific Optimization
The PA group parameters of VCD-2000 have a great impact on ERR12:
- PA.07/PA.08 (stator/rotor resistance): error >10% will cause current loop oscillation
- PA.12 (torque current overcurrent protection coefficient): recommended to set to 120%-150%
- PA.13/PA.14 (speed loop PI): increase appropriately in high-response occasions to prevent oscillation
- After performing complete dynamic self-learning, the running current should be 10%-20% lower than in V/F mode
Typical Field Case Analysis
Case 1: Frequent ERR12 Tripping in a Textile Workshop
Four 7.5kW VCD-2000 units driving winding machines in a chemical fiber factory reported ERR12 2-3 times a week after 3 years of operation. Inspection revealed that lint in the workshop severely blocked the air ducts, and the radiator temperature reached 78°C. After cleaning the air ducts, reducing the carrier frequency to 4kHz, and installing an independent air duct, the fault disappeared completely.
Lesson: The textile industry must perform mandatory maintenance on the cooling system quarterly.
Case 2: ERR12 Immediately at Startup of Injection Molding Machine
A newly installed 1.5kW unit reported ERR12 at startup. Measuring motor parameters revealed that the user directly used nameplate data without performing self-learning. After executing PA.00=2 static self-learning, the current peak dropped from 28A to 11A, and the fault was eliminated.
Note: Vector control must perform parameter self-learning, otherwise the current loop will be out of control.
Case 3: Ground Short Circuit Caused by Water Ingress in Cable
At an outdoor water pump station, ERR12 occurred after the rainy season. A megohmmeter measured U-phase to ground at only 0.8MΩ. After replacing the cable and adding an output reactor + waterproof junction box, the unit ran stably.
Case 4: Control Board Fault in an Aging Model
A 3.7kW unit used for 8 years still reported ERR12 even with a very light load. It was restored after replacing the control board. The cost was about 15% of the original model, which was worthwhile.
Preventive Maintenance and Long-Term Solutions
- Daily Inspection (Weekly)
Observe running current, temperature, and abnormal noise; record fault history (P6 group fault records). - Quarterly Maintenance
Clean air ducts, tighten all wiring, measure insulation resistance, and check fans. - Annual Professional Maintenance
Replace wearing parts (fans, electrolytic capacitors, auxiliary power supply), re-perform motor self-learning, and upgrade firmware (if available). - System-Level Protection
- Install AC reactors + surge suppressors on the input side
- Install sine wave filters on the output side (mandatory for long cables >50m)
- Use IP54 or higher protection for control cabinets with independent ventilation
- Configure bypass contactors for important occasions to ensure “inverter fault does not affect production”
- Parameter Backup
Use VCD-2000 upper computer software or manually record all parameters (especially the PA group) for quick recovery after a fault.
Conclusion
ERR12, as the most common inverter module protection fault in the VCD-2000 series, is essentially the device’s active defense for its own safety. Over 90% of cases can be completely solved through standardized diagnostic procedures, thorough hardware inspection, and targeted parameter optimization. A true expert does not passively repair after a failure occurs, but reduces the failure rate to the lowest through preventive maintenance and system design.
It is recommended that users establish an “Inverter Maintenance File” to record each fault phenomenon, handling process, and parameter modifications, forming an internal corporate knowledge base. As a mature product, the Anda VCD-2000 can achieve 5-8 years of stable operation without major faults as long as it is used according to the manual specifications.
By mastering the diagnostic thinking and optimization methods in this article, you can not only quickly solve ERR12 but also handle other inverter faults by analogy, improving the reliability of the entire automation system.