
1. Background: A TEM Filament Is Not an Ordinary “Light Bulb”
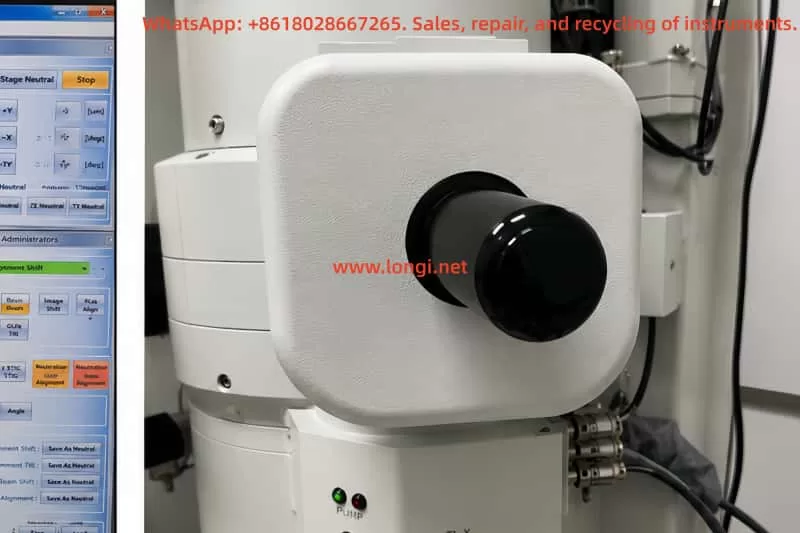
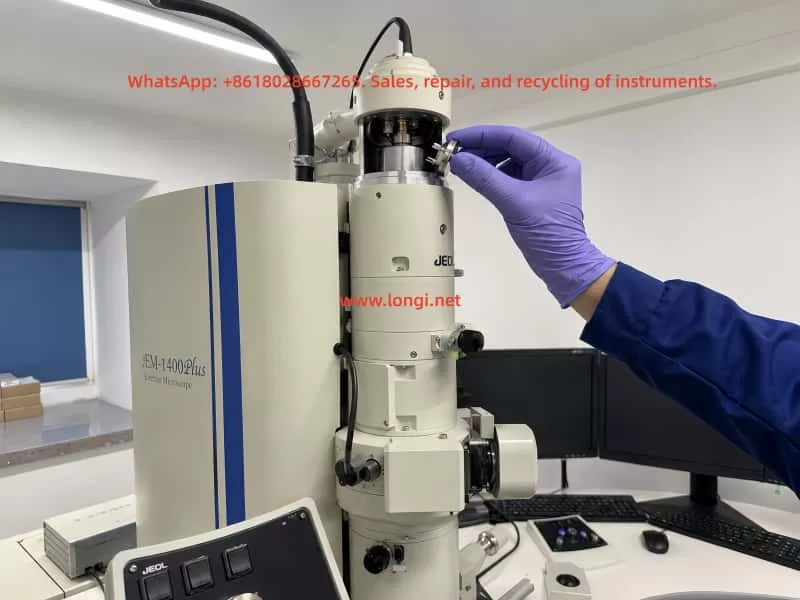
In the JEOL JEM-1400 transmission electron microscope (TEM), the so-called “bulb” is actually the electron gun filament, which serves as the electron emission source. In tungsten-filament TEM systems, the filament does not provide illumination in the traditional optical sense. Instead, under high vacuum and high-voltage conditions, it emits electrons through thermionic emission. The emitted electron beam passes through the Wehnelt electrode, anode, condenser lens system, objective lens system, specimen region, and imaging system before finally forming an image on the fluorescent screen or digital camera.
Because of this, filament replacement is not merely a simple consumable replacement procedure. It directly involves the electron gun structure, vacuum system, high-voltage stability, beam current stability, gun alignment, and imaging calibration. A filament that can emit electrons does not necessarily mean the microscope has returned to optimal imaging performance. Many JEM-1400 systems exhibit the condition commonly described as “the microscope still works, but the image quality is poor” after filament replacement.
Typical symptoms include:
- Reduced image brightness
- Gray or low-contrast images
- Difficulty focusing
- Off-center beam spot
- Uneven illumination
- Unstable beam current
- Poor high-magnification resolution
- Increased camera noise
- Beam drift or fluctuation
These issues cannot simply be attributed to “a bad filament” or “the wrong filament model.” Proper diagnosis requires systematic analysis of:
- Filament compatibility
- Installation orientation
- Electron gun contamination
- Vacuum condition
- HT (high tension) voltage stability
- Beam current stability
- Filament saturation
- Gun alignment after replacement
- Beam alignment
- Specimen condition
- Camera and imaging settings
2. Basic Equipment and Filament Verification
For the JEOL JEM-1400, the instrument label typically identifies the system as JEM-1400 Electron Microscope along with its serial information. Systems equipped with HC (High Contrast) pole pieces are particularly sensitive to beam alignment, specimen height, beam stability, and sample thickness.
Replacement tungsten filaments are commonly labeled as:
FILAMENT / K-TYPE MA113008
Physically, these filaments generally consist of:
- A circular metal mounting base
- Ceramic insulation
- Two electrical pins
- A central tungsten emission wire
Installation is not simply a matter of inserting the filament assembly. The following factors significantly affect beam quality:
- Filament center height
- Pin contact quality
- Tungsten wire position
- Mounting orientation
- Concentricity with the Wehnelt aperture
Even if the old filament was discarded and no reference photos exist, reliable diagnosis is still possible. Comparing the old and new filaments is only a secondary aid. The more important checks are:
- Whether the filament model matches the electron gun configuration
- Whether the replacement filament packaging corresponds to the proper JEM-1400 filament type
- Whether the new filament is physically intact
- Whether the tungsten wire is centered
- Whether the pins are straight and undamaged
- Whether stable beam current can be achieved after installation
- Whether a controllable beam spot appears on the fluorescent screen
If these conditions are verified step by step, troubleshooting can continue even without the original filament.
3. Safety Conditions Before and After Filament Replacement
TEM filament replacement must follow strict high-voltage and vacuum safety procedures. The electron gun area of the JEM-1400 involves:
- High voltage
- High vacuum
- Precision alignment structures
- Clean internal surfaces
Improper handling may result in:
- High-voltage discharge
- Electron gun contamination
- Reduced filament lifetime
- Vacuum instability
- Damage to the HT system
Before replacement, ensure:
- HT is OFF
- Filament power is OFF
- The electron gun is fully cooled
- The gun chamber has been vented properly
- Only the filament assembly is accessed
- No unrelated high-voltage covers are removed
- Clean gloves and proper tools are used
Never touch:
- Tungsten wire
- Ceramic surfaces
- Wehnelt aperture
- Contact surfaces
Each disassembly step should be documented with photos, especially:
- Mounting orientation
- Insertion depth
- Locking screw positions
After replacement, HT should not be enabled immediately. The gun chamber and associated vacuum regions must first recover to proper vacuum levels. Gun, Column, Specimen Chamber, and Detector Chamber should all reach READY status before HT and Filament are turned on.
Enabling HT under poor vacuum conditions may cause:
- Gun discharge
- Wehnelt contamination
- Anode contamination
- Instability of emission
4. Vacuum Status Is the First Requirement Before Judging Filament Performance
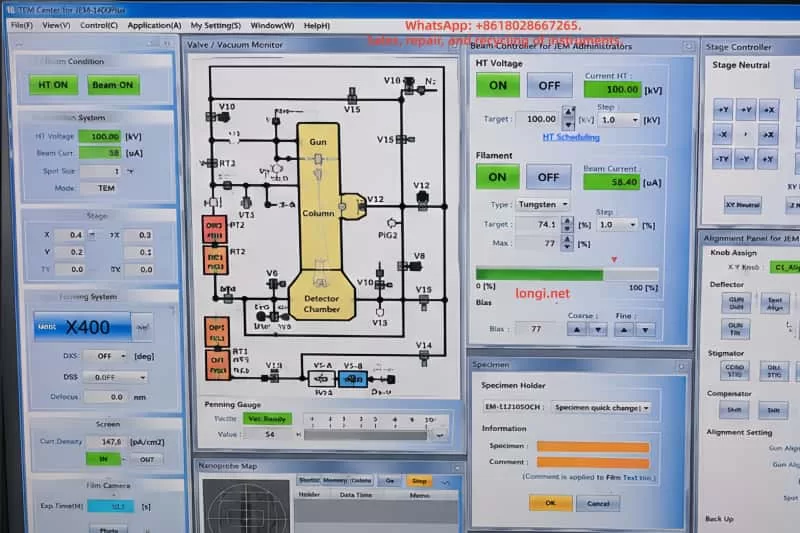
The JEM-1400 vacuum interface typically displays statuses for:
- Gun
- Column
- Specimen Chamber
- Detector Chamber
- RT1
- Penning Gauge
Before evaluating filament performance, vacuum conditions must first be confirmed.
Typical normal status indicators include:
- Gun: Evac Ready
- Column: Evac Ready
- Specimen Chamber: Evac Ready
- Detector Chamber: Evac Ready
- RT1: Evac Ready
- Penning Gauge: Vac Ready
If any section shows NOT READY, especially the Specimen Chamber, image quality evaluation becomes unreliable.
Common causes include:
- Specimen holder not fully inserted
- Chamber leakage
- Vacuum valve issues
- Incomplete evacuation
- Damaged seals
- Improper loading procedures
Under these conditions, HT may fail to activate properly, or image quality may degrade regardless of filament condition.
A common mistake is assuming:
“The image quality became poor after filament replacement, therefore the filament is defective.”
However, if the vacuum condition itself is unstable, filament evaluation becomes meaningless.
5. Relationship Between HT, Filament, and Beam Current
The JEM-1400 requires HT voltage to generate the electron beam. Typical operating voltages include:
- 80 kV
- 100 kV
- 120 kV
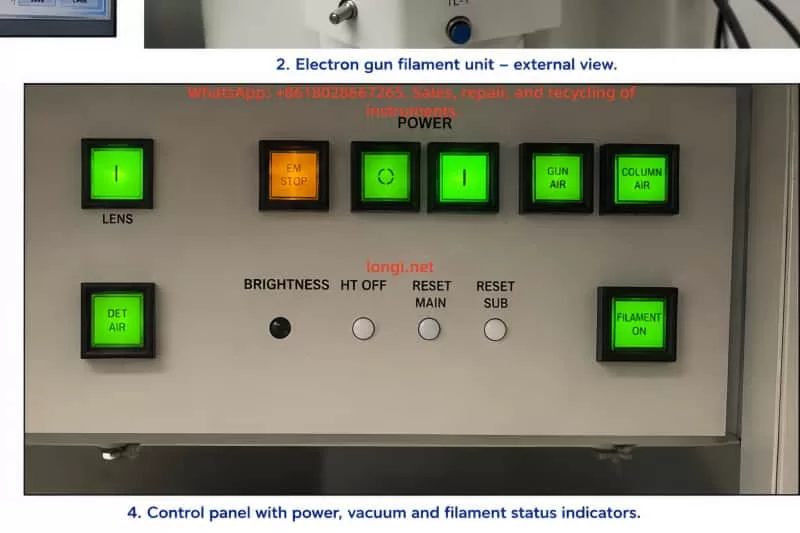
Typical software status indications include:
- HT ON
- Current HT: 100.00 kV
- Filament ON
- Beam ON
- Beam Current: tens of microamps
If HT remains OFF or Current HT remains at 0 kV, proper electron imaging cannot occur even if the filament is heated.
If the system displays:
- HT ON
- Current HT: 100.00 kV
- Filament ON
- Beam Current around 57–58 μA
- Visible fluorescent beam spot
then the filament is clearly emitting electrons.
This does not automatically mean imaging performance is optimal. Beam current alone only confirms electron emission. Additional evaluation is required for:
- Beam stability
- Beam centering
- Brightness
- Beam symmetry
- Saturation condition
- Gun alignment
If Beam Current is approximately 57 μA and the fluorescent spot responds smoothly to Brightness adjustment, the filament should not immediately be considered defective.
In such cases, poor beam alignment after replacement is a far more likely cause.
6. How to Evaluate Beam Condition Without a Specimen
Although final imaging quality must ultimately be judged using a specimen, important preliminary evaluation can still be performed without any sample loaded.
After filament replacement, fluorescent screen observation is often more important than camera imaging.
The following checks can be performed without a specimen:
Low-Magnification Beam Spot Observation
Set magnification to:
- X400
- X800
Set Spot Size to:
- 1
- 2
Adjust Brightness and observe whether a green fluorescent beam spot appears.
Brightness Adjustment Test
Slowly adjust Brightness.
The beam spot should:
- Expand smoothly
- Contract smoothly
- Change brightness continuously
- Remain stable
- Not flicker
- Not disappear abruptly
Beam Centering
If the beam spot is significantly off-center, Beam Shift, Gun Alignment, or Beam Alignment is required.
This is extremely common after filament replacement.
Beam Shape and Uniformity
A proper beam should appear:
- Circular
- Uniform
- Symmetrical
- Adjustable
Uneven illumination or distorted shape may indicate:
- Gun misalignment
- Off-center filament installation
- Wehnelt contamination
- Condenser misalignment
- Aperture issues
Beam Current Stability
After HT and Filament are enabled, Beam Current should remain relatively stable.
Large fluctuations or gradual decay may indicate:
- Filament aging
- Poor electrical contact
- Gun contamination
- High-voltage instability
Without a specimen, one cannot judge ultimate resolution performance, but it is entirely possible to evaluate:
- Electron emission
- Beam stability
- Beam centering
- Basic electron optical alignment
7. Importance of Filament Saturation
Tungsten filaments require proper filament saturation adjustment after replacement.
Simply enabling Filament power is insufficient.
Without proper saturation:
- Brightness may be inadequate
- Beam current may fluctuate
- Filament lifetime may shorten significantly
As filament current increases:
- Beam current should increase
- Fluorescent brightness should increase
Eventually, the increase slows and reaches a relatively stable plateau. This plateau represents the appropriate saturation region.
If filament current approaches maximum while Beam Current remains low and brightness remains weak, possible causes include:
- Filament aging
- Poor-quality filament
- Off-center installation
- Contact issues
- Gun contamination
If Beam Current fluctuates heavily during adjustment, possible causes include:
- Poor contact
- Wehnelt contamination
- Imminent high-voltage discharge
If Beam Current is stable and brightness is adequate, immediate replacement is generally unnecessary.
Overheating tungsten filaments greatly reduces service life. Many “rapid failures” are actually caused by:
- Improper saturation
- Excessive operating temperature
- Poor vacuum conditions
- Gun contamination
8. Electron Gun Alignment Must Be Repeated After Filament Replacement
One of the most commonly overlooked procedures after filament replacement is electron gun realignment.
Even with the correct filament model, the following factors will differ slightly from the original filament:
- Wire position
- Pin depth
- Ceramic height
- Mechanical seating
Therefore, the electron optical axis changes after replacement.
The following adjustments are typically required:
- Gun Alignment
- Beam Alignment
- Beam Shift
- Condenser Alignment
- Beam Tilt
- Spot Size alignment
- Brightness-related condenser adjustments
- Astigmatism correction if necessary
Without realignment, typical symptoms include:
- Off-center beam
- Uneven illumination
- Poor high-magnification imaging
- Low contrast
- Difficulty focusing
- Increased camera noise
These problems are often mistaken for defective filaments when the actual cause is incomplete alignment.
Replacing a filament without re-aligning the gun is comparable to replacing a laser source without recalibrating the optical path.
The system may still function, but image quality will not be optimal.
9. Effects of Off-Center Installation and Wehnelt Contamination
If proper beam quality cannot be achieved even after adjustment, mechanical installation and contamination should be investigated.
Off-Center Filament Installation
If the filament assembly is:
- Not fully seated
- Incorrectly oriented
- Unevenly tightened
- Improperly positioned
the emission point may shift away from the electron optical axis.
This causes:
- Off-center beam
- Uneven illumination
- Excessive alignment correction requirements
Tungsten Wire Deformation
If the filament wire is bent during handling or installation, beam quality may degrade significantly.
Wehnelt Aperture Contamination
Contamination around the Wehnelt aperture may cause:
- Beam instability
- Beam deflection
- Gray images
- Reduced brightness
- High-voltage discharge
Fingerprint Contamination
Direct contact with ceramic or filament surfaces introduces oils that become severe contamination sources under vacuum and HT conditions.
10. When Should Another Filament Actually Be Replaced?
A common field situation occurs when one filament from a new box has already been installed, image quality is unsatisfactory, and several unused filaments remain available. The operator may immediately want to replace another filament.
This is not always the best decision.
Each electron gun disassembly increases the risk of:
- Contamination
- Misalignment
- Vacuum leakage
- Recovery downtime
Replacement should only be considered if several of the following are observed:
- Beam Current cannot reach normal levels
- Brightness remains weak even near maximum filament setting
- Beam Current fluctuates heavily
- Beam intermittently disappears
- Saturation plateau cannot be reached
- Alignment cannot restore centered stable illumination
- Filament appears physically damaged
If the system already shows:
- HT ON
- 100 kV
- Beam Current around 57–58 μA
- Bright fluorescent beam spot
then the filament should not immediately be judged defective.
Beam alignment should be completed first.
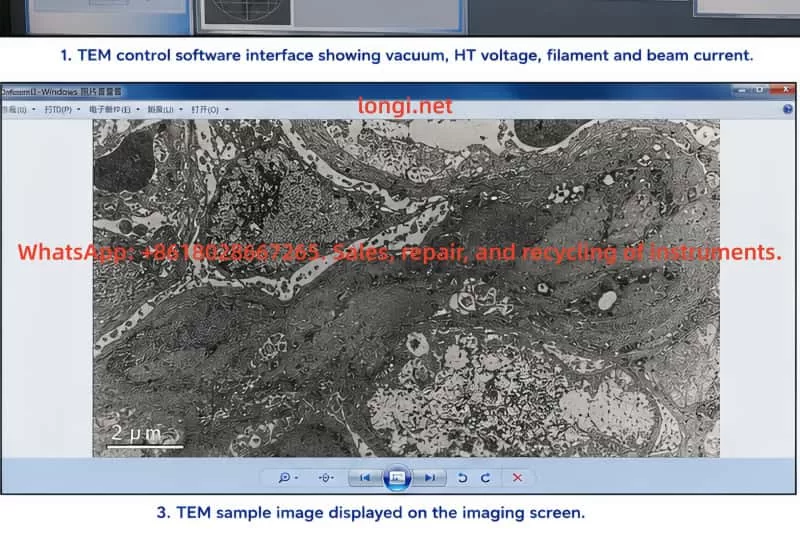
11. Poor Images Are Not Always Caused by the Filament
TEM image quality depends on many factors beyond the filament itself.
Even with proper beam emission, poor specimen quality may cause unsatisfactory images.
Possible non-filament causes include:
- Thick specimens
- Damaged sections
- Poor staining
- Specimen drift
- Objective aperture contamination
- Incorrect aperture positioning
- Poor focus
- Astigmatism
- Camera exposure settings
- Camera aging
- Mechanical vibration
Therefore, a single specimen image cannot definitively determine filament condition.
12. Recommended Troubleshooting Procedure
For JEM-1400 systems with degraded image quality after filament replacement, the recommended diagnostic sequence is:
Step 1: Verify Vacuum
Confirm all major vacuum sections are READY.
Step 2: Verify HT
Confirm HT ON and correct operating voltage.
Step 3: Verify Electron Emission
Enable Filament and Beam. Confirm stable Beam Current.
Step 4: Observe Fluorescent Beam Spot
Check beam visibility, centering, symmetry, and response to Brightness adjustment.
Step 5: Perform Filament Saturation
Confirm stable saturation plateau.
Step 6: Perform Gun Alignment and Beam Alignment
Center and optimize the beam.
Step 7: Evaluate Specimen Images
Use standard or disposable test specimens.
Step 8: Inspect Gun Components if Necessary
Inspect filament, Wehnelt, and contacts only if previous steps fail.
Step 9: Replace Another Filament Only if Necessary
Avoid unnecessary repeated gun disassembly.
13. Conclusion
Image quality degradation after filament replacement in the JEOL JEM-1400 is a comprehensive electron optical system issue rather than a simple “bad filament” problem.
If the microscope can achieve:
- 100 kV HT
- Stable Beam Current around 57 μA
- Bright fluorescent beam spot
- Smooth Brightness response
then the filament is at least functioning as a valid electron emitter.
Under these conditions, priority should be given to:
- Beam centering
- Filament saturation
- Gun alignment
- Beam alignment
- Condenser alignment
before deciding to replace another filament.
A filament should only be replaced when there is clear evidence of failure such as:
- Insufficient emission
- Severe instability
- Saturation failure
- Physical filament damage
- Persistent abnormal beam behavior after proper alignment
For TEM service engineers and technical support personnel, the correct troubleshooting sequence is:
Verify vacuum → verify HT → verify emission → optimize beam alignment → evaluate imaging → replace filament only if necessary.
Following this sequence minimizes unnecessary disassembly, reduces contamination risk, and restores stable imaging performance efficiently.