Posted on

BYD New Energy Vehicle Electric A/C Compressor Fault Diagnosis: Do Not Assume the Compressor Has Failed Just Because the Air Conditioner Is Not Cooling

In new energy vehicle maintenance, complaints such as “the air conditioner is not cooling,” “the compressor makes no sound,” or “the diagnostic tester shows an A/C-related fault” are very common. In particular, when servicing BYD electric vehicles equipped with high-voltage electric air-conditioning compressors, many technicians still use the diagnostic habits developed from conventional gasoline vehicles: once the A/C does not work, they immediately suspect the compressor and may even recommend replacing the entire compressor assembly.

This approach is risky and often incorrect.

A new energy vehicle A/C compressor is not a conventional belt-driven mechanical compressor. It is a high-voltage electric device supplied by the traction battery, usually integrating an electric motor, inverter drive circuit, control electronics, protection circuits, and communication functions. Whether the compressor can run does not depend only on the compressor itself. It also depends on high-voltage system status, vehicle control permissions, battery management system conditions, refrigerant pressure, temperature sensors, A/C controller commands, CAN communication, and high-voltage interlock circuits.

Therefore, when diagnosing a BYD electric vehicle with suspected A/C compressor failure, the correct principle is:

Confirm whether the compressor has all required operating conditions before concluding that the compressor itself is defective.

A compressor should never be replaced simply because the A/C is not cooling, the compressor appears not to run, or a diagnostic screen shows an abnormal condition.

This article explains the structure, working logic, fault diagnosis process, key data parameters, and common misdiagnoses associated with BYD high-voltage electric A/C compressors. It is intended as a practical technical reference for electric vehicle service technicians, automotive repair workshops, and maintenance professionals.
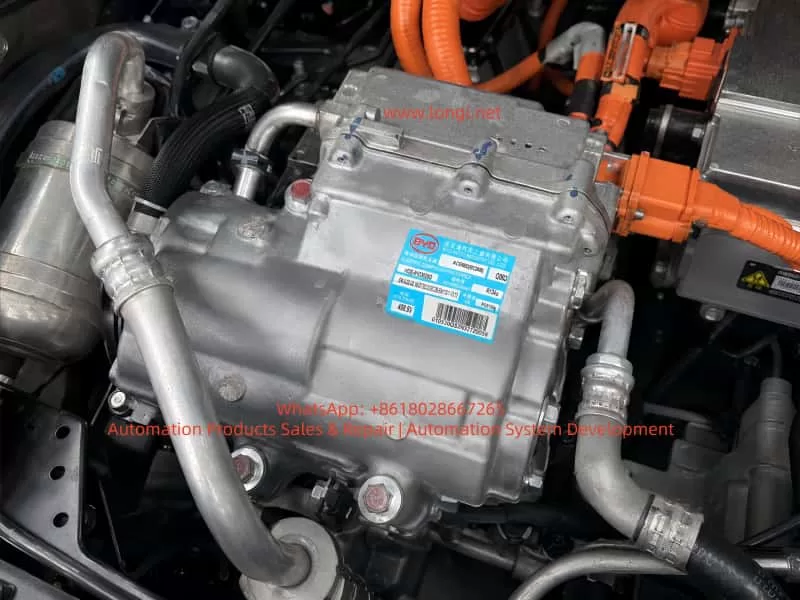

Close-up of a BYD high-voltage electric A/C compressor assembly installed in an electric vehicle, showing the aluminum compressor housing, R134a refrigerant pipes, orange high-voltage cables, and identification label.

1. Identifying the Component: This Is Not a Conventional Compressor

The nameplate on the component provides several important details:

  • Manufacturer: BYD Auto Industry Co., Ltd.
  • Description: Electric Compressor Assembly
  • Refrigerant: R134a
  • Rated operating voltage: approximately 408.8 V
  • Compressor model: HDE-8103020D
  • Compressor assembly identification code: ACE66D or similar, depending on the exact label marking

The most important markings are “Electric Compressor Assembly” and “408.8 V.”

These markings confirm that the component is part of the vehicle high-voltage thermal management system. Unlike a traditional engine-driven compressor, it is powered directly by the traction battery through the high-voltage system. The internal inverter converts high-voltage DC power into three-phase AC power to drive the compressor motor.

A high-voltage electric A/C compressor can generally be considered a combination of the following sections:

  1. Compressor mechanical body
  2. Three-phase permanent magnet motor
  3. Internal inverter drive module
  4. Electronic control board
  5. Rotor position or speed detection circuit
  6. High-voltage DC input section
  7. Low-voltage communication and control connector
  8. Internal temperature protection circuit
  9. Insulation monitoring-related structure
  10. Refrigerant compression and lubrication system

For this reason, the traditional gasoline vehicle inspection method of “checking whether the 12 V compressor clutch engages” does not apply to electric vehicles.

Most high-voltage electric compressors do not use conventional electromagnetic clutches. Their operation depends on whether the vehicle control system issues a speed command, whether high-voltage power is available, whether safety conditions are satisfied, and whether the compressor itself has internal electrical or mechanical faults.


2. Fundamental Differences Between EV and Conventional Vehicle A/C Systems

The operating logic of a conventional gasoline vehicle A/C system is relatively simple:

Engine running
→ Engine belt drives compressor
→ Electromagnetic clutch engages
→ Compressor circulates refrigerant
→ Evaporator produces cooling.

The logic of an electric vehicle A/C system is much more complex:

Traction battery high-voltage system powers on
→ BMS confirms battery status is acceptable
→ High-voltage contactors close
→ VCU confirms the vehicle is in an allowed operating condition
→ A/C controller receives a cooling request
→ System checks cabin temperature, ambient temperature, evaporator temperature, refrigerant pressure, and other conditions
→ A target compressor speed command is sent through CAN communication
→ Compressor verifies high-voltage supply, communication status, and internal conditions
→ Internal inverter drives the electric motor
→ Compressor circulates refrigerant and produces cooling.

This process shows that a compressor may fail to operate for many reasons other than compressor damage.

The main categories include:

  1. No A/C request or no compressor command
  2. High-voltage system not powered up correctly
  3. Compressor communication failure
  4. Refrigerant system conditions not satisfied
  5. Internal compressor electronic or mechanical fault
  6. Vehicle protection strategy disabling compressor operation

Therefore:

No cooling does not automatically mean the compressor has failed.
Compressor not running does not automatically mean the compressor assembly is defective.
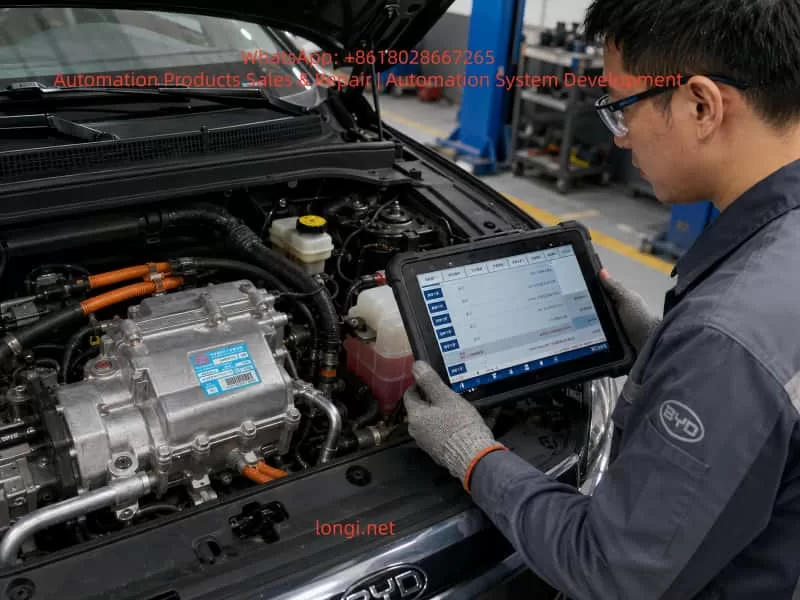

Automotive technician using a diagnostic tablet to inspect a BYD electric vehicle high-voltage A/C compressor and thermal management system in a workshop.

3. Common Incorrect Judgments During Diagnosis

Several mistakes are frequently made when diagnosing high-voltage electric compressor faults.

3.1 No Audible Compressor Noise Means the Compressor Is Bad

This is not reliable.

Electric compressors can be very quiet, especially at low speed. In a noisy workshop environment, with cooling fans operating or with underbody insulation installed, it may be difficult to hear compressor operation from outside the vehicle.

The correct approach is to use a diagnostic tool and inspect live data such as:

  • A/C request status
  • Compressor enable status
  • Compressor target speed
  • Compressor actual speed
  • Compressor operating status
  • Compressor fault level
  • High-voltage bus voltage
  • Refrigerant pressure
  • Evaporator temperature
  • Compressor current or power consumption

If the target speed is commanded but actual speed remains zero, then the technician can begin to suspect the compressor, high-voltage supply, or communication circuit.


3.2 A/C Not Cooling Means Refrigerant Must Be Added or Compressor Must Be Replaced

This is another common mistake.

In an electric vehicle, low refrigerant charge, excessive refrigerant charge, refrigerant leakage, pressure sensor failure, electronic expansion valve malfunction, or poor condenser cooling can all prevent the compressor from operating.

For example:

  • If refrigerant pressure is too low, the system may assume leakage and disable the compressor.
  • If refrigerant pressure is too high, the system may enter overpressure protection.
  • If the evaporator temperature is too low, the controller may stop the compressor to prevent icing.
  • If the condenser fan is not working, high-side pressure may rise and trigger shutdown.
  • If the pressure sensor signal is unreliable, the controller may refuse to enable the compressor.

Therefore, adding refrigerant or replacing the compressor without checking pressure data and fault codes is not a professional diagnostic method.


3.3 Measuring High Voltage Directly at the Compressor Without Proper Procedure

This is dangerous.

The compressor label indicates an operating voltage around 408.8 V. The high-voltage input circuit may therefore carry several hundred volts DC. Improper disconnection of high-voltage connectors, careless measurement with an unsuitable multimeter, or failure to follow the correct high-voltage isolation procedure can result in electric shock, arcing, short circuits, or damage to the vehicle control system.

Before servicing a high-voltage compressor, technicians must follow the manufacturer-approved high-voltage shutdown procedure. This generally includes isolating high-voltage power, waiting for capacitor discharge, confirming absence of voltage, and using proper insulated safety equipment.


3.4 Diagnostic Tool Shows “Normal,” So the Compressor Must Be Good

This conclusion is also unreliable.

A diagnostic tool showing “normal” may only indicate that a control module has not reported a specific active fault or that communication with the module is currently available.

It does not necessarily prove that:

  • The compressor mechanical section is healthy.
  • The internal inverter is functioning correctly under load.
  • The compressor can run normally at commanded speed.
  • Refrigeration performance is normal.
  • The refrigerant circuit is operating correctly.

For example, a compressor may pass its static self-check but fail when it receives a high-speed command due to overcurrent, mechanical seizure, overheating, insulation issues, or internal inverter faults.

For this reason, fault codes, live data, dynamic operation, refrigerant pressure changes, and actual cooling performance must all be evaluated together.


4. Required Operating Conditions for a High-Voltage Electric Compressor

The most effective way to diagnose whether a high-voltage compressor should operate is not immediate disassembly. Instead, the technician should establish whether all operating conditions are present.

A typical high-voltage electric compressor requires the following conditions.

4.1 Vehicle High-Voltage System Must Be Active

The vehicle must successfully enter READY mode or complete its high-voltage power-up process.

If the traction battery contactors are not closed and the high-voltage bus is not established, the compressor cannot receive the required DC voltage and cannot operate.

Relevant checks include:

  • Can the vehicle enter READY mode normally?
  • Is there any traction system warning light?
  • Is there any insulation fault in the high-voltage system?
  • Are the high-voltage contactors closing correctly?
  • Does the BMS report any fault preventing high-voltage activation?
  • Is the service disconnect correctly installed?
  • Is the high-voltage interlock circuit intact?

4.2 The A/C Controller Must Issue a Cooling Request

Pressing the A/C button does not always mean the compressor must start immediately.

The controller may evaluate:

  • Ambient temperature
  • Cabin temperature
  • Requested set temperature
  • Evaporator temperature
  • Defrost requirements
  • Battery thermal management demand
  • Energy-saving strategy
  • Battery state of charge
  • Battery temperature
  • Vehicle operating mode
  • Communication status between A/C-related control units

For example, in cold ambient conditions, the compressor may not start immediately even when the A/C button is pressed. On the other hand, the compressor may run for battery thermal management even if the cabin cooling demand is low.


4.3 High-Voltage Supply Must Be Normal

The compressor requires stable high-voltage DC input.

The following items should be checked:

  • High-voltage bus voltage
  • Compressor high-voltage fuse
  • High-voltage connector condition
  • High-voltage cable damage
  • High-voltage power distribution output
  • High-voltage interlock circuit
  • Connector locking condition
  • Terminal corrosion, overheating, or looseness

It is important to understand that a high-voltage supply fault does not always mean complete loss of voltage. A loose connector, partially burnt terminal, or damaged cable may appear acceptable under no-load conditions. However, when compressor current rises during startup, voltage may collapse and trigger compressor protection.


4.4 CAN Communication Must Be Normal

In many electric vehicles, the compressor receives operating commands through CAN communication.

Relevant modules may include:

  • Vehicle Control Unit, VCU
  • Battery Management System, BMS
  • Air-conditioning controller
  • Thermal management controller
  • Battery thermal management controller
  • Electric compressor controller
  • DC-DC converter
  • PTC heater controller
  • Gateway module

If compressor CAN communication is abnormal, the following symptoms may occur:

  • A/C panel operates normally, but compressor does not start.
  • The display shows A/C enabled, but no cold air is produced.
  • Compressor communication fault codes are present.
  • Compressor target speed remains zero.
  • Diagnostic tester cannot access compressor live data.
  • Other high-voltage systems appear normal while thermal management functions fail.

4.5 Refrigerant System Pressure Must Be Within Normal Range

An electric compressor is not allowed to run under every condition simply because high voltage is present.

Many EVs use refrigerant pressure data to determine whether compressor operation is safe. If refrigerant pressure is too low, too high, unstable, or implausible, the controller may limit or stop compressor operation.

Typical issues include:

  • Refrigerant leakage causing low pressure
  • Incorrect refrigerant charge after repair
  • Condenser blockage or poor airflow
  • Electronic expansion valve sticking
  • Receiver-drier blockage
  • Pressure sensor drift
  • Damaged or crushed refrigerant pipes
  • Air or moisture contamination in the system
  • Incorrect compressor oil type

Electric compressors require refrigeration oil with suitable electrical insulation properties. Using incorrect oil, mixing conventional compressor oil, or contaminating the system with unsuitable service equipment can reduce insulation resistance and potentially cause electrical or internal compressor damage.


4.6 Compressor Internal Condition Must Be Normal

Only after all external operating conditions have been confirmed should the compressor itself become the primary suspect.

Internal compressor faults may include:

  • IGBT or MOSFET failure
  • DC bus capacitor failure
  • Drive board failure
  • Control chip failure
  • Motor winding short circuit, open circuit, or turn-to-turn fault
  • Rotor seizure
  • Scroll mechanism damage
  • Bearing damage
  • Internal temperature sensor fault
  • Rotor position sensor fault
  • Seal failure causing refrigerant or oil contamination
  • Insulation resistance failure
  • Water ingress or corrosion in electronic circuits

These faults are genuine compressor assembly faults.


5. Using Diagnostic Live Data to Determine Compressor Failure

The most valuable step in electric compressor diagnosis is reading complete live data before removing parts.

The following parameters should be checked whenever available:

ParameterNormal Diagnostic DirectionPossible Fault Direction
A/C request statusRequest activeA/C panel, controller, communication issue
Compressor enable statusAllowed to runProtection condition or system restriction
Compressor target speedTarget RPM presentController not commanding compressor
Compressor actual speedShould follow target RPMCompressor, power supply, communication, protection
Compressor statusNormal operationInternal fault or disabled status
High-voltage bus voltageWithin normal HV rangeBattery, contactor, fuse, wiring issue
Compressor currentShould change after startupNo startup, internal fault, supply problem
Refrigerant pressureWithin operating rangeRefrigerant, sensor, fan, blockage issue
Evaporator temperatureShould decrease during coolingCooling performance or sensor issue
Condenser fan statusShould operate when requiredFan, relay, controller issue
Battery temperatureWithin acceptable rangeThermal management or power limitation
Compressor fault codeNo active compressor faultUse code to guide diagnosis

The most important diagnostic logic is described below.

Condition A: Compressor Target Speed Is Zero

This means the vehicle is not requesting compressor operation.

In this case, do not suspect the compressor first. Check:

  • Is the A/C request active?
  • Does the A/C controller permit cooling?
  • Is ambient temperature appropriate?
  • Is cabin temperature above the set value?
  • Is refrigerant pressure normal?
  • Is evaporator temperature too low?
  • Is the BMS limiting power?
  • Is there a high-voltage or thermal management fault?
  • Is CAN communication normal?

Condition B: Compressor Target Speed Exists but Actual Speed Remains Zero

This condition is highly important.

It means the vehicle has commanded the compressor to operate, but the compressor has not successfully started.

The technician should focus on:

  • Compressor high-voltage supply
  • High-voltage fuse
  • High-voltage connector
  • High-voltage interlock circuit
  • Compressor CAN communication
  • Compressor internal fault codes
  • Compressor temperature
  • Compressor mechanical seizure
  • Compressor insulation status

If high voltage, CAN communication, control command, and refrigerant conditions are all normal, but the compressor still cannot establish actual speed, the probability of internal compressor failure becomes high.


Condition C: Compressor Speed Exists but Cooling Performance Is Poor

This situation does not automatically require compressor replacement.

It indicates that the compressor may be running, but the refrigeration system is not performing correctly.

Focus on:

  • Refrigerant charge level
  • Leakage
  • Condenser cooling efficiency
  • Cooling fan operation
  • Expansion valve condition
  • Refrigerant line blockage
  • Evaporator icing
  • Pressure sensor reliability
  • Reduced compressor displacement or compression efficiency

Condition D: Compressor Starts Briefly and Then Stops

This is a common symptom and is not always caused by compressor damage.

Possible causes include:

  • Excessive refrigerant pressure
  • Condenser fan failure
  • Refrigerant overcharge
  • Compressor internal overheating
  • High-voltage bus voltage fluctuation
  • High-voltage terminal contact resistance
  • Compressor overcurrent
  • Internal inverter protection
  • Insulation monitoring fault
  • Intermittent CAN communication loss
  • Battery system power limitation

The best approach is to record freeze-frame data and observe which parameter becomes abnormal immediately before shutdown.


6. Common BYD High-Voltage Compressor Fault Types

6.1 High-Voltage Fuse or Connector Fault

The compressor normally receives power through the high-voltage power distribution system. If the fuse is open, the connector is loose, terminals are burnt, or the cable is damaged, the compressor may not start.

Typical symptoms include:

  • Vehicle can enter READY mode.
  • Other high-voltage systems may work normally.
  • A/C compressor has no response.
  • High-voltage supply-related fault code may be present.
  • Compressor target speed exists, but actual speed remains zero.

Inspect high-voltage connectors carefully for:

  • Burn marks
  • Darkened terminals
  • Melted plastic
  • Loose terminals
  • Damaged seals
  • Connector not fully locked
  • Moisture ingress
  • Cable insulation wear

6.2 High-Voltage Interlock Circuit Fault

The high-voltage interlock circuit confirms that high-voltage components, service disconnects, and connectors are correctly connected.

For example, if the compressor high-voltage connector is not fully locked, the service disconnect is not installed correctly, or another high-voltage connector is loose, the vehicle may disable some or all high-voltage functions.

A high-voltage interlock fault may not always appear as a direct “compressor fault.” It may present as:

  • Vehicle unable to enter READY mode
  • High-voltage system not powering on
  • Reduced power mode
  • A/C not functioning
  • High-voltage warning lamp illuminated
  • Several high-voltage components reporting faults simultaneously

Therefore, technicians should inspect the complete high-voltage system rather than focusing only on the compressor.


6.3 Refrigerant Leakage or Pressure Sensor Inaccuracy

Sometimes the compressor does not start because the A/C controller considers refrigerant pressure abnormal.

Possible causes include:

  • Refrigerant leakage causing low pressure
  • Condenser or pipe leakage after impact
  • Incorrect vacuuming or charging procedure after repair
  • Loose pressure sensor connector
  • Pressure sensor internal drift
  • Refrigerant circuit blockage
  • Poor condenser heat dissipation causing high pressure

In these cases, the compressor may be completely healthy but will not receive permission to run.


6.4 Condenser Fan Failure

A condenser fan failure can cause poor heat dissipation and excessive high-side pressure.

Typical symptoms include:

  • Cold air is available initially.
  • Cooling becomes weak after several minutes.
  • Cooling is better while driving but poor when stationary.
  • Compressor cycles on and off repeatedly.
  • Refrigerant high-side pressure rises quickly.
  • Cooling fan does not run or runs at insufficient speed.

If the fan fault is ignored, repeated high-pressure operation can cause frequent compressor protection events and may eventually contribute to compressor overheating.


6.5 Internal Inverter Drive Module Failure

A high-voltage electric compressor contains its own inverter drive circuit. When internal power components fail, possible symptoms include:

  • Compressor cannot start.
  • Compressor faults immediately during startup.
  • High-voltage fuse opens.
  • Internal drive fault code is stored.
  • Overcurrent, short-circuit, or phase-current faults are reported.
  • Motor winding-related faults are reported.
  • Compressor starts briefly and shuts down.

These faults often require compressor replacement or specialist repair by a workshop with capability to test high-voltage electric drive components.


6.6 Mechanical Seizure or Internal Wear

Many electric compressors use scroll compression mechanisms. Long-term operation, contaminated refrigerant oil, insufficient refrigerant, foreign material, or poor lubrication may cause internal mechanical damage.

Typical symptoms include:

  • Excessive startup current
  • Abnormal metallic friction noise
  • Significant loss of cooling capacity
  • Abnormally high compressor temperature
  • Metal particles in refrigerant oil
  • Repeated compressor protection
  • Compressor speed feedback present but poor cooling performance

If internal mechanical damage is confirmed, replacing only the compressor may not be sufficient. The entire refrigerant circuit must be checked and cleaned. Otherwise, metal particles or contamination can damage the replacement compressor.


7. Standard Diagnostic Procedure for Confirming Compressor Failure

The following procedure can be applied to most high-voltage electric vehicle A/C compressor faults.

Step 1: Confirm the Actual Symptom

Clarify the customer complaint:

  • No cooling at all
  • Weak cooling
  • Intermittent cooling
  • Cooling while driving but not when stationary
  • A/C-related warning message
  • Vehicle unable to enter READY mode
  • High-voltage fault appears when A/C is switched on
  • Compressor starts and stops immediately
  • Abnormal compressor noise
  • Refrigerant or oil leakage around the compressor

Different symptoms require different diagnostic priorities.


Step 2: Scan All Vehicle Fault Codes

Do not scan only the A/C system.

At minimum, inspect fault codes from:

  • VCU
  • BMS
  • A/C controller
  • Thermal management controller
  • Compressor
  • High-voltage power distribution system
  • Gateway
  • DC-DC converter
  • Insulation monitoring system
  • Motor controller

Pay particular attention to:

  • High-voltage interlock faults
  • High-voltage activation faults
  • Compressor communication faults
  • Compressor internal faults
  • Pressure sensor faults
  • Temperature sensor faults
  • High-voltage insulation faults
  • CAN communication faults
  • Refrigerant pressure faults
  • Condenser fan faults

Fault codes must be evaluated together with freeze-frame data, live data, current fault status, and historical records. Clearing a fault code does not confirm that the root cause has been repaired.


Step 3: Confirm High-Voltage System Readiness

Verify:

  • Vehicle can enter READY mode.
  • Traction battery state of charge is sufficient.
  • High-voltage contactors close normally.
  • High-voltage bus voltage is normal.
  • No insulation fault exists.
  • No high-voltage interlock fault exists.
  • Service disconnect is correctly installed.
  • High-voltage wiring and connectors are intact.

If the vehicle cannot establish high-voltage power, diagnose the high-voltage system first instead of beginning with the compressor.


Step 4: Check Compressor Request, Target Speed, and Actual Speed

This is the key diagnostic step.

The logic can be summarized as follows:

No A/C request
→ Check control conditions.

A/C request present, but compressor not enabled
→ Check protection conditions, pressure, temperature, high voltage, and communication.

Target speed present, actual speed zero
→ Check compressor power supply, communication, and internal fault status.

Target speed and actual speed both present
→ Check refrigerant circulation, condenser cooling, expansion valve, and cooling efficiency.


Step 5: Check the Refrigerant System

Use suitable R134a A/C service equipment to inspect:

  • Static low-side and high-side pressure
  • Dynamic low-side and high-side pressure
  • Refrigerant charge quantity
  • Vacuum holding condition
  • Leakage
  • Condenser cooling efficiency
  • Cooling fan operation
  • Refrigerant pipe temperature difference
  • Expansion valve operation
  • Receiver-drier condition
  • Evaporator icing condition

Electric vehicle compressors are highly sensitive to oil type and system cleanliness. Avoid mixing refrigerant oils and avoid introducing contamination from conventional vehicle A/C service equipment.


Step 6: Evaluate the Compressor Assembly

Only after confirming the following conditions should the compressor itself be considered a primary fault source:

  • High-voltage supply is normal.
  • High-voltage interlock is normal.
  • CAN communication is normal.
  • A/C request is normal.
  • Controller is sending a target speed command.
  • Pressure and temperature conditions are normal.
  • Condenser fan is operating correctly.
  • Wiring and connectors are intact.
  • No other system is preventing compressor operation.
  • Compressor fault code indicates an internal failure.
  • Actual speed cannot be established or is unstable.

At this stage, the compressor internal failure probability is high.


8. Important Precautions Before Replacing the Compressor

If the compressor assembly is confirmed defective, replacement should not be treated as a simple remove-and-install operation.

8.1 Confirm Exact Part Compatibility

Verify:

  • Compressor part number
  • Voltage class
  • Refrigerant type
  • Connector type
  • Communication protocol
  • Pipe connection design
  • Mounting bracket configuration
  • Software compatibility
  • Vehicle platform
  • Compressor capacity and power rating

Two compressors may look similar and use similar mounting points but still be incompatible electrically or electronically.


8.2 Check for Refrigerant System Contamination

If the original compressor has suffered internal mechanical damage, inspect the refrigerant system for metal particles, dark oil, sludge, or severe contamination.

Depending on the condition, it may be necessary to:

  • Replace the receiver-drier
  • Flush the refrigerant pipes
  • Inspect the electronic expansion valve
  • Inspect the condenser
  • Replace components that cannot be reliably cleaned
  • Use approved refrigerant oil
  • Perform a proper vacuum procedure
  • Charge refrigerant according to the vehicle specification

Failure to clean a contaminated system can lead to rapid failure of the replacement compressor.


8.3 Perform Insulation and Functional Verification After Replacement

After replacement, do not only confirm that cold air is available.

Also verify:

  • High-voltage insulation condition
  • High-voltage connector locking
  • Absence of high-voltage fault codes
  • Compressor target and actual speed
  • Compressor current
  • Refrigerant pressure readings
  • Pipe temperature difference
  • Condenser fan operation
  • Battery thermal management function
  • Long-duration operating stability
  • Absence of abnormal noise, refrigerant leak, or repeated protection shutdown

The goal of high-voltage vehicle repair is not only to restore cooling performance, but also to confirm electrical safety, insulation integrity, and proper control logic.


9. Final Judgment: Is the Compressor in the Image Necessarily Faulty?

For a component identified as a BYD high-voltage electric A/C compressor assembly, the following technical conclusion is appropriate:

First, it is indeed a key high-voltage actuator in the vehicle thermal management and air-conditioning system.

Second, it can cause no-cooling symptoms if it has internal inverter failure, motor winding failure, mechanical seizure, insulation fault, or other internal damage.

Third, compressor appearance, nameplate information, an A/C complaint, or a single diagnostic screen are not enough to confirm compressor failure.

Fourth, if diagnostic data shows that the vehicle is commanding a compressor target speed, high-voltage supply is normal, CAN communication is normal, refrigerant pressure conditions are normal, condenser fan operation is normal, but actual compressor speed remains zero, or the compressor reports internal overcurrent, drive fault, winding fault, or insulation fault, then internal compressor failure becomes highly likely.

Fifth, if compressor target speed is zero, the problem is more likely related to control conditions, high-voltage activation, pressure sensor data, CAN communication, thermal management strategy, or vehicle protection logic rather than the compressor itself.

Therefore, the technically correct answer to the question “Is the A/C compressor defective because the air conditioner is not cooling?” is:

The compressor is an important suspected component, but it cannot be condemned without testing.
High-voltage power, A/C request, communication status, pressure and temperature data, compressor target speed, and actual speed must be checked before deciding whether to replace the compressor assembly.


10. Conclusion

High-voltage electric A/C compressor diagnosis in new energy vehicles is not simply an air-conditioning repair task. It is a combined diagnosis involving the high-voltage system, electronic control system, communication network, and refrigerant circuit.

For BYD electric vehicles using high-voltage electric compressors, technicians must move away from traditional gasoline vehicle diagnostic habits. Do not add refrigerant immediately when cooling is poor. Do not replace the compressor simply because no compressor noise is heard. Do not disconnect high-voltage connectors without following proper isolation procedures.

A correct diagnostic sequence should be:

Read fault codes
→ Confirm high-voltage system status
→ Check A/C request
→ Compare compressor target speed and actual speed
→ Verify high-voltage power supply and CAN communication
→ Check refrigerant pressure and condenser cooling conditions
→ Finally determine whether the compressor itself has failed.

Following this process helps avoid unnecessary replacement of expensive components, reduces repair costs, improves diagnostic accuracy, and ensures safe servicing of high-voltage electric vehicle systems.
Posted on

Intermittent Phase Loss in VFD Systems: A Real-World Case Study on AT900 Series Drive Start Failure and Resolution

1. Introduction

In industrial motor drive applications, especially in textile, sewing, packaging, and light mechanical equipment, one of the most frequently misdiagnosed problems is “motor unable to self-start under inverter control but able to run once externally assisted”.

This case study is based on a real field troubleshooting scenario involving an AT900 series vector VFD (0.75–11kW class) controlling a sewing machine drive system. The system initially presented unstable starting behavior, requiring mechanical assistance via clutch engagement. After systematic diagnosis, the root cause was identified as an intermittent phase loss caused by an aging main contactor/fuse assembly.

The final resolution restored stable and smooth operation without vibration, confirming correct VFD behavior and motor integrity.


2. System Overview

The drive system consists of:

  • AT900 series high-performance vector inverter (SVC control mode)
  • Three-phase induction motor (~0.7–2.2kW class typical for sewing machines)
  • Mechanical clutch coupling system
  • Old-generation main contactor and fuse assembly
  • Direct inverter-to-motor wiring (no encoder feedback)

According to AT900 technical specifications, the inverter supports:

  • Sensorless vector control (SVC)
  • V/F control modes
  • Adjustable torque boost (0.1%–30%)
  • Starting torque up to 150% depending on configuration

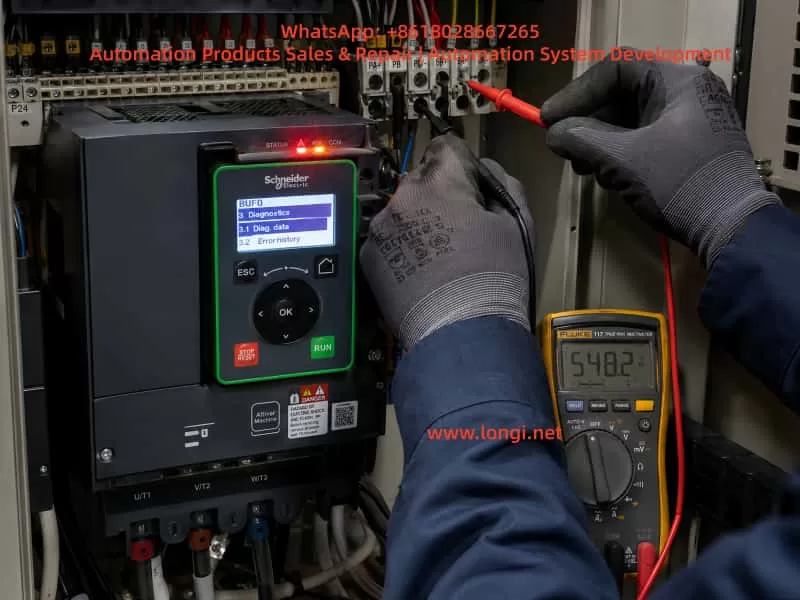
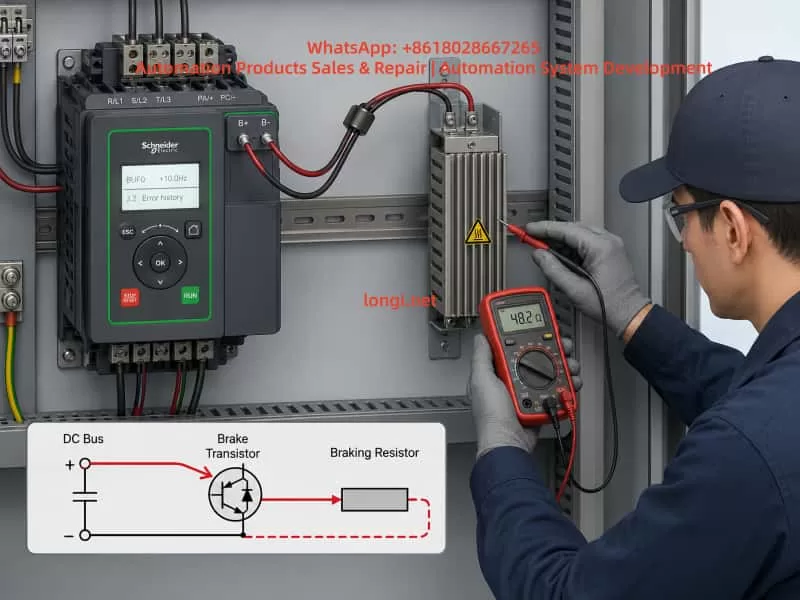
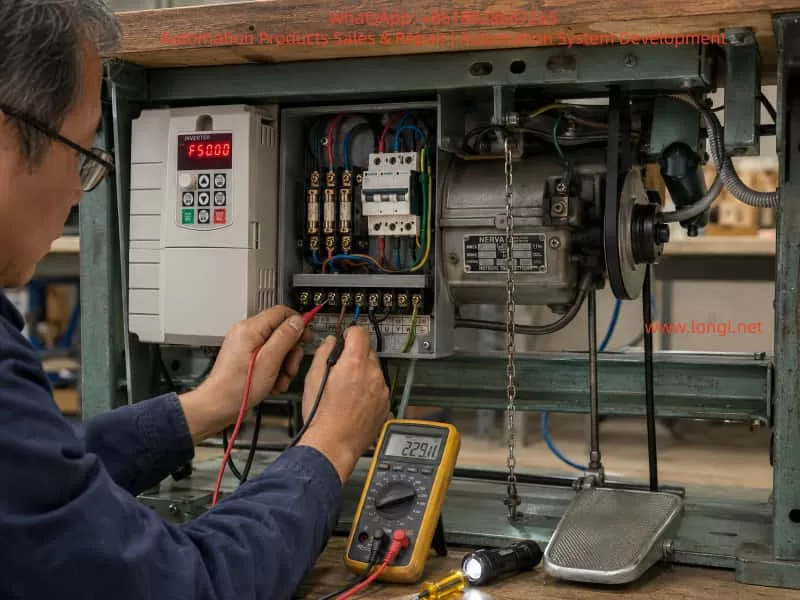
Industrial maintenance technician diagnosing a sewing machine drive system powered by a variable frequency drive, inspecting wiring connections and using measurement tools inside an electrical control panel during troubleshooting.

3. Initial Failure Symptoms

The operator reported:

  1. Motor does not start autonomously under RUN command
  2. If the clutch is manually engaged (mechanical rotation applied), motor runs normally
  3. When RUN is triggered, frequency rises smoothly from 0Hz → 15Hz
  4. Motor never reaches stable self-start torque region
  5. Changing torque boost (P04.01) and overload gain (P10.01) had no effect

Additionally:

  • Motor could not self-start even when unloaded (belt removed test)
  • Behavior was consistent but intermittent in severity

This symptom pattern strongly indicated a starting torque deficiency or phase imbalance condition, not a parameter tuning issue.


4. Critical Diagnostic Breakthrough

The decisive observation was:

Motor starts normally when externally rotated, but fails to self-start.

This is a classic signature of:

  • Phase loss (single-phase operation under load)
  • Intermittent contactor failure
  • High contact resistance in one phase path
  • Unequal phase voltage delivery to motor terminals

Such conditions reduce rotating magnetic field symmetry, preventing torque generation at zero speed.


5. Electrical Measurements

After correction and stabilization, measured values were:

  • Motor phase resistances:
    • 19.7 Ω / 18.9 Ω / 19.7 Ω
  • Cable/inverter-to-motor resistance:
    • ~0.2 Ω (excellent continuity)

Interpretation:

ParameterStatus
Motor winding symmetryAcceptable (±4% deviation)
Cable integrityExcellent
Inverter outputNormal
Historical issueExternal phase interruption

The winding values confirmed the motor itself was healthy. Therefore, the fault had to be upstream of the motor terminals.


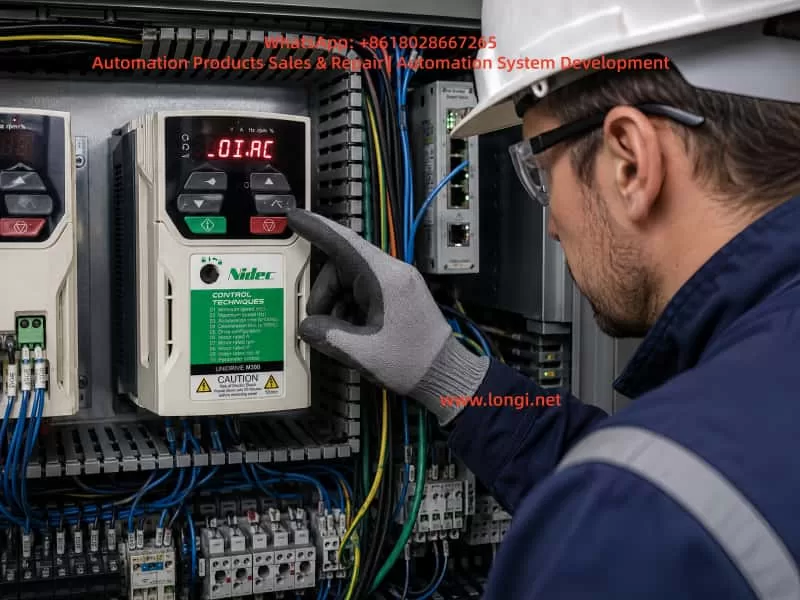
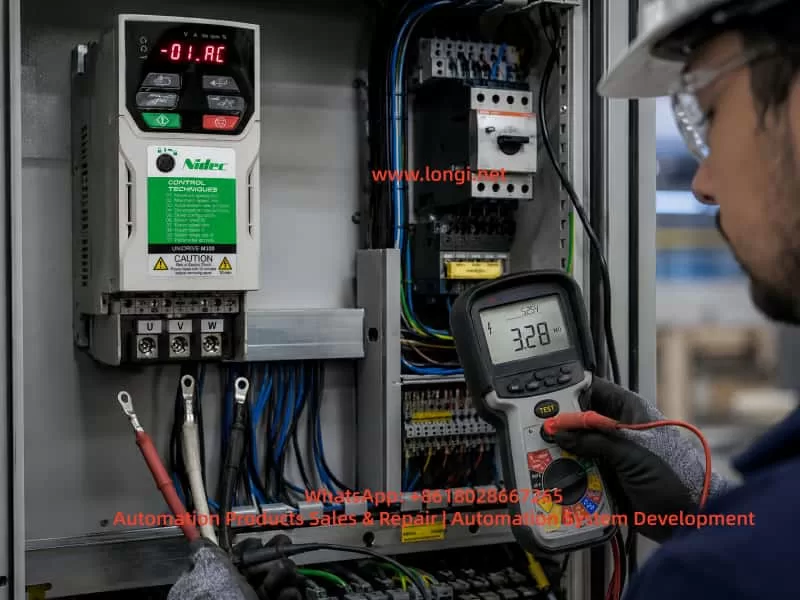
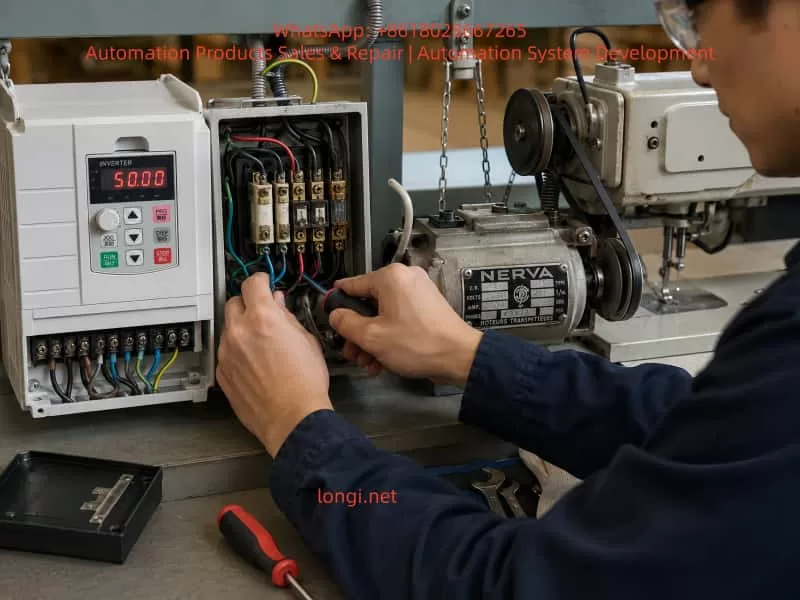
Technician repairing and replacing a faulty electrical contactor in a VFD-controlled sewing machine motor system, showing the drive operating smoothly after correction in an industrial workshop setting.

6. Root Cause Analysis

The final confirmed root cause was:

Intermittent missing phase caused by an aged main contactor / fuse assembly

Mechanism of failure:

Old contactor systems typically suffer from:

  • Oxidized silver alloy contacts
  • Arc erosion at switching points
  • Thermal expansion loosening internal pressure
  • Intermittent phase dropout under load
  • High resistance phase causing voltage imbalance

Under VFD operation, this leads to:

  1. One phase voltage drop or distortion
  2. Weak rotating magnetic field
  3. Zero-speed torque collapse
  4. Failure to self-start
  5. Motor only operates when externally “forced into motion”

Once rotating, back-EMF stabilizes the field, allowing operation.


7. Why Parameter Changes Failed

Attempts were made to adjust:

  • Torque boost (P04.01)
  • Motor overload gain (P10.01)

However, these parameters only affect:

  • Low-frequency voltage compensation
  • Thermal protection scaling
  • SVC torque estimation correction

They cannot compensate for missing or unstable phase supply.

From AT900 control logic:

  • Torque generation depends on balanced three-phase voltage vector synthesis
  • Phase imbalance cannot be corrected by software gain alone

Thus, all tuning attempts were logically ineffective.


8. Final Corrective Action

The site implemented:

Hardware replacement

  • Replacement of old contactor/fuse assembly
  • Restoration of stable three-phase supply path

System verification

  • Balanced phase continuity confirmed
  • Direct inverter-to-motor wiring validated
  • No external switching elements remaining

9. Final Performance Result

After correction:

  • Motor starts reliably every time
  • Smooth acceleration curve
  • No vibration during low-speed operation
  • Correct rotational direction
  • Stable sewing machine mechanical operation

This confirms:

✔ VFD control system is healthy
✔ Motor insulation and windings are healthy
✔ Mechanical system is properly aligned
✔ Fault was purely upstream electrical distribution


10. Engineering Lessons Learned

10.1 Phase integrity is more important than parameter tuning

In VFD systems, hardware phase continuity is foundational. Any imbalance directly affects:

  • Torque production
  • Startup stability
  • Current waveform symmetry

10.2 “Push-start symptom” is a diagnostic signal

If a motor:

  • Fails at zero speed
  • Runs normally after external rotation

Then likely causes are:

  • Phase loss
  • Voltage imbalance
  • Incorrect wiring topology
  • Weak starting flux condition

10.3 Do not modify VFD parameters before electrical verification

This case confirms a common diagnostic mistake:

Adjusting torque, frequency, and protection parameters without confirming power integrity leads to false troubleshooting cycles.


10.4 Mechanical clutch systems can mask electrical faults

The clutch in this system:

  • Masked inability to self-start
  • Allowed motor to bypass zero-speed torque requirement
  • Created illusion of “weak torque setting”

11. AT900 Series Control Insight

This inverter family uses:

  • Sensorless vector control (SVC)
  • Voltage vector synthesis based on phase stability
  • Torque estimation dependent on current feedback consistency

Therefore:

  • Any upstream phase distortion directly disrupts vector calculation
  • Protection systems may not immediately trigger fault codes
  • Symptoms appear as “soft failure” rather than hard trip

12. Conclusion

This case demonstrates a classic but often misdiagnosed industrial fault:

A motor that cannot self-start under VFD control is not always a tuning problem — it is frequently a power integrity problem upstream of the drive.

The final resolution required:

  • Rejecting parameter-centric diagnosis
  • Performing hardware continuity validation
  • Identifying intermittent phase loss in aging switching components
  • Replacing degraded contactor/fuse assembly

Once corrected, the system returned to full performance with:

  • Stable torque at low frequency
  • Smooth acceleration
  • Correct direction control
  • Fully reliable restart behavior

13. Practical Recommendation for Engineers

When encountering similar cases:

  1. Do NOT increase torque boost blindly
  2. Always verify:
    • Phase-to-phase voltage balance
    • Contactors / fuses / connectors condition
    • Continuity under load, not only static measurement
  3. Test motor behavior:
    • With load disconnected
    • With external rotation assistance
  4. Only then proceed to VFD parameter tuning
Posted on

Diagnosing and Repairing Allen-Bradley CSD3 Plus Servo Drive Alarms

A Systematic Troubleshooting Guide for CSD3-10BX2 Servo Drives Showing an E-Series Fault Code

Servo drive alarms are often misdiagnosed because technicians focus only on the code displayed on the front panel. In many cases, the displayed code is only the final result of an abnormal condition detected by the drive. It does not always identify the actual failed component.

This is especially true for older servo systems such as the Allen-Bradley OEMax CSD3 Plus series. These drives are commonly installed in packaging machines, textile machinery, assembly systems, CNC auxiliary axes, conveyors, and other equipment requiring precise motor positioning and speed control.

The drive shown in the example is an Allen-Bradley OEMax CSD3 Plus servo drive, model CSD3-10BX2. According to the nameplate, it is a 200–240 Vac three-phase servo drive with an output capacity of approximately 1.0 kW. The drive is manufactured on the RS Automation CSD3 servo platform and uses closed-loop motor feedback, typically through an encoder system.

When this type of drive displays an E-series fault code immediately after power-up, technicians should not immediately conclude that the IGBT module, motor, or encoder is defective. A structured diagnosis is required because the same alarm category may be triggered by encoder feedback failure, low-voltage power supply problems, parameter corruption, internal communication faults, power-stage protection signals, or external enable-chain issues.

This article explains how to diagnose and repair CSD3 Plus servo drive alarms in a systematic way, with particular attention to drives that display an E-type fault code during startup.


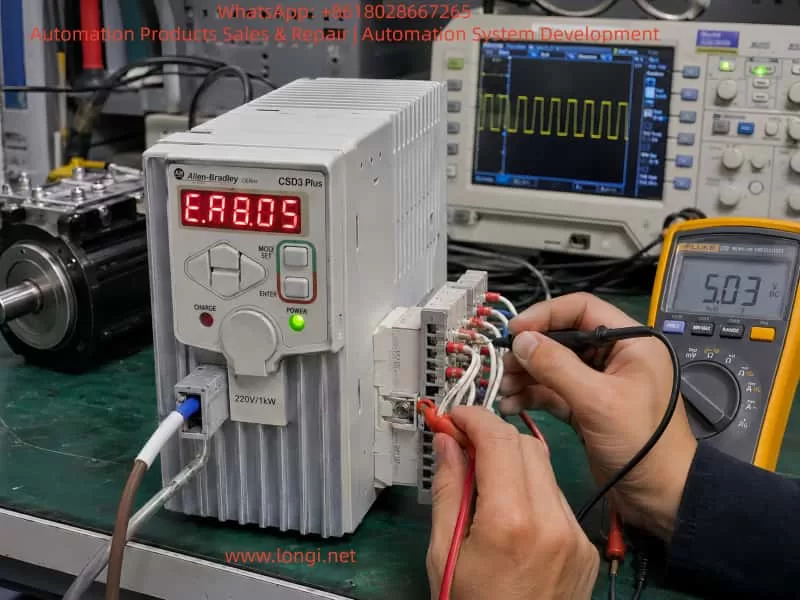
Allen-Bradley OEMax CSD3 Plus servo drive displaying an E-series fault code while a technician measures encoder and control-terminal signals with a digital multimeter on an industrial electronics repair bench.

1. Identifying the Servo Drive

The unit discussed here is identified as:

  • Brand: Allen-Bradley OEMax
  • Series: CSD3 Plus Servo Drive
  • Model: CSD3-10BX2
  • Input voltage: 200–240 Vac, three-phase, 50/60 Hz
  • Input current: approximately 11 A
  • Output voltage: 0–240 Vac, three-phase
  • Output capacity: approximately 1.0 kW
  • Output current: approximately 7.6 A
  • Manufacturer platform: RS Automation
  • Country of manufacture: Korea

This is not a standard variable-frequency drive. Although it has three-phase motor output terminals, it is a closed-loop servo drive. Its operation depends on continuous feedback from the motor encoder.

A normal VFD can control a standard induction motor mainly by generating a variable frequency and voltage. A servo drive must also monitor motor position, speed, direction, acceleration, deceleration, torque demand, and feedback integrity. For this reason, servo drives are much more sensitive to encoder faults, parameter mismatches, power-supply instability, and communication errors.


2. Why an E-Series Alarm Requires Careful Diagnosis

In many servo systems, an E-series display indicates that the drive has detected an abnormal condition during initialization, standby, servo-enable operation, or motor control.

The fault may be related to one of the following areas:

  • Encoder communication failure
  • Encoder power-supply failure
  • Motor identification mismatch
  • Incorrect servo parameters
  • Internal CPU self-test failure
  • EEPROM or parameter memory failure
  • Control board to power board communication fault
  • DC bus voltage detection failure
  • Current feedback circuit fault
  • IGBT gate-driver protection signal
  • External Servo ON input problem
  • Emergency stop circuit open
  • Positive or negative travel-limit signal active
  • Internal low-voltage power-supply instability

Therefore, the displayed fault code should be treated as a starting point for diagnosis, not as a final conclusion.

A repair technician should first determine when the alarm occurs:

  • Immediately after control power is applied
  • After main power is applied
  • Only after Servo ON is activated
  • When the motor starts moving
  • During acceleration
  • During high-speed operation
  • During deceleration
  • Randomly after the machine has been running for some time

The timing of the alarm is one of the most useful clues in servo-drive troubleshooting.


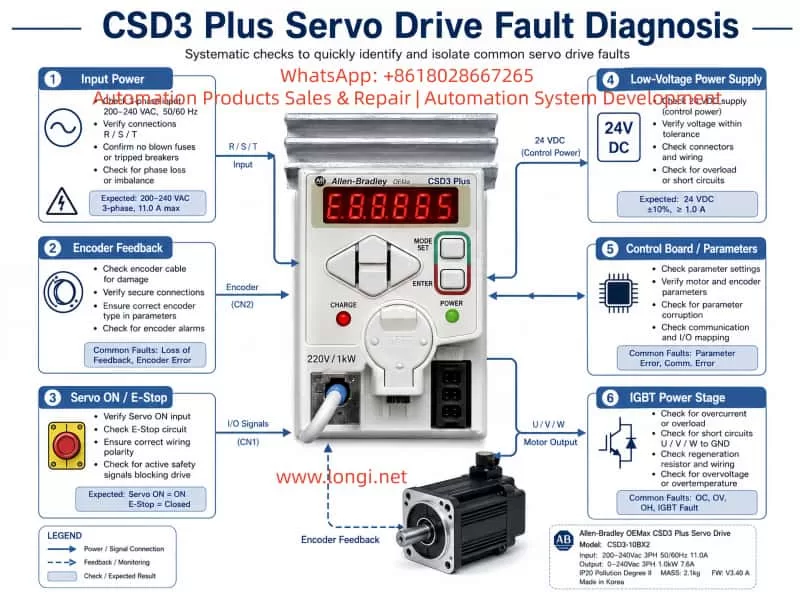
CSD3 Plus servo drive fault diagnosis infographic showing systematic checks for input power, encoder feedback, Servo ON and E-stop signals, low-voltage power supply, control board parameters, and IGBT power stage.

3. The Importance of Startup Sequence

A servo drive performs several internal checks before it is ready to operate. During startup, the drive may verify the following conditions:

  1. Control power supply voltage
  2. Internal 5 V, 12 V, 15 V, and logic power rails
  3. CPU operation and reset status
  4. EEPROM or parameter memory integrity
  5. Encoder interface condition
  6. Motor feedback communication
  7. DC bus voltage level
  8. Pre-charge circuit condition
  9. Current sensor zero point
  10. Power-stage communication
  11. IGBT or IPM protection feedback
  12. Servo-enable input status
  13. Emergency stop circuit status
  14. Positive and negative travel limits
  15. Internal temperature or thermal-protection status

If any of these checks fails, the drive may refuse to enter Ready status and display an alarm.

For this reason, a drive that alarms immediately after power-up should not automatically be classified as a power-stage failure. In many cases, the fault is located in the encoder feedback circuit, the low-voltage power supply, or the control board.


4. The Most Common Causes of CSD3 Plus Startup Alarms

4.1 Encoder Feedback Failure

Encoder-related problems are among the most common causes of servo-drive alarms.

The servo drive needs feedback information from the motor encoder to establish a closed control loop. If the encoder signal is absent, unstable, corrupted, or incompatible, the drive may generate an E-series error before the motor is allowed to run.

Common causes include:

  • Loose encoder connector
  • Bent or oxidized connector pins
  • Broken encoder cable inside a cable carrier
  • Oil contamination inside the connector
  • Coolant ingress into the motor connector
  • Damaged cable shielding
  • Incorrect cable wiring
  • Encoder power supply missing
  • Encoder internal circuit failure
  • Motor encoder damaged after collision or vibration
  • Encoder cable routed together with motor power cables
  • Poor grounding causing electrical interference
  • Incorrect replacement motor or encoder type

In many industrial machines, the encoder cable is repeatedly bent inside a drag chain. The cable may look normal from outside while one or more internal conductors are broken. This is especially common near the motor connection, near the machine frame, or at the fixed end of the cable carrier.

A damaged encoder cable can create intermittent faults. The machine may work normally when stationary but alarm during motion, vibration, or axis travel.


4.2 Encoder Power Supply Failure

The encoder itself may be healthy while the drive is unable to provide correct power to it.

The encoder interface usually receives a regulated low-voltage supply from the servo drive. Depending on the design, this may include 5 V, 12 V, or other low-voltage rails.

The following checks are important:

  • Is the encoder supply voltage present?
  • Is the supply stable after power-up?
  • Does the voltage collapse when the encoder cable is connected?
  • Is there excessive ripple on the encoder supply?
  • Does the power supply remain stable during Servo ON?
  • Is the encoder interface voltage affected by cable movement?

If the drive produces a stable 5 V supply with the encoder unplugged, but the voltage falls sharply when the encoder is connected, the likely causes are:

  • Short circuit inside encoder cable
  • Short circuit inside motor encoder
  • Moisture in the encoder connector
  • Failed TVS protection diode on the drive interface
  • Shorted filter capacitor
  • Damaged encoder interface IC
  • Damaged shielding or grounding connection

Repeatedly powering the drive under a shorted encoder condition may damage the internal low-voltage regulator. Therefore, excessive repeated testing should be avoided.


4.3 Parameter Corruption or Motor Mismatch

Servo drives are not universal devices. The drive parameters must match the connected servo motor and encoder.

If the drive has been repaired, reset, replaced, or incorrectly configured, it may not recognize the motor correctly.

Typical causes include:

  • Factory reset performed without parameter backup
  • Incorrect motor model selected
  • Incorrect encoder type configured
  • Wrong motor capacity parameter
  • Wrong control mode selected
  • Incorrect electronic gear ratio
  • Incorrect encoder resolution setting
  • Absolute encoder mode set incorrectly
  • Parameter memory corruption
  • Replacement drive installed without transferring original settings

A parameter mismatch may cause the drive to alarm immediately, or it may allow Servo ON but alarm when motion begins.

It is important not to reset the drive to factory defaults without recording the original parameters. On older machines, the original parameter list may no longer be available. A full reset can cause new problems such as incorrect direction, excessive gain, overtravel, homing failure, or machine collision.


4.4 External Servo ON, Emergency Stop, or Limit Circuit Problems

A servo drive often depends on external digital inputs before it can enter normal operating condition.

These may include:

  • Servo ON
  • Alarm reset
  • Emergency stop
  • Safety relay output
  • Positive travel limit
  • Negative travel limit
  • External interlock
  • Brake release signal
  • PLC enable command
  • Controller readiness signal

If any of these signals is missing or in the wrong logic state, the drive may not enable correctly.

Typical external causes include:

  • Failed PLC output
  • 24 V control power missing
  • Burned relay contact
  • Loose terminal screw
  • Emergency stop button activated
  • Door safety switch open
  • Broken limit switch cable
  • Incorrect NPN/PNP wiring
  • Incorrect common terminal connection
  • Improper input polarity
  • External safety circuit not reset

Before opening the servo drive, it is important to verify the external control wiring. A normal drive can be incorrectly diagnosed as defective if the safety chain is open.


5. Why the IGBT Module Should Not Be the First Suspect

When a servo drive shows an alarm, many technicians immediately inspect the IGBT module. This is understandable because IGBTs are critical components in the output stage. However, they are not always the most likely cause of a startup alarm.

A failed IGBT module often produces more obvious symptoms, such as:

  • Input breaker trips immediately
  • Main fuse is blown
  • DC bus is shorted
  • P-to-N resistance is abnormally low
  • U, V, or W output is shorted to DC bus
  • Drive alarms immediately after Servo ON
  • Motor vibrates sharply and faults
  • Severe overcurrent alarm
  • Burn marks on the power board
  • Abnormal heating
  • Failed pre-charge circuit
  • Brake transistor short circuit

If the control power LED is on and the drive displays an alarm without tripping the breaker, the first inspection should usually focus on low-voltage supplies, encoder circuits, control board signals, and external control inputs.

This does not mean that the power stage is definitely good. A power-stage fault can also occur without a hard short circuit. For example:

  • IGBT gate-driver voltage may be missing
  • Current sensor output may be incorrect
  • IPM fault output may be permanently active
  • Power board communication may be lost
  • Brake circuit feedback may be abnormal
  • One phase may have a gate-drive problem
  • DC bus voltage sensing may be incorrect

However, these conditions require deeper testing than a simple resistance check of U, V, and W terminals.


6. External Inspection Before Removing the Drive

Before sending the drive for repair or opening the unit, perform a complete external inspection.

6.1 Record the Fault Condition

Document the following information:

  • Full servo drive model number
  • Serial number
  • Exact displayed fault code
  • Whether the code is steady or flashing
  • Whether the alarm appears immediately after power-up
  • Whether the motor moves before the alarm
  • Whether the fault occurs only after Servo ON
  • Whether the fault occurs only during motion
  • Recent machine events before the fault
  • Previous repairs or replacement parts
  • Whether the machine had a collision
  • Whether the machine was exposed to water, oil, lightning, power loss, or voltage instability

This information is extremely valuable during bench repair.


6.2 Inspect Motor and Encoder Connections

Check the following carefully:

  • Encoder connector fully locked
  • Motor power connector secure
  • Connector pins not bent or oxidized
  • No coolant, oil, or water inside connectors
  • Cable shielding intact
  • Cable jacket not damaged
  • No sharp bending near connectors
  • Encoder cable separated from U/V/W motor cables
  • No cable crushed inside machine frame
  • No drag-chain damage
  • Motor brake wiring intact
  • Proper ground connection present

The encoder cable should not be routed together with motor output cables for long distances. The high-frequency switching noise from the servo output can interfere with weak feedback signals.


6.3 Verify Input Power

The CSD3-10BX2 is intended for 200–240 Vac three-phase input.

Measure:

  • R-S voltage
  • S-T voltage
  • R-T voltage
  • Voltage balance between phases
  • Voltage drop during startup
  • Main contactor condition
  • Fuse condition
  • Terminal tightness
  • Transformer output voltage, if applicable

A serious mistake is applying 380 Vac three-phase power to a 220 Vac servo drive. This can cause immediate and extensive damage to the rectifier stage, DC bus capacitors, low-voltage power supply, power module, and control board.

Always confirm actual voltage with a meter. Do not rely only on cabinet labels.


7. Internal Repair Procedure for a Drive That Alarms with Minimal External Wiring

If the drive continues to display the same alarm after external wiring, motor, and encoder issues have been excluded, internal diagnosis is required.

A proper repair sequence should proceed from high-energy power circuits toward low-voltage logic circuits.


7.1 Check Rectifier and DC Bus Circuit

After disconnecting power and allowing sufficient time for the DC bus capacitors to discharge, inspect:

  • Three-phase rectifier bridge
  • DC bus terminals P and N
  • Main filter capacitors
  • Pre-charge resistor
  • Pre-charge relay
  • Brake transistor
  • Brake resistor terminals
  • DC bus voltage sensing circuit
  • Bus capacitor ESR and leakage
  • Burnt resistors or damaged tracks

If P and N are directly shorted, isolate the possible fault sections one by one:

  • IGBT or IPM module
  • Brake transistor
  • DC bus capacitors
  • Rectifier bridge
  • Snubber circuit
  • Power board contamination

A direct bus short should never be ignored. Do not repeatedly apply power to a drive with a suspected DC bus short.


7.2 Check IGBT or IPM Module

The power module should be tested carefully.

Measure:

  • P to U, V, W
  • N to U, V, W
  • U to V
  • V to W
  • U to W
  • Gate-driver pins if accessible
  • Fault feedback output
  • Driver supply voltage
  • Isolation between power stage and control stage

A simple diode-test reading is useful, but it is not enough to prove that the IGBT stage is healthy.

The power stage may still fail because of:

  • Missing gate-drive voltage
  • Failed gate resistor
  • Failed optocoupler
  • Faulty driver IC
  • Current sensor offset
  • Internal protection latch
  • One phase not switching correctly
  • Power board connector oxidation
  • Cracked solder joints
  • Temperature sensor fault

For this reason, an oscilloscope is often required to verify gate signals and driver supply rails.


7.3 Check Low-Voltage Power Supplies

Low-voltage power supply failure is very common in older servo drives.

The following rails should be checked:

  • +5 V
  • +3.3 V
  • +12 V
  • +15 V
  • -15 V, where applicable
  • Isolated driver supply rails
  • Encoder supply voltage
  • CPU supply voltage
  • Reference voltage circuits

Typical failures include:

  • Aged electrolytic capacitors
  • High ESR capacitors
  • Failed switching controller IC
  • Failed optocoupler
  • TL431 reference circuit failure
  • Shorted secondary diode
  • Failed DC/DC converter
  • Cracked solder joint
  • Damaged regulator IC
  • Open SMD fuse
  • Burnt startup resistor

If the supply voltage is low or unstable, the CPU may reset repeatedly, the encoder interface may malfunction, and the drive may display an internal alarm even though the main power stage is not defective.


7.4 Check Encoder Interface Circuit

The encoder interface should be treated as a priority area.

Inspect and test:

  • Encoder connector solder joints
  • Connector pin condition
  • 5 V supply fuse or resettable fuse
  • TVS protection diodes
  • Common-mode choke components
  • Data-line protection arrays
  • Differential receivers
  • Differential transmitters
  • Optocouplers, if used
  • Interface IC supply voltage
  • Filter capacitors
  • Grounding and shield connection

A failed TVS diode can short the encoder supply line to ground. A damaged receiver IC can prevent encoder communication even when the encoder itself is good. A cracked connector solder joint can create intermittent feedback loss.

In environments with oil mist, coolant, vibration, or frequent cable movement, encoder-interface failures are common.


7.5 Check Control Board and Parameter Memory

If the power section, low-voltage supplies, and encoder interface appear normal, inspect the control board.

Important areas include:

  • Main MCU or DSP
  • Crystal oscillator
  • Reset circuit
  • EEPROM or Flash memory
  • CPU supply rail
  • Watchdog circuit
  • Board-to-board communication
  • Power board communication connector
  • Corrosion around IC pins
  • Solder cracks under large components
  • Parameter memory integrity
  • Communication transceivers

Faults in this area may require comparison with a known-good drive, oscilloscope testing, logic analysis, and EEPROM programming tools.

If a replacement control board is installed, parameter compatibility must be confirmed before attempting operation.


8. Isolation Testing: Internal Fault or External Fault?

A useful method is to separate the problem into two categories:

  1. Fault caused by the drive itself
  2. Fault caused by external motor, cable, encoder, PLC, or safety circuit

Scenario A: The Drive Alarms with External Wiring Removed

If the drive still alarms with the following disconnected:

  • Motor power cable
  • Encoder cable
  • PLC control wiring
  • Communication cable
  • External I/O
  • Servo ON signal
  • Brake wiring

then the fault is more likely inside the drive.

Possible internal causes include:

  • Low-voltage power supply failure
  • Control board failure
  • Parameter memory problem
  • Encoder interface fault
  • Power board communication fault
  • DC bus sensing failure
  • Current-sensor fault
  • Gate-driver protection fault
  • Internal CPU self-test failure

However, note that some servo drives are designed to alarm if no encoder is connected. Therefore, this test should ideally be compared with a known-good drive of the same model.


Scenario B: The Drive Is Normal Without the Motor but Alarms When the Motor Is Connected

This condition strongly suggests an external problem.

Priority suspects include:

  • Encoder cable
  • Motor encoder
  • Motor power cable
  • Motor winding fault
  • Brake coil fault
  • Incorrect motor
  • Incorrect encoder type
  • Cable shielding issue
  • Incorrect wiring sequence
  • Connector contamination
  • Motor-to-ground insulation failure

The best way to confirm this is through substitution testing:

  1. Test with a known-good motor.
  2. Test with a known-good encoder cable.
  3. Test the motor on another compatible drive.
  4. Test the drive with another compatible motor.
  5. Measure encoder supply voltage with and without the cable connected.
  6. Check motor winding resistance and insulation resistance.

Substitution testing is often more reliable than simple resistance measurements.


9. Common Misdiagnoses During Servo Drive Repair

Misdiagnosis 1: Every E-Series Fault Is an Encoder Fault

Encoder faults are common, but they are not the only cause.

An E-series fault may also result from:

  • CPU self-test failure
  • EEPROM corruption
  • Internal communication failure
  • Current feedback circuit problem
  • DC bus sensing error
  • Power board protection signal
  • Low-voltage supply instability
  • Parameter mismatch
  • External enable-chain issue

Replacing the encoder without testing the encoder supply and interface circuit may waste time and money.


Misdiagnosis 2: No U/V/W Short Means the Power Stage Is Good

A power module may pass a basic diode test and still be defective.

Possible hidden failures include:

  • Gate drive missing on one phase
  • Current feedback abnormal
  • IGBT protection feedback stuck active
  • Driver supply voltage missing
  • Brake circuit malfunction
  • Power-stage communication fault
  • Thermal sensor fault
  • Cracked solder joint
  • Output waveform distortion

A proper diagnosis requires more than checking terminal resistance.


Misdiagnosis 3: Resetting Parameters Immediately

Factory reset should not be the first action.

Resetting the drive can erase machine-specific settings such as:

  • Motor model
  • Encoder type
  • Electronic gear ratio
  • Position command mode
  • Speed loop gain
  • Position loop gain
  • Acceleration and deceleration parameters
  • Homing settings
  • Input logic
  • Output logic
  • Torque limit
  • Travel-limit configuration

On an older machine, these parameters may be impossible to recover. A parameter reset can turn a repairable fault into a commissioning problem.


Misdiagnosis 4: Ignoring Cable and Connector Problems

A servo drive may test normal on the repair bench but fail again after installation.

Common reasons include:

  • Broken wire inside drag chain
  • Intermittent encoder cable
  • Loose motor connector
  • Contaminated encoder plug
  • Poor grounding
  • External electrical noise
  • Damaged PLC output
  • Unstable 24 V supply
  • Poor cabinet wiring
  • Loose terminal screw

A proper repair should include dynamic testing with a compatible motor and encoder whenever possible.


10. Recommended Standard Diagnostic Workflow

For a CSD3-10BX2 or similar CSD3 Plus servo drive, the following workflow is recommended.

Step 1: Record the complete model number and fault condition

Document the exact display, fault timing, and machine behavior.

Step 2: Verify the input voltage

Confirm that the drive receives 200–240 Vac three-phase input and is not connected to 380 Vac.

Step 3: Inspect motor, encoder, brake, and control wiring

Check connectors, cable condition, shield, grounding, and drag-chain movement.

Step 4: Check encoder power supply

Measure encoder supply voltage and observe whether it collapses when the encoder is connected.

Step 5: Check Servo ON and external safety inputs

Confirm 24 V control power, emergency stop loop, limit switches, PLC output, and enable logic.

Step 6: Reduce the system to minimum wiring

Disconnect unnecessary external signals and observe the drive behavior under controlled conditions.

Step 7: Inspect the DC bus and power circuit

Check rectifier bridge, pre-charge circuit, DC bus capacitors, brake transistor, and IGBT/IPM module.

Step 8: Inspect low-voltage power rails

Check 5 V, 12 V, 15 V, negative rails, and isolated driver supplies.

Step 9: Inspect encoder interface circuit

Test protection components, interface ICs, connector solder joints, and encoder supply circuitry.

Step 10: Inspect control board and parameter memory

Check MCU, oscillator, reset circuit, EEPROM, communication signals, and board-to-board connectors.

Step 11: Perform motor matching and no-load testing

Use a compatible motor and encoder to test Servo ON, direction, low-speed rotation, and alarm response.

Step 12: Perform dynamic and thermal testing

Run repeated start-stop tests, acceleration tests, low-speed and high-speed tests, and temperature monitoring.


11. Conclusion

Allen-Bradley CSD3 Plus servo drives such as the CSD3-10BX2 should not be diagnosed only by the front-panel alarm code.

When an E-series fault appears, especially immediately after power-up, the most important areas to investigate are:

  • Encoder feedback system
  • Encoder power supply
  • Motor and cable condition
  • External Servo ON and safety circuit
  • Low-voltage power supplies
  • Control board self-test
  • Parameter memory
  • Power board communication
  • DC bus voltage detection
  • Current feedback and gate-driver protection circuits

In many cases, the actual failure is not the IGBT module. More common causes include broken encoder cables, damaged connectors, failed 5 V encoder supply circuits, aged low-voltage capacitors, parameter mismatch, internal interface faults, and unstable control power.

A reliable repair process should follow a complete diagnostic chain:

Fault display → external wiring → encoder feedback → control power → low-voltage rails → power stage → control board → dynamic motor test.

This method reduces unnecessary component replacement, improves repair accuracy, and provides a much higher chance that the servo drive will remain stable after it is returned to service.

Posted on

Diagnosing and Repairing Inovance IS580 Hydraulic Servo Drive Err45 and Err46 Faults: From External Feedback Circuits to Control Board Testing

In hydraulic servo systems used in injection molding machines, hydraulic presses, die-casting machines, rubber machinery, and other industrial equipment, the Inovance IS580 hydraulic servo drive performs several critical functions. These include motor speed control, pressure closed-loop control, flow closed-loop control, temperature protection, and hydraulic response management.

When an IS580 drive reports faults such as Err45 and Err46, the equipment may fail to start, stop immediately after startup, or remain locked in an alarm state. These faults should not be treated simply as “the drive is defective.” It is also not appropriate to immediately replace the IGBT module or power board.

In many cases, Err45 and Err46 are related to the motor temperature feedback circuit, pressure sensor feedback circuit, 24 VDC control supply, analog input wiring, common reference terminals, or the control board signal-conditioning circuit.

This article uses a typical Inovance hydraulic servo drive, such as the IS580T070-R1-1-EST, 37 kW, 380–480 VAC input model, as an example. It explains how to identify, diagnose, and repair suspected Err45 and Err46 faults in a systematic manner.


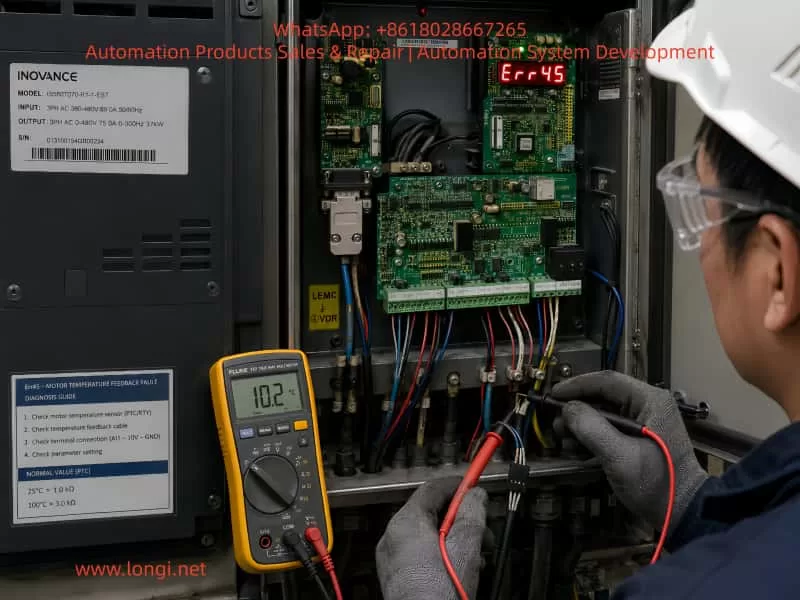
Technician diagnosing an Inovance IS580 hydraulic servo drive Err45 motor temperature feedback fault by testing the motor temperature circuit and control terminals with a digital multimeter.

1. Confirm the Actual Alarm Code Before Starting Diagnosis

Before troubleshooting, the first step is to confirm the real alarm code.

When a mobile phone records a seven-segment LED display, the displayed characters may appear incomplete, distorted, overlapped, or flashing. For example, “Err45” or “Err46” may appear in a video as something similar to “E8.8.85,” “E8.8.86,” or other unclear characters.

This happens because most LED displays use multiplex scanning. The drive scans each digit very quickly. Human eyes see a complete number, but the camera shutter may capture only part of the scan cycle.

Therefore, before diagnosing the drive:

  1. Record a video instead of taking only a single photo.
  2. Use slow-motion recording if available.
  3. Film the display from close range.
  4. Observe whether the fault code is fixed or alternates between two alarms.
  5. Record whether the alarm occurs immediately after power-on, when the motor starts, or after running for a period of time.
  6. Take photos of the drive terminals, motor terminal box, pressure sensor, and external wiring.

If Err45 and Err46 appear alternately, this usually indicates two different feedback-related faults rather than one main power circuit failure.


2. Basic Meaning of Err45 and Err46

For an Inovance IS580 hydraulic servo system, the following diagnostic direction should be considered first:

Fault CodeMain Diagnostic DirectionRelated Components
Err45Motor temperature feedback fault, PTC circuit abnormality, actual motor overheatingMotor temperature cable, PTC sensor, thermal switch, connector, terminal block, control board temperature input
Err46Pressure sensor feedback fault, pressure analog signal out of range, sensor supply problemPressure sensor, 24 VDC supply, analog input, shielded cable, analog common terminal, control board analog input circuit

Different drive firmware versions, machine builders, and parameter configurations may use slightly different alarm descriptions. Therefore, the final diagnosis should always be confirmed against the correct IS580 manual, the machine electrical drawing, and the original parameter backup.

However, both Err45 and Err46 are generally feedback-detection faults. They are not typical faults such as IGBT short circuit, DC bus undervoltage, output phase loss, or braking unit failure.

For this reason, the correct troubleshooting sequence is:

External wiring → sensor condition → terminal connections → low-voltage supply → control board

Do not begin by replacing the power module.


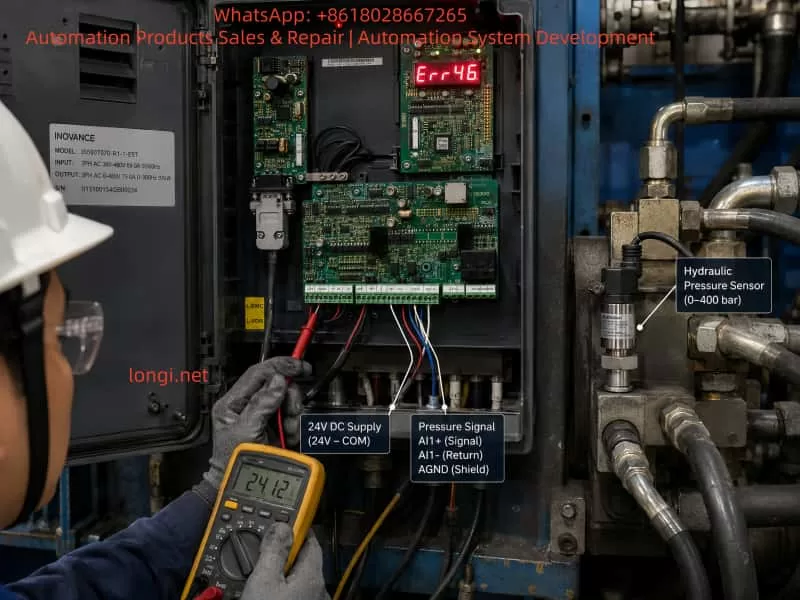
Technician troubleshooting an Inovance IS580 hydraulic servo drive Err46 pressure sensor fault by measuring the 24 VDC supply and analog pressure feedback signal at the hydraulic control cabinet.

3. Why Pressure Feedback Is So Important in a Hydraulic Servo System

A standard inverter can run a motor when it receives a run command and frequency reference. A hydraulic servo drive is more complex.

In a hydraulic servo system, the drive adjusts motor speed and torque according to pressure and flow feedback signals. The control logic can be simplified as follows:

Pressure command → Actual pressure feedback → Error calculation → Motor speed adjustment → Hydraulic pump output adjustment → Actual pressure reaches the target value.

If the pressure sensor signal is missing, unstable, out of range, incorrectly configured, or disconnected, the drive cannot accurately determine the actual hydraulic pressure.

To avoid uncontrolled pressure increase, pump overload, low-pressure operation, or dangerous hydraulic movement, the drive may stop and generate a pressure feedback alarm.

Therefore, when Err46 occurs, it does not always mean that the hydraulic pressure itself is abnormal. In many cases, it means that the drive cannot read a valid pressure signal.

Possible causes include:

  • No 24 VDC supply to the pressure sensor;
  • Loose pressure sensor connector;
  • Broken pressure signal wire;
  • Open or incorrect analog common terminal;
  • Wrong setting between 0–10 V and 4–20 mA;
  • Damaged pressure sensor;
  • Moisture or oil contamination in the connector;
  • Incorrect shielding or severe electrical interference;
  • Analog input circuit failure on the drive control board;
  • External 24 VDC supply fluctuation.

4. Err45: Motor Temperature Protection Circuit

Hydraulic servo motors are commonly equipped with an internal temperature protection element. Typical types include:

  1. PTC thermistor;
  2. NTC thermistor;
  3. Normally closed or normally open thermal switch;
  4. KTY temperature sensor;
  5. Motor temperature feedback integrated into the encoder connector.

In industrial servo motors, PTC protection is very common. At normal temperature, the PTC resistance remains low. When the motor reaches the protection temperature, the resistance rises sharply. The drive monitors this circuit to determine whether the motor is overheating.

When Err45 occurs, it does not automatically mean that the motor winding is burnt.

In real maintenance cases, Err45 is often caused by an abnormal temperature feedback circuit rather than true motor overheating.

Common causes include:

  • Broken motor temperature cable;
  • Loose aviation connector;
  • Oxidized connector pins;
  • Oil or water inside the motor terminal box;
  • Cable insulation damage caused by heat;
  • Open-circuit PTC sensor;
  • Incorrect wiring after maintenance;
  • Loose intermediate terminal block;
  • Damaged temperature input circuit on the control board;
  • Actual motor overheating caused by overload, poor ventilation, or hydraulic system problems.

Hydraulic servo motors often operate under high load, high oil temperature, and high ambient temperature. If the hydraulic system has continuous overflow, pump seizure, poor cooling, excessive pressure, or heavy mechanical load, the motor may actually overheat.


5. Field Inspection Procedure for Err45

Step 1: Check Whether the Motor Is Actually Overheating

After stopping the equipment, use an infrared thermometer to measure:

  • Motor housing temperature;
  • Motor terminal box temperature;
  • Cooling fan area temperature;
  • Hydraulic pump temperature;
  • Hydraulic oil temperature;
  • Drive heatsink temperature.

If the motor is extremely hot, has a burning smell, or the cooling fan is not operating, mechanical and cooling problems must be resolved first.

Check the following items:

  • Is the motor fan running?
  • Is the airflow path blocked?
  • Is the hydraulic oil temperature too high?
  • Is the oil cooler working properly?
  • Is the hydraulic pump mechanically overloaded?
  • Is the relief valve continuously bypassing oil?
  • Is the system pressure higher than the normal setting?
  • Are the motor parameters correct?
  • Is the motor power rating suitable for the hydraulic pump?

Step 2: Measure the Motor Temperature Circuit

Disconnect the main power supply and wait until the DC bus is fully discharged. A 37 kW drive contains significant stored DC bus energy. Do not touch control terminals or power terminals immediately after power-off.

Locate the motor temperature feedback wires and measure the resistance between the two temperature terminals.

Typical interpretations are:

Measurement ResultPossible Cause
Infinite resistance or open circuitBroken cable, loose connector, damaged PTC, disconnected terminal
Near 0 ΩShort circuit, damaged component, incorrect wiring
Stable resistance within expected rangeTemperature circuit is probably normal
Resistance changes while moving the cableBroken conductor, loose plug, poor crimping
Resistance increases sharply when motor is hotMotor may actually be overheating or PTC is operating

The exact resistance value depends on the motor manufacturer and sensor type. Do not judge the circuit only by a single resistance value. Compare with a known-good motor if possible, or refer to the motor documentation.

Step 3: Inspect Both Motor Side and Drive Side

Many technicians inspect only the drive terminal. However, the motor-side connector is often the real source of the fault.

Pay particular attention to:

  • Motor aviation connector pins;
  • Encoder connector;
  • Terminal box wiring;
  • Cable chain bending points;
  • Oil contamination;
  • Moisture ingress;
  • Loose terminal screws;
  • Oxidized connectors;
  • Improper reconnection after previous maintenance.

The temperature feedback circuit must be checked from the motor all the way to the drive input terminal.


6. Err46: Pressure Sensor Fault Diagnosis

Hydraulic pressure sensors usually use one of the following output formats:

  1. 0–10 V;
  2. 0–5 V;
  3. 4–20 mA.

The most common types are 0–10 V and 4–20 mA.

A typical pressure sensor may have three or four wires:

  • Positive supply, usually +24 VDC;
  • Negative supply, 0 VDC;
  • Signal output, 0–10 V or 4–20 mA;
  • Shield wire, depending on the sensor type.

Before checking the wiring, confirm the actual sensor type and make sure the drive parameters match it.

For example, if the sensor is 4–20 mA but the drive is configured for 0–10 V, the drive may report Err46 even though the sensor itself is healthy.


7. Three-Step Pressure Sensor Test Method

Step 1: Check the Sensor Supply Voltage

Use a multimeter in DC voltage mode and measure the sensor power supply terminals.

Typical expected values include:

  • Approximately 24 VDC;
  • In some systems, 10 VDC or 12 VDC;
  • The voltage should remain stable and should not collapse during alarm conditions.

If the pressure sensor has no supply voltage, inspect:

  • Drive 24 VDC output;
  • External switching power supply;
  • Fuse;
  • Terminal block;
  • Intermediate relay;
  • Common 0 VDC wiring;
  • Broken cable;
  • Control board 24 VDC output circuit.

If multiple sensors lose power at the same time, the problem is more likely related to the common power supply or common wiring than to a single sensor.

Step 2: Check the Pressure Signal Output

For a 0–10 V pressure sensor, measure the signal wire relative to the analog common terminal.

Normally, the output voltage should change smoothly with hydraulic pressure. For example:

  • Near 0 V when pressure is low;
  • Approximately 4–6 V at medium pressure;
  • Close to 10 V at full-scale pressure.

For a 4–20 mA sensor, measure the current in series or measure the voltage across a known sampling resistor.

Typical diagnostic conclusions are:

Signal ConditionPossible Cause
Signal always 0 VNo sensor supply, broken signal wire, failed sensor
Signal always at maximum valueSignal shorted to 24 V, failed sensor, actual pressure overload
Signal unstable or jumpingLoose connection, poor shielding, interference, unstable supply
Signal normal but drive still alarmsIncorrect parameter settings, analog common problem, control board input failure
Alarm changes when cable is movedBroken cable conductor, loose connector, poor crimping

Step 3: Check the Drive Analog Input Terminal

Even if the sensor output is normal, verify that the signal actually reaches the drive.

Measure the signal at several locations:

  1. At the pressure sensor output;
  2. At the intermediate terminal block;
  3. At the drive analog input terminal;
  4. At the analog common terminal;
  5. At the control board connector.

If the signal is correct at the sensor but missing at the drive, the fault is in the cable, terminal block, connector, or wiring arrangement.

If the signal is correct at the drive terminal but Err46 remains active, the control board analog input circuit becomes a strong suspect.


8. Why Err45 and Err46 Can Occur Together

Err45 and Err46 relate to different feedback signals, but they may appear together because of a shared fault source.

Common shared causes include the following.

1. Abnormal 24 VDC Control Supply

Pressure sensors usually depend on 24 VDC. Some encoder interfaces, external temperature modules, and control circuits may also depend on the same low-voltage supply.

If the 24 VDC power supply is unstable, overloaded, shorted, or heavily fluctuating, multiple feedback signals may become abnormal.

2. Loose or Open Common 0 VDC

In analog control systems, 0 VDC is not only the negative supply wire. It is also the signal reference point.

If the pressure sensor signal wire remains connected but the analog common terminal is open, the drive may read unstable, floating, saturated, or incorrect voltage values.

A common-terminal problem may also affect other low-voltage detection circuits.

3. Oil, Water, or Corrosion at the Terminal Block

Hydraulic equipment often operates in oily environments. If the electrical cabinet sealing is poor, oil mist, moisture, dust, and corrosion may enter the terminal area.

This can cause:

  • High-resistance leakage;
  • Analog signal drift;
  • Oxidized terminals;
  • Short circuits;
  • 24 VDC leakage to ground;
  • Increased contact resistance;
  • Unstable feedback signals.

4. Signal Cables Installed Together With Motor Cables

If pressure sensor cables, temperature feedback wires, and encoder cables are routed together with U/V/W motor output cables for a long distance, they may be affected by PWM switching interference.

This can cause:

  • Unstable pressure feedback;
  • Analog input over-range alarms;
  • Encoder communication errors;
  • Temperature input misjudgment;
  • Unstable motor operation.

Analog signal cables should use shielded twisted-pair cable and should be routed separately from power cables. Shield grounding should follow the original machine design and the drive manufacturer’s requirements.

5. Control Board Analog Input Circuit Failure

If the pressure sensor, external wiring, 24 VDC supply, and terminal block all test normally, the control board becomes a likely fault source.

Common damaged parts on the control board include:

  • Analog input operational amplifiers;
  • TVS surge protection devices;
  • Current-limiting resistors;
  • Optocouplers;
  • 24 VDC to 5 VDC or 3.3 VDC regulators;
  • ADC input circuits;
  • Connector pins;
  • Temperature detection comparators;
  • MCU peripheral sampling circuits.

Such faults usually require board-level inspection, component-level measurement, and analog signal simulation.


9. Do Not Directly Short the Motor Temperature Protection Input

Some technicians may short the motor temperature protection input temporarily in order to make the machine run.

This is risky.

Shorting the temperature input may temporarily remove Err45, but it also disables motor thermal protection. If the motor is actually overheating because of poor cooling, pump overload, blocked oil flow, high hydraulic pressure, or fan failure, continued operation may cause:

  • Motor winding burnout;
  • Encoder damage;
  • Bearing failure;
  • Hydraulic pump seizure;
  • Drive overcurrent;
  • IGBT module damage;
  • Mechanical equipment failure.

A temporary simulation may be used only by experienced personnel for diagnostic purposes and only after confirming that the motor temperature is safe. The original thermal protection must be restored after diagnosis.

Similarly, do not blindly inject a voltage or connect a resistor to simulate the pressure sensor signal. Incorrect pressure simulation can cause dangerous hydraulic movement or incorrect pressure control.


10. Recommended Complete Troubleshooting Sequence

For an Inovance IS580 hydraulic servo drive showing Err45 and Err46, use the following sequence.

Step 1: Record the Current Condition and Save Parameters

Before resetting the drive or disconnecting power, record:

  • Drive model;
  • Alarm code;
  • Parameter group settings;
  • Motor nameplate;
  • Pressure sensor nameplate;
  • Control terminal wiring;
  • Machine electrical drawings;
  • Machine condition when the alarm occurs;
  • Whether the motor, sensor, pump, or control board was recently replaced.

If the drive can still access the parameter menu, save the parameters before making changes. Pressure signal type, scaling, zero-point adjustment, maximum pressure setting, and control mode can all affect fault diagnosis.

Step 2: Check the Control Power Supply

Measure:

  • Drive 24 VDC control output;
  • External 24 VDC power supply;
  • Pressure sensor supply voltage;
  • Stability between 24 VDC and 0 VDC;
  • Insulation between 24 VDC and ground;
  • Whether the control voltage drops when the alarm occurs.

Step 3: Check the Motor Temperature Circuit

Measure:

  • Temperature feedback resistance;
  • Motor-side connector;
  • Drive-side terminal;
  • Intermediate terminal block;
  • Cable bending points;
  • Resistance variation while moving the cable.

Step 4: Check the Pressure Sensor Circuit

Measure:

  • Sensor supply voltage;
  • Sensor output signal;
  • Sensor signal type;
  • Drive parameter settings;
  • Whether the signal changes with pressure;
  • Connector contamination, looseness, or corrosion.

Step 5: Check Analog Common and Shielding

Confirm:

  • Analog common terminal connection;
  • Relationship between sensor 0 VDC and drive analog common;
  • Shield wire grounding method;
  • Separation between analog signal cables and motor power cables;
  • Absence of incorrect grounding or multiple grounding points.

Step 6: Inspect the Control Board Only After External Circuits Are Confirmed Normal

If all external checks are normal, proceed to control board inspection.

Check whether:

  • The analog input can receive a standard test voltage;
  • The temperature input can recognize a correct resistance value;
  • 24 VDC, 5 VDC, and 3.3 VDC supplies are stable;
  • The analog channel is damaged;
  • The board connector solder joints are loose;
  • There is corrosion, oil contamination, or moisture damage on the board.

11. Practical Advice for Machine Operators

For non-professional users, the following basic checks can be completed before sending the drive for repair:

  1. Check whether the servo motor is excessively hot.
  2. Check whether the motor cooling fan operates normally.
  3. Check whether the motor temperature connector is loose.
  4. Check whether the pressure sensor connector is loose, oily, damaged, or corroded.
  5. Measure whether the pressure sensor has a stable 24 VDC supply.
  6. Measure whether the pressure signal changes with hydraulic pressure.
  7. Check whether sensor cables are routed together with motor power cables.
  8. Check whether drive control terminals show signs of moisture, corrosion, overheating, or loose wiring.
  9. Do not short the motor temperature protection terminal permanently.
  10. Do not replace the IGBT module before checking the feedback circuits.

12. Conclusion

When an Inovance IS580 hydraulic servo drive reports suspected Err45 and Err46 faults, the first diagnostic focus should be the motor temperature feedback circuit and pressure sensor feedback circuit, not the IGBT module or main power board.

Err45 requires inspection of the motor PTC circuit, temperature cable, aviation connector, terminal block, motor cooling condition, and hydraulic load.

Err46 requires inspection of the pressure sensor supply voltage, output signal, analog input type, analog common terminal, shielding, and control board analog input circuit.

If both faults occur together, special attention should be given to the 24 VDC control supply, analog common wiring, control cable harness, terminal contamination, and control board connector condition.

The most effective diagnostic method is to follow the signal path step by step:

Sensor output → terminal block → drive input terminal → control board sampling circuit

This process allows technicians to quickly distinguish between an external wiring or sensor problem and an internal drive control board fault.

For high-power hydraulic servo drives such as 37 kW units, blindly bypassing protection circuits, forcing the machine to run, or replacing the power module without testing the feedback system can significantly increase repair cost and equipment risk. The correct approach is to first verify whether the feedback signals are real, stable, correctly wired, and correctly matched to the drive parameters.

Posted on

Diagnosing ABB ACS550 AI1 Analog Signal Faults in Multi-Motor Synchronization Systems

Introduction

In industrial production lines such as carbon processing equipment, conveyor systems, rolling lines, traction systems, winding machines, extrusion lines, and continuous material-handling systems, multiple motors often need to operate at synchronized speed or in a fixed speed ratio.

A common control structure uses one or more variable frequency drives to regulate motor speed, while the speed reference comes from a proximity sensor, encoder, PLC analog output, pulse-to-analog converter, tension controller, or another external control device.

ABB ACS550 drives are widely used in these applications because they support analog inputs, digital inputs, relay outputs, PID functions, external reference control, and fieldbus communication. However, when an ACS550 receives an unstable analog reference through AI1, the result can be much more serious than a simple speed fluctuation.

Typical field symptoms include:

  • The drive operates normally after reset.
  • After several hours, one drive begins to slow down or stop unexpectedly.
  • The AI1 signal fluctuates between abnormal values.
  • The displayed speed reference or percentage suddenly decreases.
  • The machine loses synchronization with other motors.
  • Other drives show a certain monitoring value, but one drive does not.
  • The production line stops even though the main power section of the drive appears normal.

These symptoms are often misunderstood as an internal VFD hardware failure. In practice, the root cause is frequently related to the analog signal chain, wiring, grounding, parameter configuration, sensor feedback, signal conversion, electromagnetic interference, or differences between drives in the same synchronization system.

This article explains how to diagnose AI1-related instability in ABB ACS550 drives, how to distinguish external signal faults from internal drive faults, and how to improve the control system for reliable long-term operation.


Technician using a multimeter to test the AI1 4–20 mA analog input signal on an ABB ACS550 variable frequency drive inside an industrial control cabinet for multi-motor synchronization troubleshooting.

1. Understanding the Role of AI1 in an ACS550 System

AI1 means Analog Input 1. In ABB ACS550 applications, AI1 may be used for:

  • Speed reference input
  • Process setpoint input
  • Pressure reference
  • Tension reference
  • PID feedback or setpoint
  • External potentiometer input
  • PLC analog output input
  • Signal converter output
  • Sensor-based speed reference

The analog signal may be one of the following:

  • 0–10 VDC
  • 0–20 mA
  • 4–20 mA
  • A voltage signal generated by an external controller
  • A current signal generated by a PLC analog output module
  • A signal converted from encoder or proximity sensor pulses
  • A process signal from a transmitter or sensor

In a simple fan or pump application, a small fluctuation in AI1 may only create a minor speed change. However, in a multi-motor synchronized production line, the analog reference often affects the speed relationship between several motors.

For example:

Proximity Sensor / Encoder
        ↓
Pulse Signal
        ↓
Pulse-to-Analog Converter or PLC High-Speed Counter
        ↓
0–10 V or 4–20 mA Speed Reference
        ↓
ACS550 AI1 Input
        ↓
Drive Frequency Reference
        ↓
Motor Speed
        ↓
Multi-Motor Synchronization

If the AI1 signal becomes unstable, the VFD does not know whether the machine really needs to speed up, slow down, or stop. It simply follows the changing reference value.

This is why AI1 stability is critical in synchronized motor systems.


2. Typical Fault Symptoms and What They Mean

2.1 The drive works after reset, then fails again after several hours

This is one of the most important symptoms.

When a drive works correctly after reset but becomes unstable later, the fault is often related to one of the following:

  • Heat-related signal drift
  • Loose wiring terminals
  • Sensor output instability
  • Power supply voltage variation
  • 24 VDC control supply instability
  • Analog signal converter overheating
  • Electrical noise increasing during production
  • Ground potential changes
  • Vibration-related intermittent contact
  • Parameter switching caused by digital inputs
  • External control logic changing under certain machine conditions

A completely failed power module, IGBT section, or main control circuit often causes a more permanent and repeatable fault, such as:

  • Overcurrent trip
  • Output phase failure
  • DC bus overvoltage
  • DC bus undervoltage
  • Permanent fault code
  • No output voltage
  • Inability to start
  • Abnormal motor current
  • Repeated trip immediately after power-up

Therefore, a fault that disappears after reset and returns only after hours of operation should first be investigated as a control signal, wiring, sensor, or parameter issue.


2.2 AI1 signal fluctuates between 0 mA and 24 mA

For most industrial current-loop applications, the expected signal range is usually:

  • 0–20 mA, or
  • 4–20 mA.

If AI1 is observed fluctuating from 0 mA to 24 mA, this is not normal and must be investigated.

Possible meanings include:

  • 0 mA may indicate a broken signal wire.
  • 0 mA may indicate transmitter power loss.
  • 0 mA may indicate an open current loop.
  • 0 mA may indicate an incorrect reference connection.
  • More than 20 mA may indicate an over-range condition.
  • More than 20 mA may indicate signal converter failure.
  • More than 20 mA may indicate incorrect 24 V wiring.
  • More than 20 mA may indicate a common-ground problem.
  • Random fluctuation may indicate electrical interference.
  • Random fluctuation may indicate poor terminal contact.
  • Random fluctuation may indicate a sensor or converter that becomes unstable when warm.

When AI1 controls speed, the fault path is usually:

AI1 Signal Fluctuation
        ↓
Frequency Reference Changes
        ↓
VFD Output Frequency Changes
        ↓
Motor Speed Changes
        ↓
Synchronization Error Increases
        ↓
Mechanical Instability or Production Stop

The drive is not necessarily malfunctioning. It may simply be responding correctly to an incorrect or unstable command signal.


Technical infographic showing the AI1 analog signal fault chain in an ABB ACS550 multi-motor synchronization system, from proximity sensor and signal converter to VFD speed reference instability, motor desynchronization, and recommended troubleshooting steps.

2.3 Speed percentage or frequency suddenly falls, then the machine stops

If AI1 is configured as the speed reference, the ACS550 calculates the target frequency from the AI1 value.

For example:

  • 4 mA = 0 Hz
  • 12 mA = 25 Hz
  • 20 mA = 50 Hz

If the analog current suddenly drops from 12 mA to 4 mA, the VFD will interpret this as a command to reduce speed toward zero.

If the signal drops to 0 mA, the drive may interpret the situation as:

  • Reference lost
  • Very low speed command
  • Signal fault
  • External stop condition
  • Analog input out of range

Depending on parameter configuration, the drive may:

  • Decelerate to stop
  • Hold the last valid speed reference
  • Trigger a warning
  • Trigger a fault
  • Switch to another reference source
  • Cause a synchronization error that stops the whole production line

Therefore, sudden speed drop does not automatically mean the motor, IGBT, or inverter output is defective. It may mean that the speed command itself has become unstable.


2.4 Other drives show a value, but one drive does not

A customer may say:

“Other drives show 112 value, but this drive is not showing.”

This information is important, but it must be interpreted correctly.

The number “112” may refer to:

  • A monitored actual value
  • A parameter number
  • A process value
  • An HMI display page
  • A PLC register
  • A fieldbus variable
  • A custom mapped signal
  • A speed reference monitoring value

It should not be assumed that “112” is always one fixed ACS550 parameter without confirming the exact menu, display page, parameter group, or engineering documentation.

However, if all other drives in the same system display the value correctly and only one drive does not, the most important action is comparison.

The faulty drive should be compared with a normal drive for:

  • Control macro
  • AI1 signal type
  • AI1 scaling
  • Reference source selection
  • AI1 filtering
  • Digital input functions
  • Motor control mode
  • Minimum and maximum frequency limits
  • Communication settings
  • I/O mapping
  • PID settings
  • Signal monitoring configuration
  • Control panel display setup

This comparison is more reliable than blindly changing parameters.


3. Main Causes of AI1 Instability

3.1 Unstable signal source

The AI1 signal may come from:

  • PLC analog output
  • Proximity sensor signal converter
  • Encoder frequency converter
  • Tension controller
  • Speed controller
  • Process transmitter
  • External potentiometer
  • Signal isolator
  • Sensor interface module

If the external signal source is unstable, the ACS550 cannot maintain stable speed.

A proximity sensor normally produces a pulse signal. It does not directly generate a smooth 4–20 mA or 0–10 V signal. Therefore, when a proximity sensor is used for speed reference, there is usually another device in the control chain, such as:

  • Pulse-to-current converter
  • Pulse-to-voltage converter
  • Frequency-to-voltage converter
  • PLC high-speed counter
  • PLC analog output module
  • Dedicated speed controller

This conversion stage is a common source of failure.

Typical faults include:

  • Sensor supply voltage instability
  • Sensor mounting movement
  • Incorrect sensor gap
  • Dirt, dust, oil, or metal particles on the sensing surface
  • Weak pulse amplitude
  • Pulse frequency outside converter range
  • Converter overheating
  • Converter output drift
  • Loose output terminals
  • Incorrect grounding
  • Incorrect signal type configuration

If the pulse converter produces a fluctuating current output, the VFD will follow that fluctuation.


3.2 Incorrect analog wiring

ACS550 analog input wiring must be handled carefully. The drive contains terminals related to:

  • Analog input
  • Analog ground
  • Signal shield
  • +10 V reference
  • +24 V control supply
  • Digital input common
  • Digital input terminals

Common wiring mistakes include:

  • AI1 negative terminal connected to the wrong common terminal
  • Analog ground connected to digital ground incorrectly
  • AI1 connected to +10 V reference terminal by mistake
  • Signal shield connected at both ends
  • Signal shield left floating
  • External 24 V supply mixed with internal 24 V supply
  • Analog cable routed together with motor output cable
  • Analog cable routed near braking resistor wiring
  • Poor terminal tightening
  • Oxidized cable lugs
  • Broken wire strands inside the insulation
  • Multiple analog sources sharing an incorrect common return path

These problems may not be visible when the machine is stopped. They often appear only during full-speed operation, high current load, high temperature, or strong electromagnetic interference.


3.3 Electromagnetic interference

Electromagnetic interference is especially important in medium- and high-power VFD systems.

A 37 kW drive produces switching pulses at the output terminals. The motor cable, output contactors, brake circuits, relay coils, and nearby power equipment can all create electrical noise.

If the AI1 cable runs parallel to the U/V/W motor output cable, interference may be induced into the analog signal.

Recommended practices include:

  • Use shielded twisted-pair cable for analog signals.
  • Keep AI1 cable physically separated from motor output cable.
  • Avoid long parallel runs with U/V/W cables.
  • Ground cable shield according to the system design.
  • Use one-end shield grounding where appropriate.
  • Do not mix analog wiring and high-power wiring in the same cable duct.
  • Use separate routing for control wires and power wires.
  • Use stable isolated 24 VDC supply for sensors and converters.
  • Install analog signal isolators when necessary.
  • Check for ground potential differences between panels.
  • Inspect relay coils, contactors, and solenoids for suppression circuits.

A 4–20 mA signal is more resistant to noise than a 0–10 V signal, but it is not immune to wiring faults, grounding errors, common-mode voltage, or poor signal conversion.


3.4 Parameter mismatch

In multi-drive synchronization systems, parameter consistency is essential.

If one drive has different configuration from the others, it may behave differently even when the wiring and sensor signal are identical.

Possible parameter-related problems include:

  • AI1 configured as voltage input while receiving current input
  • AI1 configured as 0–20 mA while the signal is actually 4–20 mA
  • Incorrect minimum or maximum scaling
  • AI1 not selected as the active speed reference
  • Keypad reference selected instead of external reference
  • AI2 selected instead of AI1
  • Fixed frequency selected by digital input
  • Reference source switching unexpectedly
  • AI1 filter time too short
  • Minimum frequency too high or too low
  • PID function enabled unintentionally
  • Digital input changes the reference source
  • Control macro differs from other drives
  • Signal-loss behavior differs from other drives

For this reason, the best practice is to use one correctly operating drive as a reference and compare the complete relevant parameter groups with the faulty drive.


4. How to Distinguish External Signal Faults from Internal VFD Faults

This is the most important part of diagnosis.

4.1 Test with local keypad control

Temporarily switch the drive to local control and set a fixed frequency from the keypad.

For example:

  • 20 Hz
  • 30 Hz
  • 40 Hz

If the motor runs steadily under keypad control, this strongly suggests that:

  • The power section is likely healthy.
  • The motor output is likely healthy.
  • The main DC bus is likely healthy.
  • The issue is likely related to external reference, analog input signal, sensor feedback, or parameter configuration.

This does not prove that the drive is perfect, but it significantly reduces the probability of a major inverter hardware fault.


4.2 Monitor AI1 while the fault occurs

The AI1 value should be monitored under several operating conditions:

  • Machine stopped
  • Start-up
  • Low-speed operation
  • Normal production speed
  • High-load operation
  • After 30 minutes of operation
  • Immediately before fault occurrence
  • During the fault
  • After reset

If the AI1 value changes randomly when machine speed should be stable, the fault is most likely in the signal chain.

A stable machine process should produce a stable speed reference.


4.3 Disconnect the external AI1 signal

With the machine safely stopped, disconnect the external AI1 signal from the drive and observe the monitored AI1 value.

Possible results:

ResultInitial Conclusion
AI1 becomes stable at zeroExternal signal source or wiring is suspect
AI1 still fluctuatesGrounding, interference, or internal AI circuit may be suspect
AI1 does not return to expected valueIncorrect parameter type or internal circuit issue possible
Other input channels also fluctuateControl board, grounding, or supply issue possible

This test should only be performed by qualified personnel and only when the machine is in a safe condition.


4.4 Use a standard 4–20 mA signal source

This is the strongest test for determining whether AI1 hardware is defective.

Use a reliable calibrator, process signal generator, or known stable analog source to provide fixed values such as:

  • 4 mA
  • 8 mA
  • 12 mA
  • 16 mA
  • 20 mA

Then observe whether the drive reads the signal consistently.

If the external test signal is stable but the ACS550 display jumps, drifts, or disappears, then the AI1 input circuit or control board becomes a serious suspect.

If the drive reads the standard signal correctly and remains stable, then the VFD AI1 hardware is probably normal. The real problem is likely outside the drive.


4.5 Compare with another working drive

If the system contains several ACS550 drives, comparison is extremely valuable.

Use a working drive as the standard and compare:

  • Analog input wiring
  • AI1 configuration
  • External reference selection
  • Control macro
  • Digital input functions
  • Frequency limits
  • Acceleration and deceleration times
  • Analog filtering
  • Fault handling
  • PID enable status
  • Monitoring values
  • Communication configuration

If the same external signal works correctly on another drive but not on the faulty one, then either:

  • The faulty drive parameters are different, or
  • The AI1 hardware of that drive is damaged.

5. Recommended Field Diagnostic Procedure

Step 1: Back up parameters before changing anything

Before modifying settings, record or back up:

  • Motor data
  • Control macro
  • AI1 type
  • AI1 scaling
  • AI1 monitoring value
  • External reference source
  • Digital input functions
  • Minimum frequency
  • Maximum frequency
  • Acceleration time
  • Deceleration time
  • Fault history
  • PID settings
  • Communication parameters

In a multi-motor synchronization system, random parameter changes can create serious mechanical or production problems.


Step 2: Confirm the actual signal type

Do not guess the signal type based only on the number of wires.

Confirm whether the source is:

  • 0–10 V
  • 0–20 mA
  • 4–20 mA
  • Pulse-to-voltage conversion
  • Pulse-to-current conversion
  • PLC analog output
  • Potentiometer output
  • Sensor transmitter output

Use the electrical drawing, device labels, converter model number, PLC program, and multimeter measurement to confirm the actual signal.


Step 3: Verify AI1 wiring

Check:

  • AI1 positive terminal
  • AI1 negative terminal
  • Analog ground terminal
  • Signal shield
  • Sensor power supply
  • Signal converter power supply
  • Terminal screw tightness
  • Cable condition
  • Cable route
  • Shield termination
  • Separation from U/V/W output cables

Pay special attention to loose terminals. A wire that appears connected may still have poor contact due to oxidation, vibration, or insufficient tightening torque.


Step 4: Compare all relevant parameters with a normal drive

Do not compare only one parameter.

Compare the full signal chain:

External Signal
        ↓
AI1 Configuration
        ↓
Scaling
        ↓
Filter
        ↓
Reference Selection
        ↓
Speed Limit
        ↓
Acceleration / Deceleration
        ↓
Motor Output

A mismatch anywhere in this chain may cause unstable speed.


Step 5: Test local keypad operation

Operate the VFD from the keypad with a fixed frequency.

If the system becomes stable, focus on:

  • AI1 signal
  • Pulse converter
  • Sensor
  • PLC output
  • Grounding
  • External reference parameter
  • Digital input switching logic

Step 6: Test with standard analog signal

Connect a stable test signal to AI1.

If AI1 remains stable, the external system is faulty.

If AI1 still fluctuates, investigate:

  • AI1 internal circuit
  • Analog ground
  • Control board condition
  • Electrical interference
  • Internal power supply
  • Control board temperature-related drift

6. Recommended Improvement Solutions

Solution 1: Improve the existing analog signal system

This is suitable when the customer wants the lowest-cost improvement.

Recommended actions:

  1. Replace AI1 cable with shielded twisted-pair cable.
  2. Keep analog cable away from motor output cables.
  3. Confirm shield grounding method.
  4. Correct analog ground connection.
  5. Tighten all terminals.
  6. Check sensor mounting condition.
  7. Check pulse-to-analog converter condition.
  8. Verify stable 24 VDC supply.
  9. Install analog signal isolator if required.
  10. Apply suitable analog input filtering.
  11. Configure reasonable behavior for temporary signal loss.
  12. Compare all parameters with a known-good drive.

This solution can significantly improve reliability when the root cause is wiring, interference, or weak signal conditioning.


Solution 2: Use PLC high-speed counter and controlled analog output

This is the preferred engineering solution when a proximity sensor or encoder is used for speed control.

A proximity sensor produces pulses. It is generally better to process those pulses in a PLC rather than feeding an unstable converted signal directly into a VFD analog input.

Recommended architecture:

Proximity Sensor / Encoder
        ↓
PLC High-Speed Counter
        ↓
Speed Calculation and Filtering
        ↓
Fault Detection and Signal Validation
        ↓
PLC Analog Output or Industrial Communication
        ↓
ACS550 Speed Reference

The PLC can provide:

  • Pulse filtering
  • Debounce logic
  • Speed averaging
  • Minimum and maximum limit
  • Signal-loss detection
  • Alarm generation
  • Hold-last-value strategy
  • Smooth acceleration and deceleration
  • Ratio control for multiple motors
  • Master-slave synchronization
  • HMI display and trend recording

This structure provides much better stability than direct pulse-to-analog conversion.


Solution 3: Use communication instead of analog reference

For systems with multiple synchronized drives, communication control is often more reliable than analog control.

Possible communication methods include:

  • Modbus RTU
  • PROFIBUS DP
  • CANopen
  • DeviceNet
  • EtherNet/IP
  • PROFINET
  • EtherCAT

Advantages include:

  • Reduced analog signal interference
  • Consistent speed reference for all drives
  • Centralized parameter control
  • Easier fault diagnosis
  • Real-time monitoring of frequency, current, status, and faults
  • Better synchronization capability
  • Easier integration with PLC and HMI
  • Improved traceability of production faults

Communication conversion should be engineered carefully. It should not be performed as a simple wiring replacement without reviewing PLC capability, network topology, response time, safety logic, and existing machine operation.


7. When Should the ACS550 Hardware Be Considered Faulty?

The VFD hardware should be suspected only after reasonable external tests are completed.

Possible indicators of AI1 internal hardware failure include:

  1. A stable calibrated 4–20 mA signal still causes AI1 fluctuation.
  2. AI1 fluctuates even when external wires are disconnected.
  3. AI1 has large reading error that cannot be corrected by normal scaling.
  4. The same external signal works correctly on another drive but not on this drive.
  5. Parameters and wiring are confirmed identical to a normal drive.
  6. Moving the signal to AI2 restores stable operation.
  7. The control board shows corrosion, moisture damage, burnt components, or abnormal heating.
  8. Other I/O points also behave abnormally.
  9. Parameters fail to save or become corrupted.
  10. AI1 becomes unstable only after the control board warms up.

If several of these conditions are confirmed, the repair path may include:

  • Control board inspection
  • AI input circuit repair
  • Replacement of analog input conditioning components
  • Replacement of the control board
  • Replacement of the drive
  • Temporary use of AI2 if system design permits
  • Installation of external signal conditioner as an interim solution

8. Why Blind Parameter Changes Are Dangerous

When a customer requests: “Please tell me which parameters to change,” it is important not to guess.

A value shown as “112” may not be a universal ACS550 parameter. It may be a custom display, HMI register, monitored signal, or application-specific value.

Blindly changing reference parameters can cause:

  • Unexpected acceleration
  • Unexpected deceleration
  • Motor reversal
  • Loss of synchronization
  • Excess tension
  • Product damage
  • Conveyor jam
  • Mechanical shock
  • Emergency stop
  • Damage to coupled machines

Before changing parameters, always identify:

  • The exact parameter number
  • The parameter name
  • The current value
  • The value on a normal drive
  • The control function connected to that parameter
  • The safety impact of the change

The safest rule is:

Compare with a working drive first, then change only confirmed differences.


Conclusion

When an ABB ACS550 drive in a multi-motor synchronization system shows AI1 fluctuation, sudden speed reduction, stopping during operation, or missing monitoring values, the first assumption should not be that the VFD power section is defective.

The correct diagnostic sequence is:

Confirm the speed reference source
        ↓
Identify the AI1 signal type
        ↓
Monitor AI1 during operation
        ↓
Compare parameters with a normal drive
        ↓
Test keypad control
        ↓
Disconnect external AI1 signal
        ↓
Inject a stable standard analog test signal
        ↓
Only then evaluate AI1 hardware or control board failure

In most cases, the root cause is related to:

  • Sensor instability
  • Pulse-to-analog converter failure
  • PLC output issue
  • Incorrect analog wiring
  • Grounding problem
  • Electromagnetic interference
  • Parameter mismatch
  • Reference source switching
  • Analog input scaling issue
  • Inadequate signal filtering

For long-term reliability, systems using a proximity sensor or encoder for multi-motor synchronization should ideally use a PLC high-speed counter, signal validation logic, filtering, and either stable analog output or industrial communication to the drives.

This approach reduces speed-reference instability, improves synchronization accuracy, simplifies troubleshooting, and helps prevent unexpected production stoppages.

Posted on

FANUC 21i-MB Alarm 935 (SRAM ECC ERROR): Technical Analysis and Field Service Guide


1. Introduction: Why Alarm 935 Must Be Treated as Critical

In FANUC CNC systems, 9xx-level alarms are not normal process-related faults. They indicate issues at the core control system level (CPU / memory / system software layer).

Among them:

935 SRAM ECC ERROR is a typical “data integrity collapse” failure.

This type of fault is characterized by:

  • CNC may still power on but cannot boot normally
  • Loss or corruption of parameters, PMC, or programs
  • Repetitive alarm after reboot
  • High risk of permanent system data loss if handled incorrectly

For legacy systems such as FANUC 21i-MB, this issue is particularly critical due to reliance on battery-backed SRAM storage.


Front view of a FANUC Series 21i-MB CNC control panel displaying SYSTEM ALARM 935 SRAM ECC ERROR, with diagnostic register data, CPU memory dump values, and system status information shown on a black industrial interface screen.

2. Technical Meaning of Alarm 935

2.1 Role of SRAM in FANUC Systems

In FANUC CNC architecture, memory is divided into:

Memory TypeFunction
ROM / FROMSystem firmware
SRAMParameters, PMC logic, NC programs, macro variables
Flash (if available)Extended storage

In 21i-MB systems:

SRAM is the core working memory that stores all machine-specific logic


2.2 What ECC (Error Correction Code) Means

ECC is a memory integrity mechanism:

  • Adds parity/check bits to each data word
  • Detects and corrects single-bit errors
  • Cannot recover multi-bit or structural corruption

When ECC fails:

The system can no longer guarantee data validity.


2.3 True Meaning of Alarm 935

When the system displays:

SYSTEM ALARM 935 SRAM ECC ERROR

It indicates:

  • SRAM data structure is corrupted
  • ECC correction is no longer possible
  • Memory content is considered unreliable

In engineering terms:

❗ The system memory integrity is fundamentally compromised, not just a parameter error.


Close-up view of a FANUC CNC internal electronic module showing a lithium backup battery pack and servo amplifier components, with wiring connectors and labeled industrial control hardware inside a machine cabinet.

3. Typical Field Symptoms

3.1 Startup Abnormalities

  • CNC stuck during boot process
  • Direct entry into SYSTEM ALARM screen
  • Unable to access MDI or AUTO modes

3.2 Parameter Loss Symptoms

  • Axis parameters missing or zeroed
  • PMC not running
  • Spindle not enabled
  • Homing failure

3.3 Intermittent Behavior

  • Temporary normal startup after reboot
  • Alarm reappears after operation or power cycle
  • Random system instability

4. Root Cause Analysis (Engineering Breakdown)

Alarm 935 is a result-level fault, not a root cause. Common root causes include:


4.1 Battery Failure (Highest Probability)

Mechanism:

SRAM requires battery backup:

  • Voltage drop → bit flipping in SRAM
  • Long-term undervoltage → memory corruption
  • Sudden power loss → incomplete write cycles

Typical conditions:

  • Battery not replaced for years
  • Machine stored or powered off for long periods
  • Loose battery connector

Conclusion:

⭐ This is the most common cause (60%+ cases)


4.2 Abnormal Power Loss / Electrical Noise

Examples:

  • Sudden main power shutdown
  • Contactor arcing
  • Voltage fluctuation
  • Poor grounding or lightning surge

This leads to:

SRAM write interruption → partial data corruption → ECC failure


4.3 SRAM / FROM Hardware Damage

Possible failures:

  • Aging SRAM chips
  • Oxidized contacts
  • Board solder joint fatigue
  • Internal memory read/write failure

Symptoms:

  • Alarm persists after reset
  • Immediate reappearance after initialization
  • Cannot retain data

4.4 CPU Main Board Failure (Less Common but Severe)

Characteristics:

  • Multiple unrelated system alarms
  • Random reboot or freeze
  • Unstable system behavior

5. Standard Field Repair Procedure


STEP 1: Do NOT Perform Blind Initialization

⚠️ Avoid:

  • Memory All Clear without backup
  • Random power cycling
  • Removing battery during unknown state

Because this may erase:

  • PMC ladder logic
  • Machine parameters
  • Servo tuning data
  • Spindle configuration
  • Tool changer logic

STEP 2: Check Backup Battery

Procedure:

  • Measure battery voltage under load
  • Check connector condition
  • Inspect corrosion or loose contact

Reference values:

  • ≥ 3.0V → OK
  • 2.6–2.9V → borderline
  • < 2.6V → high risk of failure

STEP 3: Attempt Maintenance Boot Mode

Some FANUC 21i-MB systems support:

  • SRAM restore routines
  • FROM → SRAM recovery
  • Boot-level maintenance menu

If accessible:

Prioritize automatic SRAM restoration before any reset.


STEP 4: SRAM Initialization (Only if Necessary)

Only perform when:

  • Backup is available, OR
  • Machine can be fully reconfigured

This step:

  • Clears corrupted SRAM
  • Rebuilds memory structure

STEP 5: System Data Restoration

Required data includes:

  • System parameters
  • PMC ladder program
  • Axis configuration
  • Spindle parameters
  • Pitch compensation
  • Macro variables

STEP 6: Stability Verification

After recovery:

  • Check if alarm reappears
  • Test after power cycling
  • Run machine under load

6. Diagnostic Decision Tree

Case A: Battery replacement + restore → OK

→ Root cause: battery-induced corruption


Case B: Alarm persists after initialization

→ Hardware failure (SRAM / CPU board)


Case C: Intermittent alarm

→ Electrical noise / grounding issue


Case D: Multiple system alarms

→ CPU main board failure


7. Field Failure Mechanism (Real Scenario)

Typical progression:

  1. Machine experiences power loss or long downtime
  2. Battery voltage slowly drops
  3. SRAM integrity degrades gradually
  4. ECC detects unrecoverable error
  5. Alarm 935 appears on startup
  6. Machine becomes non-operational

8. Recovery Challenges and Risks

8.1 Lack of Backup Data (Critical Risk)

Without backup:

  • Machine must be fully rebuilt
  • All CNC logic must be re-entered manually
  • Servo tuning and spindle parameters must be reconfigured

8.2 Secondary Damage Risk

Incorrect handling may cause:

  • Permanent data loss after memory clear
  • PMC download failure
  • Axis motion errors
  • System lock-up

9. Preventive Maintenance Strategy


9.1 Battery Management

  • Replace every 12–18 months
  • Do not wait for low battery alarm
  • Keep spare batteries available

9.2 Power Quality Protection

  • Install UPS for CNC system
  • Add surge suppression for contactors
  • Ensure proper grounding system

9.3 Regular Data Backup

Must include:

  • Full system backup
  • PMC ladder program
  • Parameter files

10. Conclusion

The FANUC 21i-MB Alarm 935 (SRAM ECC ERROR) is not a simple parameter issue but a system-level memory integrity failure.

Its core meaning is:

The CNC’s internal working memory has become unreliable or corrupted.

Key engineering principle:

Repair priority is not “resetting the machine”, but preserving data first.


One-line summary:

Alarm 935 means the CNC has lost trust in its own memory system — recovery depends entirely on backup availability.


Posted on

Repair and Functional Verification of the AM IN Port on a Gooch & Housego 200 MHz RF Driver

1. Background and Practical Repair Challenges

RF drivers manufactured by Gooch & Housego and similar companies are widely used in laser processing systems, acousto-optic modulators, optical measurement instruments, fiber laser systems, laboratory equipment, and precision motion or beam-control applications.

These RF drivers are normally designed to drive AOMs, AO deflectors, or other loads requiring a stable RF excitation source. In many systems, the RF driver runs at a fixed carrier frequency while an external modulation input controls whether the RF output is enabled, disabled, or amplitude-modulated.

This article uses the Gooch & Housego 1200AF-DINA-2.5 HCR RF driver as an example. The discussed fault condition is a common field failure: the external AM IN port was incorrectly connected to a 24 V industrial control signal, causing damage to the modulation input circuit. After repair, the main question becomes: how can a technician safely verify that the AM IN function, RF switching path, and RF output path have been restored when only basic instruments are available?

The difficulty is not simply whether the unit powers up. A correct repair verification requires answering several technical questions:

  1. What is the correct DC supply voltage for the RF driver?
  2. Is AM IN a 24 V industrial control input, a TTL input, or an analog modulation input?
  3. How should the RF output be terminated during test?
  4. Can a normal oscilloscope probe be connected directly to the RF output?
  5. How can RF output activity be confirmed without an RF power meter or spectrum analyzer?
  6. How should a simple detector circuit be connected?
  7. What conditions prove that AM IN actually controls the RF output?

A proper test sequence should follow the logic below:

Verify correct DC supply
→ Connect a suitable RF load
→ Apply the correct AM IN control voltage
→ Convert RF output into a low-frequency or DC detector signal
→ Compare RF output at AM IN low and high states
→ Apply square-wave modulation and verify synchronized switching

Only after this chain has been verified can the technician reasonably conclude that the AM IN interface, control logic, RF generation path, RF power amplifier, and RF output path are operating normally.


A real-world electronics laboratory setup showing a Gooch & Housego 1200AF-DINA-2.5 HCR 200 MHz RF driver under test. The device is connected to a 24V DC power supply, a function generator producing a 0–5V square wave into the AM IN port, and an RF output feeding a 50Ω dummy load. A simple RF detector circuit is connected to an oscilloscope displaying the modulation waveform. The scene includes test instruments, coaxial cables, SMA connectors, and a technician’s hand probing the AM IN input, illustrating practical RF driver repair and verification.

2. Main Interfaces and Operating Principle

The front panel of this type of RF driver normally includes three important electrical connections:

AM IN
Vcc +24V
RF OUTPUT

Their functions are different:

  • Vcc +24V: Main DC supply input.
  • AM IN: External modulation or RF-enable control input.
  • RF OUTPUT: RF power output to the AOM, AO device, or matched RF test load.

The internal architecture of a typical fixed-frequency RF driver can be simplified as follows:

24 V DC input
↓
Internal DC regulation and bias circuits
↓
RF oscillator or frequency source
↓
RF enable / modulation control circuit
↓
RF pre-amplifier stage
↓
RF power amplifier stage
↓
RF OUTPUT connector

The AM IN port is not a power supply terminal. It is a control input. Depending on the model, AM IN may be an analog modulation input, a digital enable input, a TTL input, or a logic-controlled RF switching input.

For a model identified as DINA, the practical testing approach should normally follow a digital-input logic method. In other words:

Low level → RF output disabled or strongly reduced
High level → RF output enabled

For initial testing, the safest control levels are generally:

Low level: 0 V
High level: approximately +3.3 V to +5 V

A 24 V industrial control signal must not be applied directly to this port unless the manufacturer explicitly specifies a 24 V input rating.


3. Why Applying 24 V to AM IN Can Damage the Driver

In industrial equipment, technicians often encounter 24 V PLC outputs, relay outputs, photoelectric sensors, solenoid control circuits, and other standard 24 VDC control systems. Because the RF driver has an interface labeled “AM IN,” it may be incorrectly assumed that this port can accept an industrial-level input signal.

That assumption can destroy the input circuit.

The AM IN port may internally connect to one or more of the following circuits:

  • TTL logic input buffer;
  • CMOS digital input;
  • comparator input;
  • transistor switching stage;
  • optocoupler input;
  • RF-enable control transistor;
  • PIN diode bias circuit;
  • RF gain-control circuit;
  • ESD protection diode network;
  • logic gate or pulse-shaping stage.

Many of these components are designed for low-voltage logic operation.

Typical limits may be approximately:

TTL input: normally 0 V to 5 V
CMOS input: normally 0 V to 3.3 V or 5 V
Comparator input: limited by supply rails
Small-signal transistor junctions: low reverse-voltage tolerance
ESD clamp diode: damaged if high current is forced through it

When 24 V is directly injected into AM IN, the failure path may be:

24 V applied to AM IN
↓
Input series resistor overheats or burns
↓
Protection diode becomes shorted or open
↓
Logic IC input pin is damaged
↓
Control transistor is punctured
↓
RF enable command becomes abnormal
↓
RF output stays permanently OFF, permanently ON, unstable, or intermittent

For this reason, repairing the visibly damaged resistor or diode may not be sufficient. The technician should also verify whether the following stages still work:

AM IN voltage recognition
↓
Logic-level conversion
↓
RF enable switching
↓
RF oscillator control
↓
RF power amplifier enable chain

A clean technical infographic illustrating the AM IN verification process for a 200 MHz RF driver. The diagram shows three main sections: 24V DC power input, AM IN control input (0–5V square wave), and RF output connected to a 50Ω dummy load. A simplified RF detector circuit feeds a multimeter or oscilloscope to measure modulation response. A warning clearly indicates that 24V must not be applied directly to the AM IN port. The layout uses structured blocks, arrows, and labeled signal paths to explain RF driver functional testing methodology.

4. Why the Internal RF Power Module Gets Hot

Inside the RF driver, there may be a wideband RF power amplifier module, such as an RFHIC module or another hybrid RF amplifier block. This component is not a normal digital IC or low-power transistor. It is a high-frequency RF power amplifier.

Such modules may operate with characteristics similar to:

Supply voltage: 24 VDC
Frequency range: tens of MHz to hundreds of MHz or higher
Output capability: several watts
Quiescent current: hundreds of milliamps

Even with no full RF output, the amplifier may consume significant current due to bias circuits and RF amplifier operating conditions.

For example:

24 V × 0.6 A = 14.4 W

Much of that energy becomes heat.

Therefore, it is normal for an RF power amplifier module to become warm or hot after power is applied. However, the technician must distinguish between normal heating and abnormal overheating.

Normal heating conditions

  • The module warms gradually after power-on.
  • The metal heat spreader becomes noticeably warm after one or several minutes.
  • DC current remains stable.
  • The RF load is correctly connected.
  • Temperature rise is controlled and repeatable.
  • AM IN switching causes only moderate changes in current or temperature.

Abnormal heating conditions

  • The module becomes extremely hot within a few seconds.
  • The power supply immediately enters current limit.
  • The current is much higher than expected.
  • The RF output is left open or badly mismatched.
  • The RF amplifier remains fully enabled even when AM IN is low.
  • The module heats strongly even with no valid RF activity.
  • There is visible discoloration, smoke, smell, or abnormal noise.

The RF power amplifier must be firmly attached to its aluminum heat sink or metal chassis. If the module is tested without proper thermal contact, thermal grease, thermal pad, or mechanical pressure, it may overheat rapidly and be damaged.


5. Why RF OUTPUT Must Be Connected to a Load

The RF output of this driver is not a normal DC output. It is a high-frequency RF source, typically designed around a 50 Ω transmission system.

Most RF cables, RF test instruments, spectrum analyzers, RF power meters, directional couplers, and RF amplifier outputs use 50 Ω as the standard impedance.

Therefore, the correct RF load should be:

50 Ω

The correct connection is:

SMA center pin
↓
50 Ω load resistor
↓
SMA outer shell / RF ground

The resistor must be connected across the RF center conductor and RF ground. It is not placed in series with the line.

A correct physical arrangement is:

SMA center pin ── 50 Ω resistor ── SMA outer shell

The SMA outer shell is the RF return path. It is normally connected to the RF ground, chassis ground, and usually the DC supply negative reference.

There is no need to connect the resistor separately to building earth or protective earth. The critical connection is from the RF center pin to the SMA metal shell.

If the RF output is open-circuit or badly mismatched, RF energy is reflected back toward the power amplifier:

RF output not properly terminated
↓
Reflected RF power returns to amplifier
↓
Voltage standing wave ratio increases
↓
Power transistor load condition becomes abnormal
↓
RF amplifier temperature rises
↓
Possible instability or amplifier damage

For this reason, the RF output should never be left open for extended testing.


6. Can a 75 Ω Resistor Be Used for Temporary Testing?

A true 50 Ω RF dummy load is preferred. However, during repair work, a technician may only have a 75 Ω / 5 W cement resistor or another non-standard resistor available.

A 75 Ω resistor can be used for short-duration functional verification, but it should not be treated as a permanent RF load.

For a 50 Ω RF source driving a 75 Ω load, the reflection coefficient is:

Γ = (ZL - Z0) / (ZL + Z0)

Where:

ZL = 75 Ω
Z0 = 50 Ω

Then:

Γ = (75 - 50) / (75 + 50)
Γ = 25 / 125
Γ = 0.2

This corresponds approximately to a voltage standing wave ratio of:

VSWR ≈ 1.5 : 1

A VSWR of approximately 1.5:1 creates some reflected power, but for a small RF driver producing only a few watts, it is usually acceptable for short functional testing if the amplifier temperature and current are carefully monitored.

The following conditions must be observed:

  1. The resistor must have sufficient power rating, preferably 5 W or higher.
  2. The resistor leads must be kept extremely short.
  3. One resistor lead must connect to the SMA center pin.
  4. The other resistor lead must connect directly to the SMA outer shell.
  5. Long wires must not be used.
  6. Testing should be brief.
  7. If current rises sharply or the RF amplifier becomes excessively hot, power must be removed immediately.

At 200 MHz, lead length is important. Long resistor leads add inductance. Long wires behave like antennas. A 75 Ω resistor connected by several centimeters of wire may no longer behave like a simple 75 Ω load at RF frequency.

For a temporary hand-built load:

Keep resistor leads as short as possible.
Ideally, each lead should be only a few millimeters long.

The preferred long-term solution is:

50 Ω SMA termination load
Power rating: at least 5 W

7. Why a Normal Oscilloscope Probe Should Not Be Connected Directly to RF OUTPUT

A standard oscilloscope probe usually has an input impedance such as:

1 MΩ in parallel with several pF

But the RF output is designed for:

50 Ω

Connecting a normal oscilloscope probe directly to the RF output creates severe mismatch.

Possible consequences include:

  • Strong RF reflection;
  • Distorted waveform;
  • Incorrect amplitude reading;
  • Probe ground lead acting as an antenna;
  • Unstable RF amplifier operation;
  • RF coupling into the oscilloscope;
  • Possible damage to the scope input or probe;
  • Misleading waveforms caused by radiated RF rather than real output measurement.

Even if the oscilloscope bandwidth is high enough, a proper RF measurement normally requires:

50 Ω terminated input
Coaxial cable connection
Suitable attenuator
Controlled RF power level

Without a spectrum analyzer, RF power meter, 50 Ω oscilloscope input, or calibrated RF attenuator, the safest practical method is to use a simple detector circuit.

The detector converts the 200 MHz RF signal into a DC or low-frequency envelope signal that can be measured safely by a normal multimeter or oscilloscope.


8. Principle of a Simple RF Detector

The purpose of a simple RF detector is not to accurately measure the exact RF output power. Its purpose is to determine whether RF output exists and whether the RF output follows the AM IN control signal.

The detector is used to answer the following questions:

Is RF output present?
Does RF output decrease when AM IN is low?
Does RF output increase when AM IN is high?
Does RF output follow square-wave modulation?

A practical detector usually includes:

Coupling capacitor
Schottky diode
Load resistor
Filter capacitor

A typical circuit is:

RF input
↓
100 pF to 1 nF coupling capacitor
↓
Schottky diode
↓
Detector output node
↓
10 kΩ resistor to ground
↓
10 nF to 100 nF capacitor to ground

Coupling capacitor

The coupling capacitor blocks DC and passes RF energy into the detector circuit.

A practical range is:

100 pF to 1 nF

This range is generally suitable for RF around 200 MHz.

Schottky diode

The diode is the main RF detection component.

Recommended types include:

1N5711
BAT54
HSMS-2850
HSMS-2820

Schottky diodes are preferred because they have lower forward voltage and faster switching behavior than ordinary rectifier diodes.

A standard diode such as 1N4007 is not suitable for this application.

A 1N4148 may sometimes detect RF under strong-signal conditions, but it is usually less suitable than a proper Schottky diode for low-power RF detection around 200 MHz.

Load resistor

A 10 kΩ resistor provides a discharge path and establishes the detector load condition.

Filter capacitor

A capacitor in the range of 10 nF to 100 nF removes much of the RF carrier and produces a smoother DC or low-frequency envelope output.


9. Practical Detector Wiring Method

The recommended method is to use an SMA T-adapter or RF tee.

The RF output connection should be:

RF OUTPUT
↓
SMA T-adapter
├── Branch 1: 50 Ω or temporary 75 Ω RF load
└── Branch 2: simple RF detector input

The important principle is:

The RF dummy load must remain connected.
The detector is only a parallel sampling branch.
The detector must not replace the RF load.

The detector wiring is:

RF center pin
↓
Coupling capacitor
↓
Schottky diode anode
↓
Schottky diode cathode
↓
Detector output node

At the detector output node, connect:

10 kΩ resistor to RF ground
10 nF to 100 nF capacitor to RF ground

Measurement instruments should connect as follows:

Multimeter red lead → detector output node
Multimeter black lead → RF ground

Oscilloscope probe tip → detector output node
Oscilloscope ground clip → RF ground

RF ground is generally:

SMA outer shell
RF driver metal chassis
24 V supply negative terminal
Function generator ground
Oscilloscope ground

All test equipment should share a common reference ground.


10. Correct Function Generator Settings for AM IN

One of the most common errors in this type of test is misunderstanding the function generator amplitude setting.

For example, many function generators display:

Amplitude: 5 V
Offset: 0 V

But this may actually mean:

5 Vpp
Meaning the waveform swings from -2.5 V to +2.5 V

That output is not suitable for AM IN if the input is designed for 0 V to +5 V logic.

The intended AM IN test waveform should be:

Low level: 0 V
High level: +5 V

If the generator is configured in Vpp mode, the correct setting is normally:

Amplitude: 5 Vpp
Offset: +2.5 V

This creates:

0 V to +5 V

Before connecting the function generator to AM IN, the generator output should first be checked directly with the oscilloscope.

Use:

DC coupling
Appropriate voltage scale
Confirm minimum voltage is near 0 V
Confirm maximum voltage is near +5 V
Confirm there is no negative voltage excursion

Only after confirming the waveform should the function generator be connected to AM IN.


11. Step-by-Step AM IN Functional Verification Procedure

Step 1: Verify DC supply polarity

Confirm the RF driver supply connection:

Vcc+ → +24 VDC
Vcc- → 0 V / GND

Do not apply 24 V to AM IN.

Because the internal RF power amplifier may have significant quiescent current, the current limit should not be set too low.

A practical initial setting is:

24 VDC
Current limit: approximately 0.8 A

Observe whether the driver immediately enters current limit.

Step 2: Connect the RF load

RF OUTPUT must be connected to:

Preferred: 50 Ω dummy load, rated at 5 W or higher
Temporary: 75 Ω resistor load, rated at 5 W or higher

The load must be connected:

RF center pin ↔ RF shell / RF ground

Step 3: AM IN low-level test

Connect AM IN center pin to 0 V.

Observe:

Detector output should be low.
Supply current should remain stable.
RF amplifier temperature should remain controlled.

Step 4: AM IN high-level test

Apply +5 V to the AM IN center pin.

Observe:

Detector output should rise significantly.
Supply current may change slightly.
RF amplifier temperature may increase moderately.

The exact detector voltage is not the critical measurement. The key is a clear, repeatable difference between AM IN low and AM IN high.

For example:

AM IN = 0 V
Detector output = 0.05 V

AM IN = +5 V
Detector output = 1.2 V

AM IN returned to 0 V
Detector output returns near 0.05 V

This indicates that:

The AM IN input stage is working.
The RF enable chain is responding.
The RF power path is being controlled.
RF output activity changes with the command signal.

Step 5: Square-wave modulation test

Set the function generator to:

Waveform: square wave
Frequency: 1 kHz
Amplitude: 5 Vpp
Offset: +2.5 V
Duty cycle: 50%

Connect the oscilloscope to the detector output node.

Under normal conditions, the detector output should change at the same frequency as the function generator.

The waveform may not look like a perfect square wave because the detector circuit includes an RC filter. Rounded edges and charge/discharge slopes are normal.

A good result is:

Input = 1 kHz
Detector output switches at approximately 1 kHz

Input = 10 kHz
Detector output still follows

Input = 100 kHz
Detector output still shows synchronized modulation

If the oscilloscope displays an unrelated value such as 13 Hz or 20 Hz while the function generator is set to another frequency, the result is not valid. This may indicate incorrect triggering, poor grounding, RF pickup, incorrect probe location, or a detector wiring problem.


12. Why Random Oscilloscope Waveforms Do Not Prove a Successful Repair

During RF testing, it is common to place an oscilloscope probe near the RF output or detector circuit and observe noisy, high-frequency, irregular waveforms.

Such waveforms may come from:

  • RF radiation from the output cable;
  • RF leakage from the amplifier module;
  • Ground-loop noise;
  • Probe ground lead acting as an antenna;
  • Reflections caused by a 75 Ω temporary load;
  • Improper detector wiring;
  • Incorrect scope trigger configuration;
  • Incorrect probe placement;
  • Function generator and RF driver not sharing common ground;
  • RF amplifier instability;
  • Switching power supply noise;
  • Oscilloscope AC coupling or unsuitable timebase settings.

Therefore, simply seeing “some waveform” does not prove that AM IN has been repaired.

A valid functional test requires the following relationship:

AM IN = 0 V → detector output low
AM IN = +5 V → detector output high
AM IN toggled high/low → detector output toggles correspondingly
Square-wave AM IN → detector output follows the same modulation frequency

This relationship is much more important than the exact waveform shape.


13. Common Wiring Errors and Their Consequences

Error 1: Applying 24 V directly to AM IN

Possible consequences:

Input protection resistor burns
Clamp diode fails
Logic IC input is damaged
RF enable function is lost
RF output remains permanently ON or OFF

Error 2: Leaving RF OUTPUT open-circuit

Possible consequences:

Reflected RF power increases
RF amplifier temperature rises
Output stage becomes unstable
RF amplifier damage risk increases

Error 3: Connecting a normal oscilloscope probe directly to RF OUTPUT

Possible consequences:

Severe impedance mismatch
Distorted measurement
Unstable RF operation
Possible probe or oscilloscope input damage

Error 4: Connecting the dummy load using long wires

Possible consequences:

Additional inductance
Impedance distortion
Antenna-like radiation
Unstable or misleading results

Error 5: Applying a waveform with negative voltage to AM IN

Possible consequences:

Input protection may be damaged again
Logic input may operate incorrectly
RF enable may become unstable

Error 6: Failing to establish common ground

Possible consequences:

AM IN reference level becomes undefined
Oscilloscope waveform becomes unstable
Control signal may not be recognized
RF noise and interference increase

14. Practical Final Acceptance Criteria

Without a spectrum analyzer or RF power meter, it is not possible to fully verify exact output frequency, absolute RF power, harmonic content, spurious emission, and calibrated modulation depth.

However, a technician can still perform a reliable functional acceptance test.

The following points should be confirmed:

1. The driver receives correct 24 VDC supply.
2. There is no reverse polarity or abnormal current limiting.
3. The RF power module temperature rise is controlled.
4. RF OUTPUT is connected to a proper 50 Ω load, or temporary 75 Ω load for short tests.
5. AM IN at 0 V produces low detector output.
6. AM IN at +5 V produces clearly higher detector output.
7. Repeated AM IN high/low switching produces repeatable detector response.
8. A 1 kHz square-wave AM IN signal produces a corresponding detector waveform.
9. Higher modulation frequencies such as 10 kHz and 100 kHz can still be followed.
10. The unit remains stable during several minutes of operation.
11. No abnormal current surge, overheating, oscillation, or random RF dropout occurs.

If these conditions are met, the technician can reasonably conclude:

The AM IN repair is functionally successful.
The input control stage is working.
The RF switching or enable path is responding.
The RF output path is active.
The driver can proceed to final verification with proper RF instruments.

However, final customer delivery should ideally include testing with:

A calibrated 50 Ω RF dummy load
An RF power meter
A spectrum analyzer
A directional coupler

A simple detector circuit proves that RF output exists and responds to AM IN control. It does not guarantee:

Exact output frequency is correct
Output power is exactly 2.5 W
Harmonics are within specification
Spurious output is within specification
RF matching performance is fully compliant

15. Conclusion

RF drivers used in AOM and optical systems may appear simple externally, with only a DC supply input, an AM IN control port, and an RF OUTPUT connector. Internally, however, they contain high-speed logic, RF switching, oscillator circuits, power amplifiers, impedance-matching networks, and thermal management structures.

When AM IN is incorrectly connected to 24 VDC, the damage may extend beyond a visible resistor or protection diode. A successful repair must confirm that the logic input, RF-enable chain, and RF output response all function correctly.

The correct verification method is not merely “the unit powers on” or “the oscilloscope shows some waveform.” The correct logic is:

Correct DC supply
→ Proper RF termination
→ Correct AM IN voltage level
→ Proper RF detector connection
→ Low-level and high-level comparison
→ Square-wave synchronization test

When AM IN at 0 V produces a low detector reading, AM IN at +5 V produces a substantially higher detector reading, and a square-wave input produces synchronized detector switching, the repair can be considered functionally successful.

For RF equipment, correct load matching, short wiring, common grounding, thermal control, and suitable measurement methods are as important as component-level repair. Avoiding future 24 V misconnection, avoiding open-circuit RF output, and avoiding direct probing of high-frequency RF output will significantly improve reliability and prevent repeat failure.

Posted on

Inovance MD310 VFD Err14 Fault: Technical Analysis, Troubleshooting, and Repair Guide for Module Overheating

1. Introduction

In industrial automation systems, variable frequency drives, commonly called VFDs or inverters, play an important role in motor speed control, soft starting, energy saving, and process optimization. In small and medium power applications such as conveyors, fans, pumps, packaging machines, food processing equipment, textile machinery, and general OEM equipment, the Inovance MD310 series is widely used because of its compact structure, simple operation, and practical control functions.

During long-term operation, VFD fault codes are one of the most important clues for diagnosing equipment problems. When an Inovance MD310 VFD displays Err14, it generally indicates module overheating. In practical maintenance work, this usually refers to overheating of the power module, IGBT module temperature protection, or an abnormal module temperature detection signal.

At first glance, Err14 may appear to be a simple high-temperature alarm. However, the actual cause can be more complex. In some cases, the power module is genuinely overheating because of poor ventilation, a failed cooling fan, blocked heatsink fins, high cabinet temperature, or excessive load current. In other cases, the VFD may display Err14 immediately after power-on, even before the motor runs. In this situation, the heatsink is still cold, so the fault is unlikely to be caused by real overheating. Instead, the likely cause may be a faulty temperature sensor, abnormal temperature detection circuit, damaged driver board, poor connector contact, or IGBT module temperature feedback failure.

Therefore, troubleshooting Err14 should not stop at the simple conclusion that “the VFD is too hot.” A correct diagnosis must combine the fault timing, load condition, ambient temperature, running current, ventilation system, parameter settings, and internal circuit condition. This article provides a systematic technical analysis of the Err14 fault on the Inovance MD310 VFD, including its meaning, common causes, field troubleshooting steps, repair logic, and preventive maintenance recommendations.

Inovance MD310 variable frequency drive displaying Err14 module overheating fault inside an electrical control cabinet, with a technician checking the keypad and using a thermal imaging camera.

2. Basic Meaning of Err14 on the MD310 VFD

On the Inovance MD310 series, Err14 normally means module overheating. The “module” mainly refers to the internal power inverter section, including the IGBT power module, freewheeling diodes, driver circuit, heatsink, and temperature detection components.

When a VFD operates, the input AC power is first rectified into DC bus voltage. The IGBT inverter section then converts the DC bus into a variable-frequency, variable-voltage three-phase AC output for the motor. During high-speed switching, IGBTs generate switching losses and conduction losses. These losses become heat. If the heatsink, cooling fan, and airflow path cannot remove this heat efficiently, the module temperature will rise. When the temperature reaches the protection threshold, the VFD will stop output and display a fault code to prevent further damage to the power devices.

However, Err14 does not always mean that the IGBT has failed, and it does not always mean that the heatsink is actually hot. In essence, the control system has detected an abnormal module temperature signal. This signal may come from real high temperature, or it may come from an abnormal detection circuit.

Therefore, during maintenance, Err14 should be divided into two major categories.

The first category is real overheating. The VFD runs for a period of time before the alarm appears. The heatsink is hot, the fan may be stopped or weak, the airflow path may be blocked, or the output current may be too high. In this case, the main focus should be cooling, ventilation, and load condition.

The second category is false overheating. The VFD reports Err14 immediately after power-on, before the motor starts. The heatsink is cold, and the machine has not produced any meaningful heat. In this case, the fault is more likely related to the temperature sensor, temperature sampling circuit, driver board, control board, connector, or internal module feedback signal.

This distinction is very important. Real overheating requires thermal and load correction. False overheating requires electrical diagnosis and board-level repair.

Technician servicing an Inovance MD310 VFD with Err14 fault, cleaning a dusty cooling fan and heatsink while inspecting internal components with a multimeter.

3. Main Components Related to Err14

To analyze Err14 correctly, it is necessary to understand which internal parts of the VFD are related to module temperature protection.

3.1 IGBT Power Module

The IGBT power module is the core component responsible for generating the three-phase output voltage. It withstands the DC bus voltage and switches rapidly under PWM control. During operation, the IGBT produces heat. The amount of heat depends on output current, carrier frequency, load characteristics, cooling performance, and switching condition.

If the motor is overloaded, mechanically jammed, frequently started and stopped, or if the acceleration and deceleration time is too short, the IGBT thermal stress will increase. A high carrier frequency also increases switching loss and can raise module temperature.

3.2 Heatsink

The power module is usually mounted on an aluminum heatsink. Heat is transferred from the module to the heatsink through thermal grease or a thermal interface material, and then removed by air. If the heatsink fins are blocked by dust, oil, cotton fibers, wood dust, or metal particles, heat dissipation becomes poor. Even if the fan is running, the thermal performance may still be insufficient.

3.3 Cooling Fan

Many compact VFDs rely on built-in cooling fans for forced-air cooling. A cooling fan may fail completely, rotate slowly, make abnormal noise, or become unstable after running for several minutes. Fan bearing wear is very common in old drives. A weak fan may still appear to be rotating, but the actual airflow may be insufficient. This is why checking fan speed and airflow is more important than simply checking whether the fan moves.

3.4 Temperature Detection Element

The VFD normally monitors power module temperature through a thermistor, temperature sensor, or internal temperature feedback pin of the module. The control board receives this signal and determines whether the module is overheated.

If the thermistor is open-circuit, short-circuit, drifting in resistance, or if the sampling circuit is damaged, the control board may mistakenly judge that the module temperature is too high. This can cause Err14 even when the module is cold.

3.5 Driver Board and Control Board

The temperature signal is often processed by the driver board or control board before being sent to the CPU. If the driver board power supply is abnormal, the sampling resistor has changed value, the connector is oxidized, the ribbon cable has poor contact, or the CPU input circuit is damaged, Err14 may be triggered incorrectly.

For repair engineers, if the heatsink is cold but the drive still reports Err14, the temperature detection path should be checked carefully.

4. Common Causes of Err14

4.1 Cooling Fan Failure or Low Fan Speed

This is one of the most common causes. During operation, the IGBT and rectifier section continuously generate heat. If the cooling fan does not work properly, the heatsink temperature will gradually rise and eventually trigger Err14.

The field inspection method is straightforward. Observe whether the fan rotates, listen for abnormal noise, and feel whether there is enough airflow from the outlet. It is important not to judge the fan only by whether it rotates. Some old fans rotate slowly, start with difficulty, or stop after running for a short time. These faults are easy to miss.

For old VFDs operating in dusty environments, replacing the fan directly is often more reliable than only cleaning it.

4.2 Blocked Airflow Path or Dusty Heatsink

Many VFDs are installed in environments with dust, oil mist, fibers, wood powder, or industrial particles. Over time, the heatsink fins become blocked. Even if the fan is working, air cannot pass through the heatsink effectively.

This type of problem usually has a clear pattern: the VFD works normally at first, then reports Err14 after running for some time. After cooling down, it can restart again. Once the heatsink and airflow path are cleaned thoroughly, the fault may disappear.

During maintenance, the cover should be removed after the DC bus is safely discharged. The heatsink fins, inlet, outlet, and internal air duct must be cleaned properly. Cleaning only the surface is not enough.

4.3 High Control Cabinet Temperature

Sometimes the VFD itself is normal, but the control cabinet temperature is too high. This is especially common in summer, high-temperature workshops, sealed cabinets, or cabinets containing several drives, contactors, power supplies, servo drives, and braking resistors.

The technician should measure the temperature inside the cabinet and check whether the cabinet has a proper air inlet, exhaust fan, filter, or air conditioner. Some cabinets only use internal circulating fans. This does not remove heat from the cabinet and therefore has limited effect. Real cooling requires cold air intake and hot air exhaust.

4.4 Insufficient Installation Clearance

A VFD needs enough space around it for heat dissipation. If several drives are installed too close to each other, or if wiring ducts and panels block the top outlet, hot air cannot escape smoothly.

Compact drives are often installed in tight spaces because they are small. However, poor installation clearance can directly cause overheating. This is especially common in retrofit projects where the cabinet space is limited.

4.5 Heavy Load or Motor Abnormality

Although Err14 is a module overheating fault, the root cause may be excessive output current. A jammed bearing, heavy mechanical load, dry gearbox, tight belt, blocked fan impeller, blocked pump, or high conveyor resistance can all increase motor current.

Higher current means higher IGBT loss and higher module temperature. In this case, repairing only the VFD is not enough. The motor and mechanical load must also be inspected.

A practical method is to check the VFD output current during operation and compare it with the motor rated current. A clamp meter can be used to verify whether the three-phase output current is balanced. If the drive runs normally without load but reports Err14 under load, the mechanical system should be inspected first.

4.6 Carrier Frequency Set Too High

A higher carrier frequency can reduce motor electromagnetic noise and improve current waveform quality, but it increases IGBT switching loss. Under heavy load or high ambient temperature, excessive carrier frequency may cause module overheating.

In this situation, the carrier frequency parameter should be reduced appropriately. After lowering the carrier frequency, the motor may produce more audible noise, which is normal. For fans, pumps, and general conveyor applications, an unnecessarily high carrier frequency is usually not required.

4.7 Acceleration or Deceleration Time Too Short

If the equipment starts, stops, reverses, or changes speed frequently, or if the acceleration time is set too short, the VFD may output high current for a short period. This increases IGBT thermal stress.

Large-inertia loads such as centrifugal fans, centrifuges, heavy conveyors, and winding systems are especially sensitive to short acceleration and deceleration settings. In these cases, Err14 may appear together with overcurrent, overload, overvoltage, or braking-related faults.

The acceleration and deceleration time should be adjusted according to the load inertia. If necessary, braking resistors or optimized stopping methods should be considered.

4.8 Temperature Detection Circuit Failure

If the VFD displays Err14 immediately after power-on and the heatsink is cold, real overheating is unlikely. The temperature detection circuit should then be investigated.

Common problems include open or shorted thermistor, abnormal thermistor resistance, damaged module temperature feedback pin, changed-value sampling resistor, poor connector contact, abnormal driver board circuit, or damaged control board input channel.

Board-level diagnosis usually requires measuring the temperature detection signal voltage or resistance and comparing it with a normal unit. Without a reference unit, the technician must analyze the thermistor characteristics carefully. The temperature protection circuit should not be simply shorted or bypassed for long-term operation, because it is an important protection function.

4.9 IGBT Module Aging or Damage

If the IGBT module itself has internal damage, poor thermal contact, or abnormal temperature feedback, Err14 may also appear. If the VFD also has output phase loss, unbalanced current, unusually fast temperature rise, or abnormal output waveform, the power module should be checked.

After power-off and safe discharge, a multimeter diode test can be used to check the diode characteristics between P, N, and U/V/W terminals. The readings should be relatively balanced among the three output phases. Any short circuit, open circuit, or obvious phase-to-phase inconsistency indicates that the power module may be defective.

5. Recommended Field Troubleshooting Procedure

For efficient field diagnosis, the troubleshooting process should follow a clear order: external first, internal later; cooling first, circuit later; operating condition first, board-level repair later.

Step 1: Confirm When the Fault Appears

The first question is: when does Err14 appear?

If Err14 appears immediately after power-on before running, suspect temperature detection or board failure.

If Err14 appears after several minutes or tens of minutes of operation, suspect cooling, ventilation, high load, or high ambient temperature.

If the fault appears only at high speed but not at low speed, check carrier frequency, output current, cooling condition, and motor load.

If the fault appears mainly in summer but not in winter, inspect cabinet cooling and ambient temperature.

If the fault started after changing the motor or mechanical system, check motor parameters, load matching, and running current.

Step 2: Check the Cooling Fan

Observe the fan operation, fan speed, and noise. Feel the airflow at the outlet. If the fan starts slowly, stops intermittently, has weak airflow, or makes abnormal noise, replace it. The fan is a low-cost part, but it has a major influence on VFD reliability.

Step 3: Clean the Heatsink and Air Duct

After disconnecting power and confirming DC bus discharge, remove the cover and inspect the heatsink, inlet, outlet, and internal air path. Clean dust and oil contamination thoroughly. In harsh environments, surface cleaning is not enough; the heatsink fins must be cleared.

Step 4: Check the Installation Environment

Check whether the VFD has enough space above and below it, whether the cabinet is sealed, and whether hot air can escape. If several VFDs are installed close together, thermal accumulation must be considered. If the cabinet temperature is high, add ventilation, exhaust fans, or an industrial air conditioner.

Step 5: Check Running Current

Run the equipment under normal load and observe the VFD output current. Use a clamp meter to verify the current if necessary. If the current is close to or above the rated current for a long time, inspect the motor and mechanical load. For pumps and fans, check the pipeline, valve position, impeller, bearing, and mechanical resistance.

Step 6: Check Parameter Settings

Important parameters include motor rated voltage, rated current, rated frequency, rated speed, control mode, acceleration time, deceleration time, and carrier frequency. Incorrect motor parameters may cause high current. A high carrier frequency increases module heating. Too short acceleration and deceleration time increases thermal shock.

Step 7: Determine Whether It Is False Overheating

If the cooling system, environment, load, and parameters are all normal, and the VFD reports Err14 while cold, the issue should be treated as false overheating. The temperature detection circuit, connectors, ribbon cables, driver board, control board, and module feedback circuit should then be checked.

The technician should not permanently bypass the temperature protection circuit simply to make the drive run. Doing so can cause severe IGBT damage and higher repair cost.

6. Safety Precautions During Repair

A VFD contains a high-voltage DC bus. Even after power is disconnected, the capacitors may still hold several hundred volts. Before opening the drive, wait long enough and measure the voltage between P and N terminals to confirm that it has dropped to a safe level. Do not assume that the drive is safe just because the keypad display is off.

When cleaning the inside of the VFD, prevent screws, wire ends, or metal particles from falling onto the PCB. When using compressed air, avoid excessive pressure because it may damage small components or push dust deeper into the drive. If cleaning solvent is used, it must be suitable for electronic equipment and must fully evaporate before power-on.

When testing the IGBT module, avoid live measurement at the U, V, and W output terminals during operation. The output waveform is high-frequency PWM, and ordinary multimeter readings may not be meaningful. Incorrect measurement may damage the instrument or create a safety hazard.

When replacing the cooling fan, confirm the voltage, size, airflow direction, connector type, and installation direction. If the fan is installed backwards, cooling performance will be reduced, and hot air may circulate inside the drive.

7. Relationship Between Err14 and Other Faults

Err14 may not always appear alone. It can occur together with overcurrent, overload, undervoltage, overvoltage, or braking-related faults. For example, if the mechanical load is jammed, the VFD may first experience high output current, then the power module heats rapidly, and finally Err14 appears. Poor cooling may also cause the power devices to operate at high temperature, resulting in unstable switching characteristics and additional faults.

Therefore, when a site reports that the drive sometimes shows Err14 and sometimes shows overcurrent, these should not be treated as completely separate problems. The technician should look for common causes such as excessive load, poor cooling, aging power module, abnormal driver waveform, motor insulation problem, or incorrect parameter settings.

8. Typical Case Analysis

In one field case, an Inovance MD310T2.2B series VFD was used to drive a small motor. After running for a period of time, the drive stopped and displayed Err14. At first, the site suspected that the VFD was damaged. After inspection, however, the control cabinet was found to be dusty, the heatsink fins were blocked, and the built-in fan speed was weak. After cleaning the heatsink and replacing the fan, the drive resumed normal operation and the fault did not return.

In another case, the VFD displayed Err14 immediately after power-on. The motor had not started, and the heatsink was completely cold. Replacing the fan and cleaning the airflow path did not solve the issue. After board-level inspection, the temperature detection circuit was found to be abnormal, causing the control board to continuously receive an over-temperature signal. This case shows that Err14 is not always caused by real overheating. If the alarm appears while the drive is cold, the temperature feedback circuit should be checked first.

9. Preventive Maintenance Recommendations

To reduce the possibility of Err14 faults on MD310 VFDs, regular maintenance is necessary.

First, clean the control cabinet and VFD air duct regularly. In dusty environments, inspection every one to three months is recommended. In normal environments, inspection every six months may be sufficient.

Second, check the cooling fan regularly. The fan is a wear part. After long-term operation, bearing wear, low speed, and startup failure are normal aging symptoms. For equipment running continuously, preventive fan replacement is recommended.

Third, ensure proper cabinet ventilation. The cabinet should have a clear intake and exhaust path. Filters should be cleaned regularly. If the cabinet temperature remains high, an additional fan or industrial air conditioner should be installed.

Fourth, set carrier frequency and acceleration/deceleration time reasonably. Do not increase carrier frequency only to reduce motor noise, and do not set acceleration time too short only to achieve faster machine movement.

Fifth, pay attention to the motor and mechanical load. Many overheating faults are not caused by the VFD itself but by excessive output current due to mechanical problems. Electrical maintenance and mechanical inspection should be combined.

Sixth, do not repeatedly reset and restart the drive after Err14 appears. If real overheating has not been eliminated, repeated reset operation may eventually damage the IGBT module and increase repair cost.

10. Conclusion

When an Inovance MD310 VFD displays Err14, the core meaning is module overheating or abnormal module temperature detection. The correct repair approach is to first distinguish between real overheating and false overheating.

If Err14 appears after the drive has been running for some time, the most likely causes are fan failure, blocked airflow, high ambient temperature, excessive load current, improper installation clearance, high carrier frequency, or unreasonable acceleration and deceleration settings.

If Err14 appears immediately after power-on while the drive is still cold, the fault is more likely related to the temperature detection circuit, driver board, control board, connector, or power module temperature feedback signal.

The correct troubleshooting method is not simply resetting the fault or declaring the VFD damaged. Instead, the technician should analyze the fault timing, cooling system, load condition, parameter settings, and internal detection circuit step by step.

For field maintenance engineers, Err14 is a typical comprehensive VFD fault. It can be caused by environment and maintenance problems, but it can also be caused by circuit board or power module faults. Only by combining external inspection with internal electrical diagnosis can the fault be located accurately and unnecessary replacement avoided.

In daily use, good ventilation, regular air duct cleaning, timely fan replacement, reasonable parameter settings, and proper load inspection are the key measures to prevent Err14 on the Inovance MD310 series. For drives that report Err14 immediately after power-on, professional inspection should be carried out as soon as possible, with special attention to the temperature detection circuit and power module feedback signal.

Posted on

In-Depth Analysis of Schneider Variable Frequency Drive bUF / BUF Braking Circuit Faults: Principles, Troubleshooting, and Repair Strategy

1. Overview of the Fault

In Schneider Electric Altivar variable frequency drives, braking-related faults are commonly encountered in applications involving rapid deceleration, high-inertia loads, lifting mechanisms, centrifugal machines, conveyors, winding equipment, woodworking machinery, injection molding machines, and other systems with frequent start-stop cycles.

When the display shows a code such as bUF, BUF, BUF0, or a similar braking-circuit-related message, the fault should generally be treated as a braking circuit abnormality. In many cases, it indicates that the drive has detected an abnormal condition in the braking branch, especially a possible short circuit, excessively low resistance, damaged braking transistor, or braking unit drive failure.

This fault should not be interpreted simply as “the braking resistor is defective.” The braking system is made up of several interconnected sections, including the DC bus, braking IGBT, braking resistor, braking wiring, braking parameters, external braking unit, thermal protection, machine inertia, and deceleration settings. A failure in any one of these sections may trigger a braking-related fault.

In practical maintenance work, simply replacing the braking resistor without checking the internal braking transistor may not solve the real problem. Likewise, repeatedly resetting the drive without checking the external circuit may lead to more serious damage to the power module, rectifier bridge, DC bus capacitors, IGBT assembly, driver board, or control board.

Therefore, troubleshooting a bUF / BUF fault should follow a systematic sequence:

  1. Identify when the fault occurs.
  2. Isolate the external braking circuit.
  3. Test the braking resistor and wiring.
  4. Check the internal braking IGBT or braking module.
  5. Review the deceleration conditions and braking parameters.
  6. Confirm the repair through staged running tests.

Technician using a multimeter to test braking terminals inside a Schneider Electric Altivar variable frequency drive control cabinet displaying a BUF0 braking circuit fault.

2. Basic Operating Principle of the Braking System

2.1 Why overvoltage occurs during motor deceleration

During normal motor operation, the variable frequency drive converts incoming AC power into DC voltage through its rectifier section. The inverter stage then converts the DC bus voltage back into adjustable-frequency AC output for the motor.

During acceleration and normal running, electrical energy flows from the drive to the motor.

However, when the motor decelerates quickly, when a heavy load drives the motor, when a hoist lowers a load, when a winding machine releases material, or when a large fan is stopped rapidly, the motor can enter regenerative operation.

In regenerative operation, the motor no longer consumes electrical energy. Instead, it becomes a generator and returns mechanical energy back into the drive’s DC bus.

If this regenerated energy cannot be dissipated, the DC bus voltage rises rapidly. Once the voltage exceeds the drive’s protection threshold, the inverter will trip on a DC bus overvoltage fault.

2.2 Function of the braking resistor

A braking resistor is used to absorb regenerative energy and convert it into heat.

When the DC bus voltage rises above a preset threshold, the drive activates its internal braking IGBT. The braking IGBT switches on and connects the braking resistor to the DC bus.

The regenerative energy is then discharged through the braking resistor and converted into heat.

For this reason, a braking resistor is not an ordinary resistor used only for current limiting. It is a high-power energy absorption component that must be selected according to resistance value, power rating, duty cycle, thermal capacity, and machine operating conditions.

2.3 Main components of a braking circuit

A typical VFD braking system includes:

  • DC bus capacitors
  • DC bus voltage sensing circuit
  • Internal braking IGBT or braking transistor
  • Braking IGBT driver circuit
  • Braking resistor
  • Braking resistor cables
  • Braking terminals
  • External braking unit, if required
  • Thermal protection device
  • Deceleration parameters
  • Load inertia and regenerative energy conditions

A fault in any of these sections can cause braking-related alarms, DC overvoltage trips, resistor overheating, braking transistor damage, or bUF / BUF type faults.


Technical troubleshooting diagram for an Inovance CS700 hoist drive system showing the inverter, motor, brake, gearbox, encoder, lifting drum, load, power input, and Er.138 fault inspection path.

3. Meaning of bUF / BUF Type Faults

A bUF / BUF type fault generally indicates an abnormal condition in the braking circuit, with particular attention required for possible short circuit conditions, low-resistance conditions, damaged braking IGBT, or abnormal braking drive control.

This type of fault should not be confused with a braking resistor overload fault.

A braking resistor overload fault usually means that the drive’s thermal model has calculated excessive temperature rise in the braking resistor. This is often caused by frequent braking, short deceleration times, insufficient resistor power rating, excessive machine inertia, or incorrect braking parameters.

By contrast, a bUF / BUF fault usually points more directly to a hardware abnormality in the braking branch.

Possible causes include:

  • Shorted braking resistor
  • Braking resistor resistance too low
  • Incorrect braking resistor wiring
  • Damaged braking cable insulation
  • Braking cable shorted to ground
  • Braking terminals connected incorrectly
  • Failed internal braking IGBT
  • Shorted braking transistor
  • Braking driver circuit malfunction
  • Failed external braking unit
  • Incorrect connection between DC bus terminals and braking terminals
  • Moisture, conductive dust, metal particles, or oil contamination around terminals
  • Faulty DC bus voltage detection circuit
  • Control board misdetection

For this reason, a bUF / BUF fault should first be approached as a braking hardware and wiring issue rather than a simple parameter issue.


4. Why the Timing of the Fault Matters

One of the most important pieces of information during troubleshooting is the moment when the fault occurs.

The occurrence timing provides valuable direction for locating the root cause.

4.1 Fault appears immediately after power-on

If the drive trips on bUF / BUF immediately after power is applied, before the motor is started, the main suspected causes are:

  • Internal braking IGBT short circuit
  • Internal braking module failure
  • External braking resistor short circuit
  • Incorrect terminal wiring
  • Braking resistor resistance far below the allowed value
  • Braking cable shorted or damaged
  • Braking driver circuit stuck in the ON state
  • Power board damage
  • Moisture or conductive contamination inside the drive
  • Failure of the braking circuit detection circuit

This condition is usually not caused by deceleration settings because the motor has not yet been commanded to run or stop. The highest priority should be checking the braking resistor circuit and the internal braking transistor.

4.2 Fault appears immediately after motor start

If the drive powers up normally but trips shortly after receiving a run command, check the following:

  • Braking resistor connected to the wrong terminals
  • Motor output cable accidentally connected to braking terminals
  • DC bus terminals incorrectly wired to braking terminals
  • External braking unit installed incorrectly
  • Braking resistor resistance below the minimum allowed value
  • Internal braking IGBT leakage or partial short circuit
  • Power board damage caused by vibration, moisture, or aging
  • Wiring error after drive replacement or maintenance

This type of fault is common after equipment relocation, drive replacement, electrical cabinet rewiring, or installation of a new braking resistor.

4.3 Fault appears only during deceleration or stopping

If the fault occurs only while decelerating, stopping, lowering a load, reducing speed, or applying a quick stop command, focus on the braking circuit under actual load conditions.

Key inspection points include:

  • Braking resistor damaged or overheating
  • Braking resistor resistance incorrect
  • Braking resistor power rating insufficient
  • Loose braking terminals
  • Braking cable damaged by vibration
  • Braking cable touching the cabinet or ground
  • Internal braking IGBT failing under load
  • Intermittent short circuit in the braking branch
  • Deceleration time set too short
  • Load inertia too high
  • Braking frequency too high
  • External braking unit overheating
  • Poor ventilation around the drive or braking resistor

4.4 Fault appears intermittently

Intermittent bUF / BUF faults are often related to thermal, environmental, or mechanical problems.

Important possibilities include:

  • Braking resistor insulation drops after heating
  • Braking cable insulation becomes unstable at high temperature
  • Terminal screws become loose due to vibration
  • Internal resistor connections are cracked or poorly welded
  • Humidity or condensation in the cabinet
  • Conductive dust or metal particles around terminals
  • Cooling fan failure causing excessive internal temperature
  • Braking IGBT thermal instability
  • Solder cracks on the braking drive board
  • External braking unit intermittent failure

Intermittent faults should not be ignored. They are often an early sign of future power module damage.


5. Standard Field Troubleshooting Procedure

Step 1: Record the fault condition before resetting

Before pressing RESET or cycling power repeatedly, record the operating condition.

Important information includes:

  • Complete Schneider drive model number
  • Rated power and voltage class
  • Motor rated power
  • Fault code shown on display
  • Frequency at the moment of fault
  • Whether the drive was accelerating, running, decelerating, or stopped
  • Whether a braking resistor is installed
  • Whether an external braking unit is installed
  • Recent parameter changes
  • Recent motor replacement
  • Recent drive replacement
  • Recent cable replacement
  • Recent electrical cabinet work
  • Ambient temperature and cabinet ventilation condition

Repeated resets without recording the fault condition can hide useful diagnostic information and may worsen power circuit damage.


Step 2: Disconnect input power and wait for DC bus discharge

A VFD contains high-voltage DC bus capacitors.

Even after incoming AC power is switched off, dangerous DC voltage may remain inside the drive for several minutes.

The safe procedure is:

  1. Disconnect the upstream power supply.
  2. Wait until the keypad and display are fully off.
  3. Follow the discharge waiting time specified on the drive label or manual.
  4. Measure DC bus voltage and confirm it has fallen to a safe level.
  5. Only then remove wiring or perform measurements.

Never touch braking terminals, DC bus terminals, or internal power boards before confirming that the DC bus voltage has discharged.


Step 3: Inspect the braking resistor visually

Inspect the braking resistor for:

  • Burn marks
  • Discoloration
  • Cracked housing
  • Melted insulation
  • Loose terminals
  • Burned cable lugs
  • Strong burnt smell
  • Broken leads
  • Overheating marks on nearby wiring
  • Contact with the cabinet or grounded metal parts
  • Poor ventilation
  • Dust accumulation
  • Oil contamination
  • Moisture or condensation

If the braking resistor shows clear signs of overheating or physical damage, do not continue running the equipment before verifying resistor selection and braking circuit condition.


Step 4: Isolate the external braking resistor circuit

This is one of the most important diagnostic steps.

After disconnecting power and confirming the DC bus has discharged, remove the two braking resistor wires from the drive braking terminals. Label both wires clearly to prevent incorrect reconnection.

Then power the drive again and observe whether the bUF / BUF fault remains.

Result A: Fault disappears after braking resistor is disconnected

This strongly suggests that the fault is in the external braking circuit.

Possible causes include:

  • Braking resistor short circuit
  • Braking resistor resistance too low
  • Braking cable short circuit
  • Cable insulation damage
  • Wrong wiring
  • Ground fault
  • External braking unit failure
  • Moisture or conductive dust around braking terminals

Result B: Fault remains after braking resistor is disconnected

If the drive still displays bUF / BUF immediately after power-on with the braking resistor completely disconnected, the fault is more likely inside the drive.

The most likely internal causes are:

  • Braking IGBT short circuit
  • Braking transistor damage
  • Braking IGBT driver circuit failure
  • Braking power board failure
  • DC bus detection circuit failure
  • Control board fault
  • Internal contamination or damaged PCB traces

Step 5: Measure the braking resistor resistance

The braking resistor should be measured with at least one side disconnected from the drive.

Important measurement rules:

  • Do not measure the resistor while it is still fully connected to the drive.
  • Compare the measured value with the resistor nameplate value.
  • A resistance close to zero ohms is abnormal.
  • A resistance far below the specified value is dangerous.
  • Infinite resistance may indicate an open resistor.
  • Measure insulation resistance between the resistor terminals and ground.
  • Inspect for unstable readings caused by poor internal connections.

For example, if a braking resistor is rated at 50 ohms but measures only a few ohms or nearly zero ohms, it must not be connected to the VFD. Such a low resistance may cause excessive braking current and can damage the internal braking IGBT.


Step 6: Inspect braking cables and terminals

Braking cable problems are frequently overlooked.

Check for:

  • Crushed cable sections
  • Cable trapped by cabinet doors
  • Cable installed too close to hot components
  • Heat damage caused by braking resistor radiation
  • Hardened or cracked insulation
  • Cable touching cabinet metal
  • Loose crimped terminals
  • Oxidized terminal lugs
  • Loose screws
  • Conductive dust around terminals
  • Incorrect grounding of cable shields
  • Braking cable mixed with motor output cables
  • Wrong connection between braking terminals and DC bus terminals

For vibrating equipment such as hoists, presses, centrifuges, winding machines, conveyors, and woodworking equipment, terminal looseness and cable fatigue are especially common.


Step 7: Check the internal braking IGBT and driver circuit

If the external braking resistor and wiring are confirmed normal, but the bUF / BUF fault remains, the internal braking circuit must be inspected.

Common repair checks include:

  • Measuring the braking transistor using diode-test mode
  • Comparing readings with a known-good drive of the same model
  • Checking for near-zero resistance between braking terminals and DC bus terminals
  • Inspecting the braking IGBT for short circuit conditions
  • Inspecting the power board for burn marks
  • Checking gate resistors
  • Checking optocouplers
  • Checking driver ICs
  • Checking snubber capacitors and suppression components
  • Checking for damaged PCB tracks
  • Checking whether the braking IGBT gate is permanently driven ON

The internal topology differs between drive models. Therefore, measurements must be interpreted according to the specific Schneider Altivar model and power structure.

High-power drives, integrated IGBT modules, coated power boards, and high-voltage systems should be tested by qualified VFD repair personnel.


6. Problems Caused by Incorrect Braking Resistor Selection

Incorrect braking resistor selection is one of the main reasons braking faults repeat after repair.

6.1 Resistance value too low

When braking resistor resistance is too low, braking current becomes excessive whenever the braking IGBT turns on.

This may cause:

  • Excessive braking IGBT current
  • bUF / BUF braking circuit fault
  • Braking transistor overheating
  • Damage to the braking module
  • Excessive resistor heating
  • DC bus instability
  • Blown semiconductor devices
  • Damage to the power board

It is incorrect to assume that “lower resistance always means stronger braking.” The braking resistor value must never be lower than the minimum resistance specified for the VFD model.

6.2 Resistance value too high

If braking resistance is too high, insufficient current flows through the braking resistor.

This may result in:

  • DC bus overvoltage during deceleration
  • Overvoltage trips
  • Long stopping time
  • Failure to meet process stop requirements
  • Poor speed control during high-inertia deceleration
  • Safety risk in lifting or winding applications

6.3 Resistor power rating too low

Correct resistance value alone is not enough. The resistor power rating must also match the regenerative energy and braking duty cycle.

An undersized resistor may cause:

  • Excessive surface temperature
  • Thermal protection trip
  • Internal resistor wire oxidation
  • Cracking or deformation
  • Resistance drift
  • Insulation breakdown
  • Cable damage
  • Cabinet overheating
  • Secondary short circuit conditions

The resistor must be selected based on peak braking power, average braking power, deceleration frequency, machine inertia, and expected duty cycle.


7. Relationship Between Deceleration Time and Braking Faults

When a drive trips while stopping, many users immediately increase the deceleration time. This can help in some cases, but it is not a universal solution.

If the drive is tripping on DC bus overvoltage, increasing deceleration time can reduce regenerative power and lower the stress on the braking circuit.

However, if the drive has a bUF / BUF short-circuit-related fault, increasing deceleration time may not solve the root cause.

This is because the actual issue may be:

  • Shorted braking IGBT
  • Shorted braking resistor
  • Shorted braking cable
  • Incorrect braking terminal wiring
  • Failed external braking unit
  • Faulty braking driver circuit

A practical distinction is:

  • DC bus overvoltage during deceleration: Review deceleration time, braking resistor size, and regenerative energy.
  • Braking resistor overload: Review resistor power rating, braking duty cycle, and thermal parameters.
  • bUF / BUF type fault: Prioritize braking circuit hardware, wiring, and braking transistor diagnostics.

Different fault codes require different troubleshooting logic.


8. Common Causes of Internal Braking IGBT Failure

When the internal braking transistor or braking module fails, there is usually an underlying cause.

8.1 Braking resistor value too low

This is one of the most common causes. An excessively low resistance value creates excessive braking current and overloads the braking IGBT.

8.2 Short circuit in braking wiring

Cable damage, water ingress, wiring error, crushed insulation, and loose terminals can create near-short-circuit conditions in the braking branch.

8.3 Insufficient braking resistor capacity

An undersized braking resistor may overheat repeatedly. Over time, it can develop insulation failure, internal damage, or unstable resistance, eventually affecting the braking circuit.

8.4 Frequent rapid stopping

High-inertia equipment that repeatedly decelerates in a short time places heavy stress on the braking IGBT.

Typical examples include:

  • Hoists
  • Centrifuges
  • Large fans
  • Winding machines
  • Presses
  • Conveyors
  • Mixers
  • High-speed spindles

8.5 Poor cooling

Blocked airflow, damaged fans, high cabinet temperature, clogged heatsinks, or poor ventilation can significantly reduce braking IGBT lifetime.

8.6 High input voltage

When the input voltage is high, the normal DC bus voltage is already elevated. During deceleration, the bus voltage rises faster and the braking system must absorb more energy.

8.7 Surge voltage and electrical disturbances

Lightning, switching surges, welding machines, unstable generators, poor grounding, and high-power load switching can damage the braking driver circuit or power module.


9. Verification Procedure After Repair

After replacing a braking resistor, repairing a braking unit, or repairing the VFD power board, the drive should not be returned directly to full production.

A staged verification process is recommended.

9.1 Power-on test without load

Power on the drive with the braking circuit correctly connected and confirm that no bUF / BUF fault appears.

9.2 Low-frequency motor test

Run the motor at a low frequency and observe:

  • Output current
  • Motor sound
  • Motor vibration
  • DC bus behavior
  • Drive temperature
  • Fault history
  • Braking circuit response

9.3 Normal-frequency operation

Increase to normal operating frequency and verify that current, speed, and output stability are normal.

9.4 Light-load deceleration test

Use a relatively long deceleration time first. Confirm that the system stops smoothly and that no braking fault occurs.

9.5 Normal process deceleration test

Gradually restore normal deceleration settings. Monitor braking resistor temperature, DC bus behavior, fault history, and stopping performance.

9.6 Repeated braking test

For applications such as lifting systems, centrifuges, winding machines, presses, and high-inertia machinery, perform repeated brake cycles to confirm stable operation under thermal conditions.

A braking circuit that operates correctly when cold may still fail after repeated braking cycles if the resistor, wiring, or IGBT is thermally unstable.


10. Engineering Measures to Prevent bUF / BUF Braking Faults

Reliable braking system performance requires attention to system design, installation, parameter configuration, maintenance, and operating practice.

10.1 Design stage

  • Select braking resistor resistance according to the drive manufacturer’s minimum allowable value.
  • Select resistor power and thermal capacity according to load inertia and braking duty cycle.
  • Use an external braking unit or regenerative unit for frequent or high-energy braking applications.
  • Provide thermal protection for braking resistors.
  • Ensure sufficient ventilation space around the braking resistor.
  • Consider regenerative energy calculations for high-inertia systems.

10.2 Installation stage

  • Install braking resistors away from combustible materials.
  • Use high-temperature-rated cables.
  • Keep braking wiring separate from motor output cables where practical.
  • Tighten all braking terminals to the specified torque.
  • Keep wiring away from sharp edges and moving mechanical parts.
  • Prevent conductive dust accumulation.
  • Maintain cabinet sealing, ventilation, and moisture protection.

10.3 Parameter stage

  • Set deceleration time according to actual load inertia.
  • Configure braking-related parameters correctly.
  • Use suitable thermal protection settings.
  • Avoid unnecessary fast-stop commands.
  • Do not copy braking parameters blindly from another machine.
  • Review braking duty requirements after process changes.

10.4 Maintenance stage

  • Periodically inspect braking resistor temperature and appearance.
  • Measure braking resistor resistance during scheduled maintenance.
  • Tighten terminals regularly.
  • Inspect cable insulation.
  • Clean dust from the electrical cabinet.
  • Check cooling fans and heatsinks.
  • Review braking-related fault history.
  • Inspect for abnormal odor, discoloration, or heat damage.

10.5 Operating stage

  • Avoid repeated emergency stops under heavy load.
  • Avoid frequent rapid acceleration and deceleration unless the braking system is designed for it.
  • Do not install a lower-resistance braking resistor without confirming the drive’s limits.
  • Do not continue production after repeated braking faults.
  • Investigate intermittent faults before they become catastrophic power failures.

11. Conclusion

A Schneider VFD bUF / BUF type fault generally indicates an abnormal condition in the braking circuit. The most important suspected causes are braking resistor short circuit, braking resistor value too low, incorrect wiring, braking cable failure, damaged internal braking IGBT, braking driver circuit malfunction, or external braking unit failure.

The correct troubleshooting process is not simply resetting the drive or extending the deceleration time. A reliable diagnosis should follow this sequence:

  1. Determine whether the fault occurs during power-on, start-up, deceleration, or repeated operation.
  2. Disconnect power and confirm DC bus discharge.
  3. Inspect the braking resistor and braking wiring.
  4. Disconnect the external braking resistor to isolate the circuit.
  5. Measure resistor resistance and insulation condition.
  6. Inspect braking terminals and cables.
  7. If the fault remains with the external circuit disconnected, inspect the internal braking IGBT, driver circuit, and power board.
  8. After repair, verify the drive through staged no-load, light-load, full-load, and repeated braking tests.

Only by treating the braking resistor, braking transistor, DC bus, wiring, parameters, and machine inertia as one complete system can bUF / BUF braking faults be accurately diagnosed and permanently eliminated.

Posted on

Nidec Unidrive M300 OI.AC Fault: Causes, Diagnosis, and Corrective Actions

1. Introduction

The Nidec Control Techniques Unidrive M300 is widely used in industrial applications such as pumps, fans, conveyors, mixers, packaging machines, textile machinery, woodworking equipment, and general-purpose motor control systems. Its compact design, simple commissioning structure, and reliable motor-control capability make it suitable for a large number of standard automation applications.

During operation, the drive may display a fault such as:

OI.AC
Er.OI.AC

This fault indicates an instantaneous AC output over-current condition. It is not simply a normal motor overload alarm. Instead, the drive has detected that the output current has risen above the internal protection threshold within a very short period of time. To protect the IGBT power module, motor cable, and motor winding, the drive immediately blocks its output.

An OI.AC trip should therefore be treated as a protection event requiring systematic troubleshooting. Repeatedly resetting the drive and restarting the machine without identifying the root cause may lead to IGBT damage, motor winding failure, cable burning, or more serious control cabinet faults.

The correct diagnostic approach is to determine when the fault occurs, inspect the mechanical load, test the motor and cable insulation, verify motor parameters, examine output switching devices, and finally determine whether the fault is external or internal to the drive.


Technician inspecting a Nidec Control Techniques Unidrive M300 variable frequency drive displaying an OI.AC over-current fault inside an industrial control cabinet.

2. What Does OI.AC Mean?

The Unidrive M300 converts the fixed AC input supply into a variable-frequency, variable-voltage three-phase output for the motor.

Its energy path is generally:

AC Input Supply
      ↓
Rectifier Bridge
      ↓
DC Bus
      ↓
DC Bus Capacitors
      ↓
IGBT Inverter Stage
      ↓
U / V / W Output
      ↓
Motor and Mechanical Load

The drive continuously monitors its output current through internal current sensing circuits. If the current rises sharply above the allowed limit, the drive immediately disables the IGBT output stage.

This high-speed protection is different from a normal thermal overload trip.

A thermal overload condition occurs when the motor draws excessive current over a relatively long period and heats up gradually. By contrast, an OI.AC fault usually means that a very high current appeared suddenly.

Typical causes include:

  • Phase-to-phase short circuit in the motor cable
  • Motor winding short circuit
  • Motor insulation breakdown to earth
  • Mechanical jam or locked rotor
  • Excessively short acceleration time
  • Incorrect output contactor switching
  • Incorrect motor parameter settings
  • Improper motor connection
  • IGBT module damage
  • Current detection circuit failure

For this reason, OI.AC should not be treated as a minor parameter issue. It is a fast protection response against an abnormal output current condition.


Electrical technician testing disconnected U, V and W motor cables with an insulation resistance tester on a Nidec Unidrive M300 drive system showing an OI.AC fault.

3. Diagnose According to the Moment the Fault Occurs

The timing of the fault is one of the most important diagnostic clues.

When OI.AC OccursLikely Cause
Immediately after power-upInternal drive fault, IGBT failure, current sensing fault, drive power circuit issue
Immediately after start commandMotor cable short circuit, motor winding problem, jammed load, brake not released
During accelerationAcceleration time too short, excessive load inertia, heavy load, incorrect motor parameters
At low speedHigh torque demand, motor stall, vector control setting issue, mechanical resistance
At high speedCable insulation problem, loose terminal, vibration-related intermittent fault, load fluctuation
During decelerationOutput contactor switching, mechanical back-driving, braking-related issue
With motor cables removedInternal drive hardware fault is highly likely
Only with one particular motorMotor, cable, mechanical load, or connection issue

Before making parameter changes, the maintenance technician should record the actual operating conditions:

  • At what frequency did the trip occur?
  • Was the motor starting, accelerating, decelerating, or running steadily?
  • What was the displayed current before the trip?
  • Was the machine loaded or unloaded?
  • Was an output contactor operating?
  • Had the motor, cable, or drive recently been replaced?
  • Did the fault begin after moisture, overload, mechanical damage, or electrical maintenance?

These details often reduce troubleshooting time significantly.


4. Motor Cable Short Circuit and Ground Leakage

4.1 Phase-to-Phase Short Circuit

A short circuit between U, V, and W motor phases can cause an immediate OI.AC trip.

Common causes include:

  • Damaged motor cable insulation
  • Cable crushed by machinery
  • Loose copper strands touching adjacent terminals
  • Water inside the motor terminal box
  • Motor winding short circuit
  • Incorrect wiring after motor repair
  • Conductive dust inside the terminal box
  • Oil, coolant, or moisture contamination
  • Cable damage caused by vibration

The first inspection should be visual and mechanical. Check the motor terminals, cable glands, cable tray, junction boxes, and drive output terminals carefully.

A standard multimeter can help identify an obvious short circuit, but it cannot reliably assess insulation quality. A motor may appear normal under the low voltage of a multimeter but fail under the high dv/dt PWM output of a variable frequency drive.

Therefore, insulation testing is necessary.

4.2 Motor-to-Earth Insulation Failure

Motor insulation deterioration is one of the most common reasons for intermittent over-current or output-related faults.

Typical warning signs include:

  • The fault occurs more frequently in humid weather.
  • The motor runs normally when cold but trips after warming up.
  • The fault started after the machine was washed or exposed to water.
  • The cable is old, oily, or exposed to high temperature.
  • The motor has been unused for a long time.
  • The fault appears randomly rather than continuously.

Before insulation testing, disconnect the motor cable completely from the drive output terminals. Never apply a megger directly to a connected VFD output.

The following measurements should be performed:

U-V
V-W
U-W
U-Earth
V-Earth
W-Earth

For many low-voltage motors, a 500 V insulation resistance tester is commonly used. However, the test method and acceptance value should always follow the motor manufacturer’s requirements and local electrical standards.

If insulation resistance is low, the problem may be caused by moisture, cable damage, contaminated terminal boxes, winding degradation, or insulation breakdown inside the motor.

4.3 Long Motor Cables and PWM Reflection

The output of a VFD is not a pure sine wave. It consists of high-frequency PWM pulses. When the motor cable is long, cable capacitance, inductance, and reflected voltage waves can create additional electrical stress.

Possible consequences include:

  • Higher motor terminal voltage spikes
  • Increased leakage current
  • Motor insulation aging
  • Bearing current and bearing damage
  • Nuisance over-current trips
  • EMC interference
  • Encoder signal instability
  • Sensor communication problems

For long cable installations, an output reactor, dv/dt filter, or sine wave filter may be required depending on drive size, cable length, motor type, and application duty.

A motor that appears to run normally may still suffer accelerated insulation damage if the cable arrangement is not suitable for VFD operation.


5. Mechanical Jamming and Excessive Load

5.1 Mechanical Locking or High Resistance

When the drive receives a start command, the motor must develop torque to overcome the mechanical load. If the mechanical system is jammed, the motor cannot accelerate normally and the current rises quickly.

Common mechanical causes include:

  • Failed gearbox
  • Seized bearing
  • Blocked pump impeller
  • Fan blade rubbing against casing
  • Conveyor belt jam
  • Frozen or hardened material inside a mixer
  • Excessive belt tension
  • Lack of lubrication
  • Misaligned coupling
  • Closed mechanical brake
  • Foreign object interference

Mechanical faults often produce the following symptoms:

  • OI.AC immediately after start
  • Motor humming without accelerating
  • Current rising sharply
  • Motor shaft difficult to turn manually
  • Normal operation when the load is disconnected
  • Abnormal mechanical noise or vibration

For motors with holding brakes, always verify that the brake coil is energized correctly and that the brake is actually released before the motor starts.

5.2 Acceleration Time Too Short

A large-inertia load needs sufficient acceleration time.

Typical high-inertia applications include:

  • Large fans
  • Centrifuges
  • Heavy conveyors
  • Mixers
  • Winding machines
  • Crushers
  • Extruders
  • Pumps with high starting torque
  • Machines with gear reducers

If the acceleration time is set too short, the drive demands excessive torque from the motor. High torque demand means high current demand. If the current rises above the protection threshold, the drive trips on OI.AC.

A practical correction method is to increase the acceleration time gradually.

For example:

Original acceleration time: 3 seconds
First test value: 10 seconds
Second test value: 15 seconds
Further adjustment: 20–30 seconds if necessary

The correct value depends on the machine inertia, process requirements, motor size, and drive capacity.

The goal is not simply to make acceleration extremely slow. The objective is to reduce the current peak to a safe and stable value while maintaining acceptable production performance.


6. Incorrect Motor Parameters and Wiring Configuration

The motor parameters entered into the Unidrive M300 directly affect magnetic flux, torque production, current control, and protection behavior.

Important parameters include:

  • Motor rated voltage
  • Motor rated current
  • Motor rated frequency
  • Motor rated speed
  • Motor rated power
  • Motor power factor
  • Motor connection method
  • Control mode
  • Acceleration and deceleration time
  • Current limit setting

If these parameters do not match the motor nameplate, the drive may produce unstable torque, high current, poor low-speed performance, motor overheating, or over-current trips.

6.1 Incorrect Star/Delta Connection

A common issue involves dual-voltage motors.

For example, a motor nameplate may state:

220 V Delta / 380 V Star

If a 380 V output drive is connected to this motor in Delta configuration, each winding may receive excessive voltage. The motor can become over-fluxed, current can rise sharply, and the motor may overheat or trip on over-current.

Conversely, if a 220 V drive is connected to the motor while the motor is wired in Star configuration, the motor may produce insufficient torque. Under load, it may stall or draw excessive current.

Always verify both the drive output voltage class and the motor terminal connection.

6.2 Incorrect Rated Current Setting

If the motor rated current is set too low, the drive may limit current too early or generate protection trips during normal operation.

If the value is set too high, the motor thermal protection becomes ineffective and the motor may be exposed to excessive current for too long.

Increasing the current limit is not a proper solution for OI.AC unless the entire system has been carefully evaluated.

If the true cause is a cable short circuit, mechanical jam, motor insulation fault, or damaged IGBT, increasing the current limit can make the failure much more destructive.

6.3 Unsuitable Control Mode

Standard V/F control may be sufficient for simple fan and pump applications.

However, applications requiring high starting torque, low-speed torque, rapid response, or stable speed control may require correct vector control settings and proper motor tuning.

Examples include:

  • Extruders
  • Mixers
  • Crushers
  • Hoists
  • Heavy conveyors
  • Winding machines
  • Printing machines
  • Woodworking machines
  • Low-speed constant torque systems

Incorrect control settings may result in current oscillation, unstable torque, low-speed vibration, inability to accelerate, or OI.AC trips.

When appropriate, static or rotating motor autotuning should be performed after confirming that the motor data is correct and that the machine is safe for possible motor movement.


7. Output Contactor Switching and Its Risks

Some installations include an output contactor, isolation switch, bypass arrangement, or multi-motor switching circuit between the drive and the motor.

If these devices switch while the VFD is still producing output, OI.AC can occur.

The reason is that disconnecting or reconnecting the motor while the IGBT stage is actively switching creates a sudden voltage and current disturbance.

Risks include:

  • OI.AC trips
  • IGBT stress
  • Contactor contact damage
  • Electrical arcing
  • Severe electromagnetic interference
  • Motor torque shock
  • Premature drive failure

The proper switching sequence should be:

Stop the drive output
      ↓
Disable the drive
      ↓
Confirm motor current has reached zero
      ↓
Switch output contactor
      ↓
Confirm contactor position
      ↓
Enable the drive
      ↓
Restart the motor

Never switch U, V, and W directly while the drive is actively running.

In systems with bypass circuits, multiple motors, reversing circuits, star-delta circuits, or automatic transfer arrangements, PLC timing and electrical interlocking should be inspected carefully.


8. Identifying Internal Drive Faults

When the motor, cable, load, and wiring have been verified, the next step is to determine whether the drive itself has failed.

8.1 Test the Drive with Motor Cables Disconnected

A key diagnostic method is to disconnect the motor output cables completely.

Basic procedure:

Disconnect incoming power
      ↓
Wait for DC bus discharge
      ↓
Remove U, V, W motor cables
      ↓
Confirm no external load is connected
      ↓
Restore power
      ↓
Issue a start command
      ↓
Observe whether OI.AC still occurs

If OI.AC still occurs with U, V, and W disconnected, the fault is likely inside the drive.

Possible internal fault locations include:

  • IGBT power module
  • IGBT gate driver circuit
  • Gate driver optocoupler
  • Current sensor
  • Current feedback amplifier
  • Current sampling resistor
  • Drive power supply circuit
  • Control board
  • DC bus circuit
  • Internal wiring or connector issue

8.2 IGBT Failure

The IGBT module is the core power switching component inside the drive.

If an IGBT fails short circuit or develops leakage, the drive may show:

  • Immediate OI.AC after start command
  • Input fuse failure
  • Abnormal output waveform
  • Motor vibration or no rotation
  • One output phase abnormal
  • DC bus fault
  • Visible burn damage
  • Abnormal resistance readings between output terminals and DC bus

However, replacing only the IGBT module may not solve the problem permanently.

The following should also be inspected:

  • Gate driver circuitry
  • Gate resistors
  • Driver power supply
  • Snubber circuit
  • DC bus capacitors
  • Cooling fan operation
  • Heatsink condition
  • Current feedback circuit
  • External motor cable condition
  • Motor insulation condition

If an external short circuit caused the IGBT failure, installing a repaired drive without fixing the motor or cable may result in immediate repeat damage.

8.3 False Over-Current Caused by Current Detection Failure

In some cases, the actual motor current may not be excessive. The drive may trip because the current sensing circuit is faulty.

Potential causes include:

  • Hall current sensor failure
  • Faulty current feedback power supply
  • Drifted sampling resistor
  • Failed operational amplifier
  • Control board fault
  • Loose connector
  • Corrosion or moisture damage
  • Cracked solder joint
  • Excessive power supply ripple

Typical symptoms include:

  • OI.AC with no motor connected
  • Fault occurs randomly under normal load
  • Displayed current is clearly unreasonable
  • One phase current reading differs greatly from the others
  • Fault remains after mechanical and cable checks
  • Drive works temporarily after repair but fails again later

These faults usually require professional repair equipment such as an oscilloscope, isolated power supply, power module tester, and current waveform measurement tools.


9. Standard Troubleshooting Procedure

The following procedure is suitable for most Unidrive M300 and similar VFD over-current faults.

Step 1: Record the Fault Condition

Record:

  • When the fault occurs
  • Motor frequency at the time of trip
  • Displayed current before trip
  • Whether the motor is loaded
  • Whether the fault occurs during start, acceleration, steady running, or deceleration
  • Whether output contactors are used
  • Whether the machine has recently been repaired or modified
  • Whether water, dust, overload, vibration, or cable damage may be involved

Step 2: Stop Repeated Restart Attempts

Do not continue pressing reset and restarting the drive.

Disconnect the run command, switch off the incoming power, and allow sufficient time for the DC bus capacitors to discharge.

Step 3: Inspect the Mechanical Load

Check:

  • Can the motor shaft rotate manually?
  • Is the gearbox damaged?
  • Is the pump impeller blocked?
  • Is the fan rubbing?
  • Is the conveyor jammed?
  • Is the brake released?
  • Is the coupling aligned?
  • Are bearings seized?
  • Is the belt tension excessive?
  • Is there foreign material in the machine?

Step 4: Inspect the Motor and Cable

Disconnect the motor from the drive and check:

U-V
V-W
U-W
U-Earth
V-Earth
W-Earth

Also inspect:

  • Cable damage
  • Water ingress
  • Loose terminals
  • Exposed copper strands
  • Damaged cable gland
  • Terminal box contamination
  • Cable crushed by machinery
  • Cable routing near high-temperature areas
  • Grounding condition

Step 5: Verify Motor Nameplate Data and Drive Parameters

Check:

Motor rated power
Motor rated voltage
Motor rated current
Motor rated frequency
Motor rated speed
Motor power factor
Star or Delta connection
Drive output voltage class

The motor connection must match the drive output voltage.

Step 6: Increase Acceleration Time

Increase the acceleration time gradually and test again.

This is especially important for high-inertia systems and heavy-duty loads.

Step 7: Check Output Contactors and Logic Sequence

Confirm that:

  • The output contactor does not switch while the drive is running.
  • The drive is disabled before output disconnection.
  • The contactor closes before the drive is enabled.
  • PLC timing is correct.
  • Interlocks are reliable.
  • No reversing contactors are switching incorrectly.
  • No output switching device is vibrating or chattering.

Step 8: Test the Drive Without Motor Cables

If OI.AC remains after removing U, V, and W cables, the drive likely has an internal hardware fault.

At this point, inspection should focus on the IGBT module, driver board, current feedback circuit, and control board.


10. Common Incorrect Practices and Their Risks

10.1 Repeatedly Resetting the Fault

This does not eliminate the root cause.

Potential risks:

  • IGBT damage
  • Motor winding damage
  • Cable overheating
  • Larger electrical failure
  • Increased repair cost
  • Production downtime

10.2 Increasing Current Limit Blindly

This is dangerous because it may hide the protection instead of correcting the fault.

Potential risks:

  • Motor overheating
  • Cable heating
  • IGBT overload
  • More severe short circuit damage
  • Mechanical damage worsening

10.3 Replacing the Drive Without Testing the Motor and Cable

A replacement drive may fail immediately if the motor or cable is the real cause.

This can lead to the common situation where multiple drives are damaged one after another.

10.4 Megger Testing Through the Drive Output

Never connect an insulation tester directly to U, V, and W while the motor cable remains connected to the drive.

The test voltage can damage the IGBT power stage, gate drivers, EMC components, and internal electronics.

Always disconnect the motor cable from the drive first.

10.5 Switching the Motor Output While the Drive Is Running

Opening or closing an output contactor while the drive is producing output can create severe electrical stress.

Possible results include:

  • OI.AC trip
  • Contactor damage
  • Arc generation
  • Output stage damage
  • EMI problems
  • Unstable motor torque

11. Preventive Measures

11.1 Select the Drive with Adequate Margin

Drive selection should not rely only on motor kW rating.

Heavy-duty, high-inertia, high-starting-torque, or frequent-start applications may require a larger drive capacity or a heavy-duty rating.

A 7.5 kW fan and a 7.5 kW crusher do not impose the same stress on a drive.

11.2 Maintain Motor Cables Properly

Use suitable VFD-rated cables when required and ensure:

  • Correct cable clamping
  • Proper shielding and grounding
  • Secure terminal connections
  • Moisture protection
  • Oil resistance
  • Mechanical protection
  • Separation between power and control cables
  • Appropriate output filtering for long cables

11.3 Perform Regular Insulation Testing

Motors operating in humid, dusty, corrosive, hot, or outdoor environments should undergo periodic insulation testing.

Priority equipment includes:

  • Pumps
  • Cooling tower fans
  • Chemical mixers
  • Outdoor conveyors
  • Food processing machines
  • Textile equipment
  • Woodworking equipment
  • Machines restarted after long shutdown periods

11.4 Optimize Acceleration and Deceleration Profiles

Acceleration ramps should match the mechanical inertia and process requirements.

For large-inertia loads, S-curve acceleration may reduce mechanical shock and current peaks.

11.5 Avoid Output-Side Switching During Operation

Output contactors should operate only when the drive output is disabled.

Systems with bypass circuits or multiple motors require proper electrical and PLC interlocking.

11.6 Maintain Cooling and Cabinet Conditions

Heat, dust, and humidity accelerate failure of power electronics and current sensing components.

Maintenance should include:

  • Cooling fan inspection
  • Heatsink cleaning
  • Control cabinet temperature checks
  • Terminal tightening
  • DC bus capacitor inspection
  • Grounding inspection
  • Input voltage monitoring
  • Moisture control

12. Conclusion

An OI.AC fault on a Nidec Control Techniques Unidrive M300 indicates that the drive has detected an instantaneous output over-current condition.

It should not be considered a simple overload warning. It is a fast protective response that may be caused by motor cable faults, insulation breakdown, mechanical jamming, incorrect motor settings, output contactor switching, excessive acceleration demand, or internal drive hardware failure.

The most reliable troubleshooting principle is:

Identify the fault timing
      ↓
Stop repeated reset attempts
      ↓
Check the mechanical load
      ↓
Test the motor and cable insulation
      ↓
Check for output short circuits
      ↓
Verify motor parameters and wiring
      ↓
Increase acceleration time if necessary
      ↓
Inspect output contactor timing
      ↓
Test with U/V/W disconnected
      ↓
Determine whether internal drive repair is required

A structured diagnosis prevents unnecessary drive replacement, avoids repeated IGBT damage, reduces downtime, and improves long-term reliability of the motor control system.