
Abstract
The ABB ACS611 series inverter is a versatile product widely used in industrial drives for applications like fans, pumps, and compressors. One common fault in this series is the “LINE CONV” fault (Line Converter Fault), which is one of the main reasons for frequent shutdowns. This fault involves the rectification topology, power system, and control circuits, and if not promptly addressed, it can lead to rectifier module damage, DC bus instability, and even safety incidents. This article begins by explaining the rectification principle of the ACS611 inverter and systematically analyzes the “LINE CONV” fault’s triggering mechanism, core causes, and troubleshooting process, providing practical case studies and preventive measures for engineers.
1. Introduction
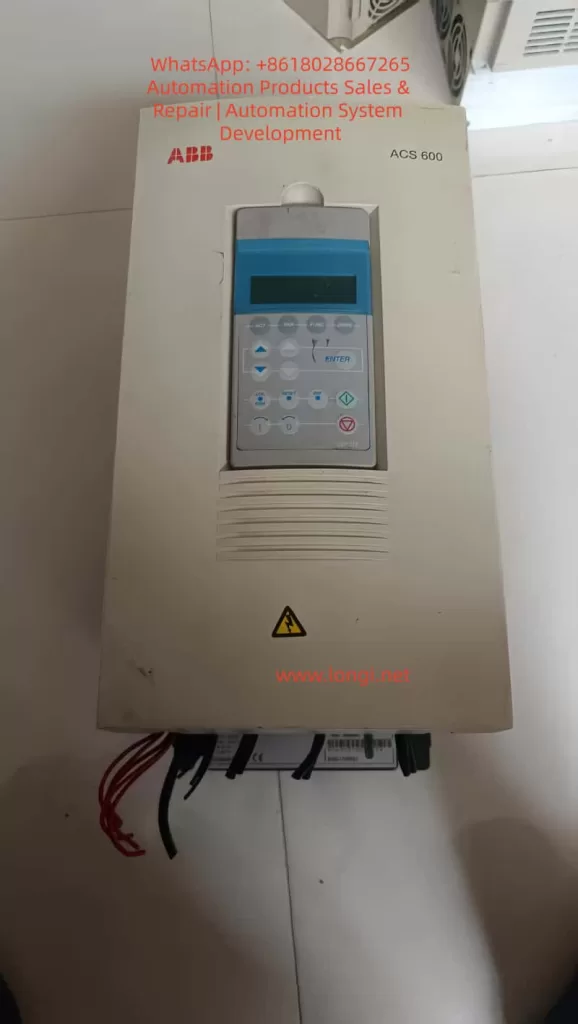
The ABB ACS611 series inverter, designed for medium to large loads, covers power ratings from 5.5 to 560 kW (approximately 7 to 700 kVA). It supports various topologies such as diode rectification and AFE (Active Front End), with the 70 kVA model commonly used for medium-sized fans, pumps, and compressors. This inverter features energy feedback and power factor correction (PF ≥ 0.98), making it a core component of industrial energy-saving retrofits.
However, during long-term operation, the “LINE CONV” fault (Fault Code: LINE CONV FAULT) becomes a frequent issue in the ACS611 series. According to ABB’s service data, this fault accounts for approximately 18% of the ACS611 inverter’s shutdowns, primarily due to abnormal rectifier unit scenarios. This article breaks down the fault from principle explanation to troubleshooting, offering engineers a step-by-step guide to quickly locate and resolve the issue.
2. ACS611 Rectification Topology and “LINE CONV” Fault Definition
(a) ACS611 Rectification Topology
The line converter (rectifier unit) is the “energy entry point” of the ACS611 inverter, responsible for converting AC input into DC bus voltage. The 70 kVA and higher models typically use the AFE (Active Front End) topology, which includes the following core components:
- IGBT Modules: These act as the rectifier switches, using PWM control to achieve bidirectional energy flow (motor feedback energy can be fed back into the grid).
- Pre-charging Circuit: Consisting of pre-charging resistors (PTC/coil resistors) and a pre-charging contactor, it limits inrush current when powering up.
- DC Bus Capacitors: These buffer the rectified DC voltage, stabilizing the input to the inverter unit.
- Control Circuit: Includes voltage/current sensors, driver boards, and CPU boards, implementing closed-loop control of the rectifier unit.
Compared to traditional diode rectifiers, AFE topologies offer the advantages of energy feedback and power factor correction, but they are more complex, with more potential fault points (e.g., IGBT drivers, pre-charging circuits).
(b) “LINE CONV” Fault Official Definition
According to ABB’s ACS611 Fault Code Manual, the “LINE CONV” fault is triggered when the rectifier unit fails to convert AC to DC, which can be caused by one of the following issues:
- The rectifier unit detects abnormal conversion from AC input to DC bus voltage, leading to an unstable DC bus voltage.
- Rectifier modules (diodes/IGBTs) experience short circuits, open circuits, or driver signal loss.
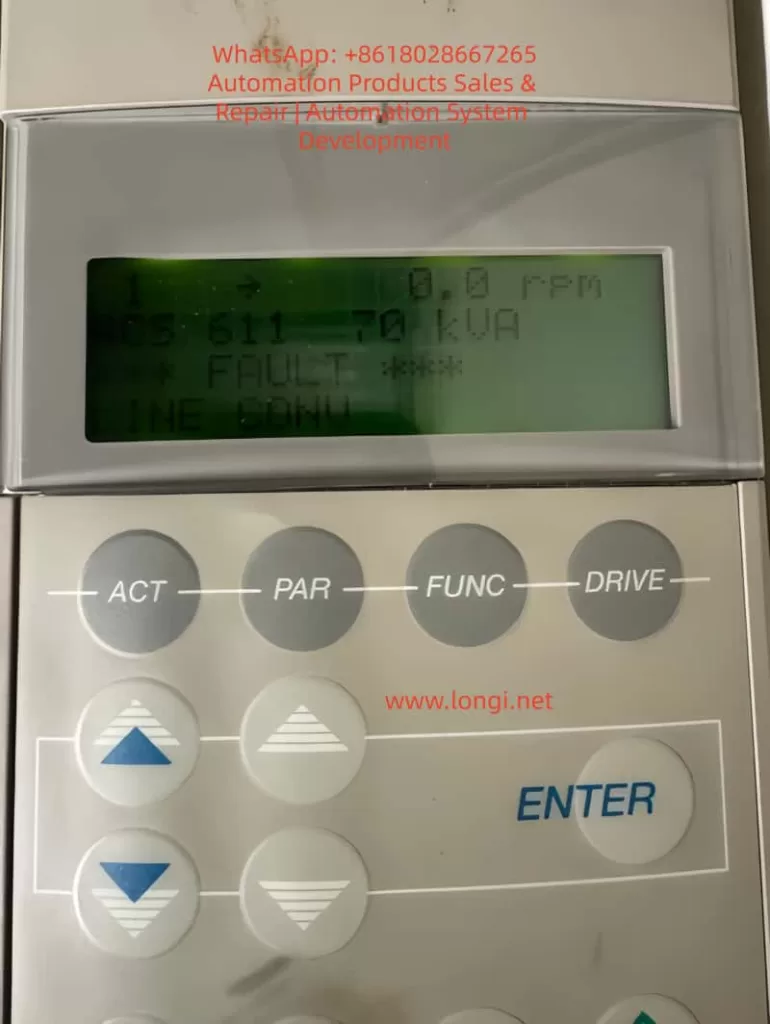
The typical symptoms of this fault include:
- The inverter panel displays “*** FAULT ***” followed by “LINE CONV.”
- Abnormal DC bus voltage (overvoltage, undervoltage, or fluctuation).
- Rectifier current exceeds the rated value (e.g., 120% rated current).
- Pre-charging failure (unable to establish DC bus voltage during startup).
3. Core Cause Analysis of “LINE CONV” Fault
The essence of the “LINE CONV” fault is the inability of the rectifier unit to complete the AC-to-DC conversion. The causes can be categorized into four main areas: external power supply issues, hardware damage, control abnormalities, and environmental factors, as detailed below:
(a) External Power Supply Issues (Approximately 35%)
The power supply is the “energy source” for the rectifier unit, and any issues with the power supply can trigger the fault:
- Phase Loss: If one of the three-phase inputs is disconnected (e.g., fuse blown or contactor contacts burned), the current distribution is uneven, potentially causing overheating and damage.
- Voltage Imbalance: If the three-phase voltage imbalance exceeds 5%, rectifier current peaks can increase by 2-3 times, accelerating aging.
- Overvoltage/Undervoltage: If the input voltage exceeds ±10% of the rated value, overvoltage can damage rectifier modules, while undervoltage prevents the DC bus from being established.
- Harmonic Interference: Large amounts of harmonics in the power supply can trigger false rectifier module actions.
(b) Rectifier Module Damage (Approximately 28%)
Rectifier module damage is a core hardware issue for the “LINE CONV” fault:
- Diode Rectifier Bridge:
- Short Circuit: Both forward and reverse directions conduct (measuring 0Ω between input L1 and output + terminal).
- Open Circuit: Both directions are blocked (measuring “OL” between input and output), causing DC bus voltage fluctuation.
- AFE IGBT Modules:
- Gate (G) Damage: Resistance between gate and emitter is lower than expected (<1kΩ, indicating gate damage).
- Collector-Emitter (C-E) Short Circuit: Both directions conduct, triggering overcurrent protection.
- Flyback Diode Damage: Internal diode failure causes improper current flow, triggering overvoltage.
(c) Pre-charging Circuit Failure (Approximately 20%)
The pre-charging circuit limits inrush current during startup. Failures in this circuit can directly cause “LINE CONV” faults:
- Pre-charging Resistor Damage: Overuse or insufficient power rating of the resistor leads to overheating and failure (e.g., 500W resistor used instead of 200W).
- Pre-charging Contactor Failure: Issues such as open circuits or burnt contact points prevent the pre-charging circuit from engaging, causing excessive inrush current.
(d) DC Bus Issues (Approximately 12%)
The DC bus stabilizes the energy between the rectifier and inverter units. Abnormalities here can affect the rectifier unit’s operation:
- Overvoltage: A sudden increase in power supply voltage or failure to release motor feedback energy leads to an overvoltage condition.
- Undervoltage: Drop in input voltage or excessive load causes undervoltage.
- Ripple Issues: Aging DC bus capacitors increase ripple, causing instability in the rectifier unit.
(e) Control Circuit Failures (Approximately 5%)
The control circuit, the “brain” of the rectifier unit, can cause false alarms or improper control if damaged:
- Sampling Circuit Failure: Voltage sensor damage can cause incorrect voltage readings.
- Driver Circuit Failure: Failure in the IGBT driver board causes improper switching of IGBTs.
- CPU Board Failure: If the CPU board malfunctions, the rectifier unit may not receive proper start-up instructions.
(f) Environmental and Cooling Issues (Minimal Impact)
Though not a primary cause, environmental and cooling issues can contribute to failure:
- Fan Failure: Fans malfunctioning due to bearing issues lead to overheating of rectifier modules.
- Excessive Dust: Accumulated dust on heat sinks reduces cooling efficiency.
- High Ambient Temperature: High installation temperatures can hinder module cooling.
4. Troubleshooting and Resolution Methods
The troubleshooting process begins with safety preparation and proceeds through a step-by-step diagnosis from external to internal causes:
- Step 1: Check Input Power
Use a multimeter to measure the three-phase voltage, ensuring no phase loss or imbalance. - Step 2: Inspect Rectifier Modules
Test diodes and IGBT modules for shorts or open circuits, replacing faulty components as necessary. - Step 3: Inspect Pre-charging Circuit
Test the pre-charging resistor and contactor for failure, replacing faulty components to restore functionality. - Step 4: Inspect DC Bus
Use a high-voltage probe to measure DC bus voltage, checking for overvoltage, undervoltage, and excessive ripple. - Step 5: Inspect Control Circuits
Use Drive Composer software to analyze fault history, checking sensors, IGBT drivers, and CPU boards for malfunctions. - Step 6: Inspect Cooling and Environment
Check for fan operation, clean dust from heat sinks, and monitor ambient temperatures to ensure proper cooling.
5. Case Studies
- Case 1: Chemical Plant ACS611-70kVA Inverter “LINE CONV” Fault
- Symptoms: Inverter suddenly trips with “LINE CONV” error and 0V DC bus voltage.
- Diagnosis: Short circuit in the diode rectifier bridge.
- Solution: Replaced the damaged rectifier bridge (ABB 6SY7000-0AB42).
- Case 2: Water Plant ACS611-70kVA Inverter “LINE CONV” Fault
- Symptoms: Pre-charging failure during startup.
- Diagnosis: Open circuit in pre-charging contactor.
- Solution: Replaced the pre-charging contactor (ABB A145-30-11).
6. Preventive Measures
- Regularly maintain power supply, rectifier modules, pre-charging circuits, and cooling systems to avoid “LINE CONV” faults.
- Use Drive Composer to monitor system performance and detect early signs of trouble.
7. Conclusion
The “LINE CONV” fault in the ABB ACS611 inverter involves complex interactions between the power supply, hardware, control circuits, and environment. Engineers can effectively troubleshoot and resolve these faults by following a systematic approach and utilizing diagnostic tools. Regular preventive maintenance is crucial to avoid such failures and ensure the long-term reliability of industrial drive systems.