
1. Introduction
Spin coaters are critical tools in microfabrication, material science, and semiconductor laboratories. They rely on high-speed rotation to uniformly spread photoresists or other coating materials onto wafers, glass slides, or substrates. One of the most commonly used systems in this category is the Laurell Technologies spin coater series.
A built-in safety interlock system ensures that the sample does not fly off during rotation. This is achieved by using a vacuum chuck, which secures the wafer or substrate via suction. If the machine does not detect a valid vacuum signal, it will refuse to start the spin cycle and display the warning message:
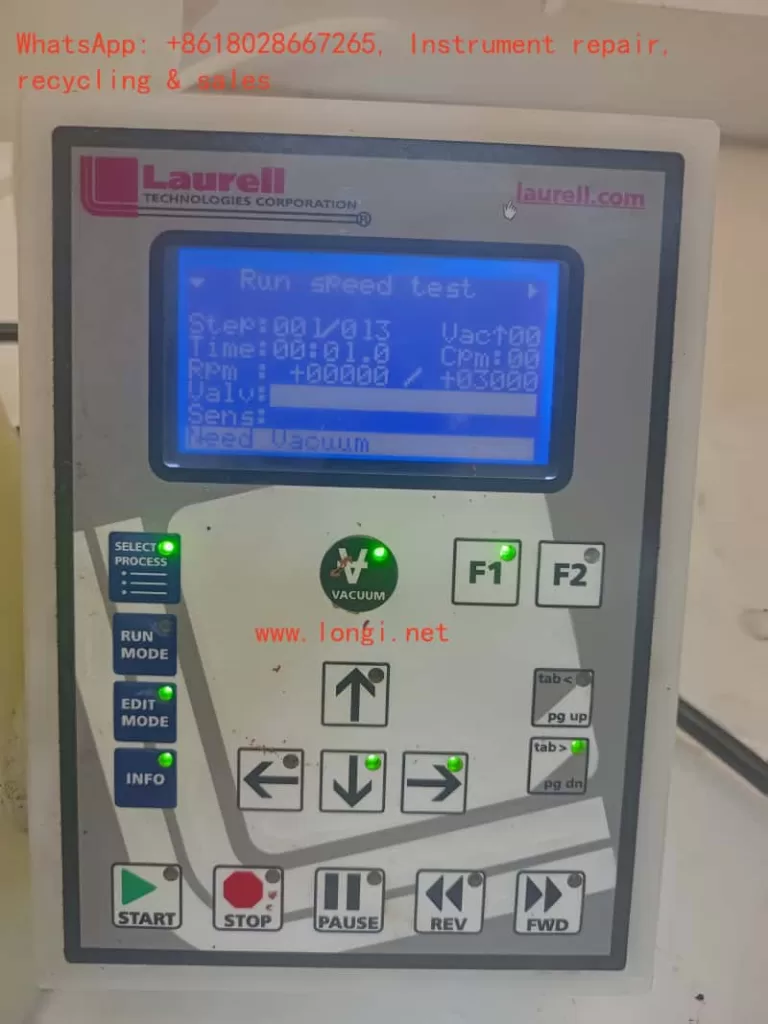
“Need Vacuum”
This safety feature prevents dangerous accidents and sample loss. However, in some situations, operators may encounter a scenario where:
- The sample is firmly held by the vacuum chuck, indicating that the vacuum suction is working.
- But the controller display still shows “Need Vacuum”, and the motor will not rotate.
This contradiction is exactly the case observed by the customer in South Africa, as shown in the photos and video evidence provided.
In this article, we will thoroughly analyze the issue, explain why it happens, and provide a structured troubleshooting guide for engineers, technicians, and laboratory users.
2. How the Vacuum Interlock Works in Laurell Spin Coaters
To understand the problem, one must first understand the design of the vacuum interlock system:
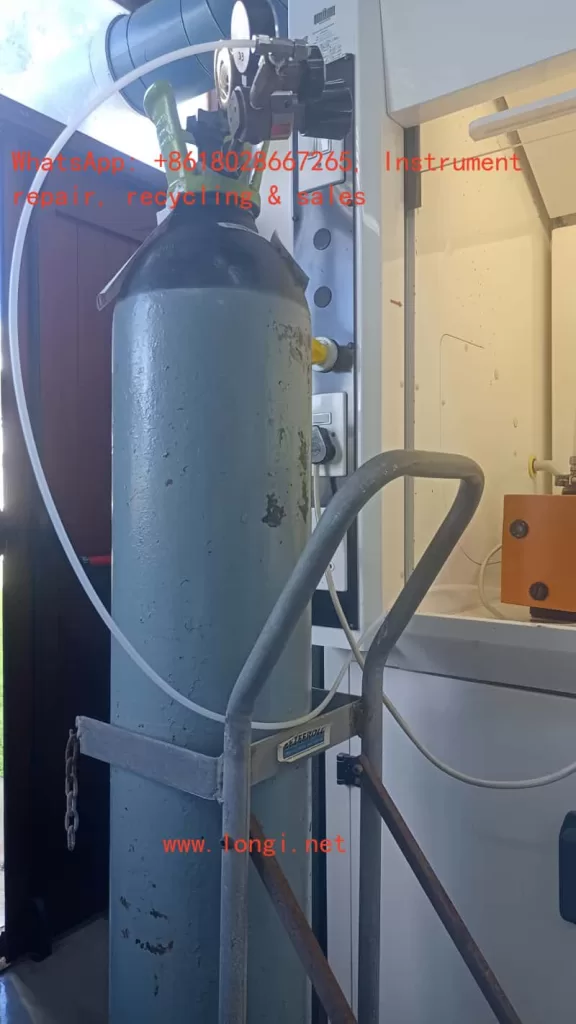
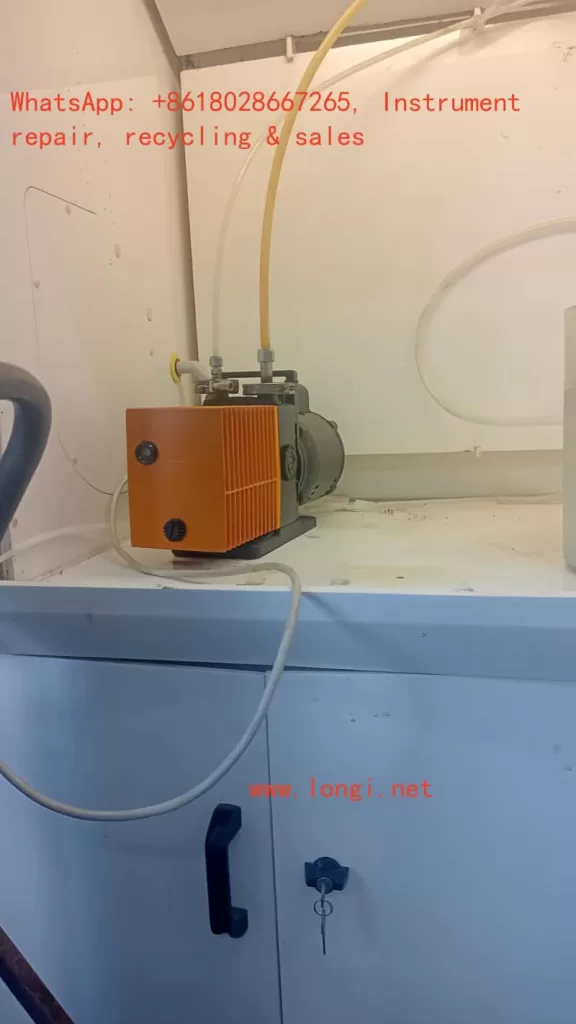
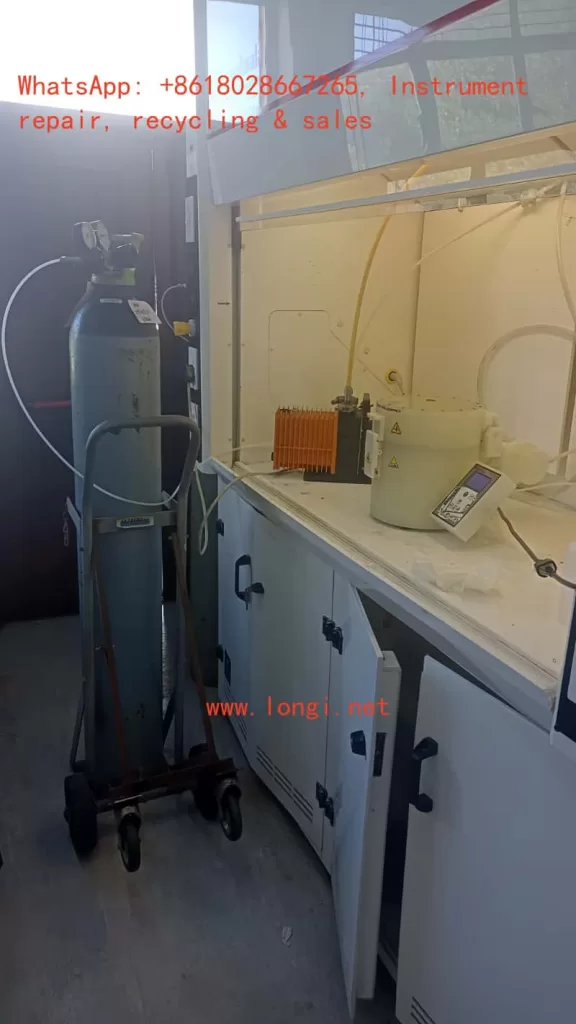
- Vacuum Source
- Usually provided by an external vacuum pump.
- In some labs, a central vacuum line is available.
- The pump draws negative pressure through tubing connected to the spin coater chuck.
- Vacuum Chuck
- A flat plate with small holes that holds the sample by suction.
- When the pump is active, the wafer is tightly fixed to the chuck surface.
- Vacuum Sensor or Switch
- Located inside the spin coater.
- Detects whether the vacuum level is sufficient for safe operation.
- Sends a signal (ON/OFF or analog voltage) to the controller board.
- Controller Logic
- If the vacuum sensor indicates “No Vacuum,” the motor remains locked.
- If vacuum is detected, the program is allowed to start spinning.
Thus, the machine requires both physical vacuum suction AND a valid signal from the sensor.
3. Symptom Observed by the Customer
From the photos and video provided, the following facts were established:
- The sample (a square substrate) is securely attached to the chuck during vacuum operation.
- The vacuum pump and tubing system are operational, as suction is clearly holding the substrate.
- Despite this, the Laurell controller display shows “Need Vacuum” and the spin motor does not activate.
- The operator is stuck at Step 00 in the spin program, unable to proceed further.
This mismatch between actual vacuum state and controller feedback is the root cause of the complaint.
4. Possible Causes of the Problem
4.1 Vacuum Sensor Malfunction
- The vacuum sensor inside the coater may have failed.
- Even though negative pressure exists, the sensor does not detect or report it.
- Sensors can fail due to aging, contamination, or internal electrical faults.
4.2 Wiring or Connection Issues
- The electrical signal from the sensor to the main control board may be interrupted.
- Loose connectors, broken wires, or corrosion can cause signal loss.
- A perfectly working vacuum will not be recognized if the signal path is broken.
4.3 Blocked or Misrouted Sensor Line
- In some Laurell models, the sensor has its own dedicated small tubing.
- If this line is blocked, pinched, or not connected to the correct port, the sensor will not see the vacuum.
- Meanwhile, the chuck still holds the wafer properly.
4.4 Controller I/O Board Failure
- The sensor might be functional, but the control board input channel is defective.
- The vacuum detection signal never registers in the system.
4.5 Incorrect Parameter or Setup Configuration
- Laurell systems allow configuration of Vacuum Interlock settings.
- If the interlock is mistakenly disabled or misconfigured, the machine logic can behave unexpectedly.
- For example, the controller might be waiting for a different signal threshold than what the sensor provides.
5. Evidence from the Video
The customer’s video shows:
- At the beginning, the wafer is firmly attached to the vacuum chuck.
- The operator gently touches or shakes it, and it stays in place.
- This proves that vacuum suction is indeed active.
- However, the spin coater does not proceed with rotation, confirming that the problem lies in signal recognition, not actual suction.
This video evidence eliminates issues like:
- Faulty vacuum pump.
- Leaking tubing.
- Improper wafer placement.
Therefore, the focus must shift to detection, feedback, and controller logic.
6. Step-by-Step Troubleshooting Guide
Step 1: Confirm Vacuum Pump Operation
- Ensure the pump is turned on.
- Measure vacuum level at the pump output with a gauge (should meet Laurell’s specifications).
Step 2: Verify Chuck Suction
- Place a sample or even a flat piece of glass.
- If it is firmly held, the vacuum path from pump → tubing → chuck is confirmed.
Step 3: Inspect Sensor Tubing (if applicable)
- Some models use a separate small tube leading to the vacuum sensor.
- Make sure it is not disconnected, clogged, or leaking.
Step 4: Check Sensor Signal
- Disconnect the electrical connector from the sensor.
- Measure output with a multimeter when vacuum is applied.
- If the signal does not change, the sensor is defective.
Step 5: Test Wiring Integrity
- Use continuity testing on the wiring harness from sensor to controller.
- Repair or replace cables if broken.
Step 6: Bypass/Short Test (For Verification Only)
- Short the sensor signal input to simulate “vacuum present.”
- If the machine starts spinning, the controller is fine but the sensor or wiring is faulty.
Step 7: Check Controller Settings
- Access the system configuration menu.
- Verify that Vacuum Interlock is enabled and thresholds are correct.
- If necessary, temporarily disable interlock for diagnostic purposes (not recommended for normal operation).
Step 8: Controller Board Diagnosis
- If sensor and wiring are confirmed good, the controller input board may be defective.
- Replacement or repair of the I/O board is required.
7. Practical Recommendations
- Replace the vacuum sensor if it shows no electrical response under suction.
- Check and secure wiring connectors to eliminate intermittent signals.
- Clean the sensor line to remove possible blockages.
- Review the configuration in the Laurell menu to ensure interlock is properly set.
- Contact Laurell service if controller hardware is suspected faulty.
8. Why This Problem Matters
This situation highlights an important principle in equipment maintenance:
- Mechanical performance does not guarantee electrical recognition.
- Even though the vacuum holds the wafer physically, the safety system relies on an independent electrical or pneumatic feedback mechanism.
- If the feedback loop is broken, the machine assumes unsafe conditions and refuses to operate.
Such protective interlocks are common in high-speed rotating machinery, where user safety must always be prioritized.
9. Conclusion
The South African customer’s Laurell spin coater issue is a textbook case where vacuum is physically present, but the system still displays “Need Vacuum.”
- The video clearly shows that the wafer is tightly held, ruling out pump or chuck problems.
- Therefore, the most probable causes are vacuum sensor failure, wiring disconnection, or controller input malfunction.
- A systematic troubleshooting procedure should start from confirming sensor response, checking wiring, and reviewing interlock settings, before finally suspecting controller board faults.
Ultimately, the problem is not the vacuum itself, but the failure of the machine to recognize and accept the vacuum signal.
By following the structured troubleshooting flowcharts and step-by-step guide, laboratory staff can isolate the fault, repair it effectively, and restore the spin coater to full working condition.