Posted on

User Guide for Hitachi Ion Sputter Coater MC1000/MC100 Series

1. Introduction and Instrument Overview

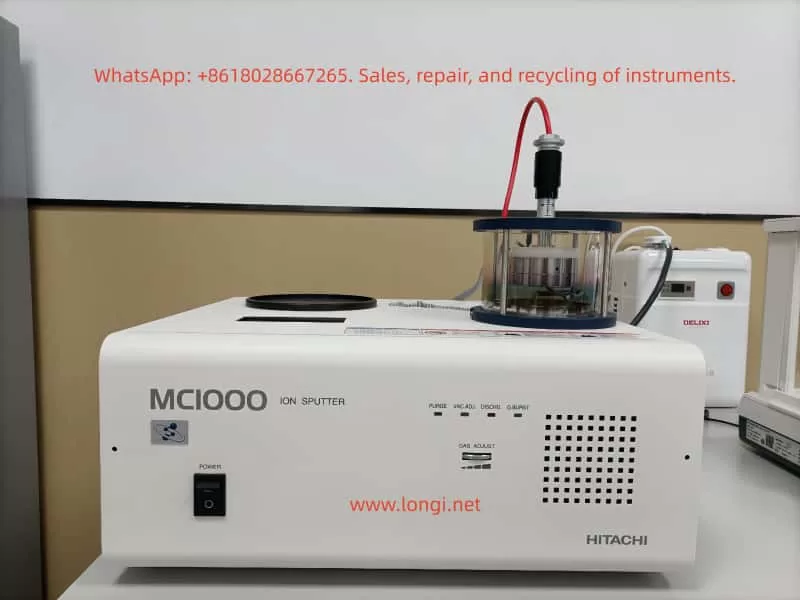
The Hitachi MC1000 Ion Sputter Coater is a benchtop magnetron sputtering coating device specifically designed by Hitachi High-Tech Corporation for the preparation of scanning electron microscope (SEM) samples. It is used to deposit extremely thin (1 – 30 nm) conductive metal films on the surfaces of non-conductive samples, eliminating the charging effect during SEM observation and improving the quality of secondary electron imaging.

Core Advantages:

  • Utilizes magnetron sputtering technology to achieve low-temperature, low-damage, and high-particle-fineness coating.
  • Particularly friendly to heat-sensitive, biological, polymer, and other sensitive samples.
  • Features a 7-inch color LCD touch screen for operation and supports multiple languages.
  • The Recipe function allows for the storage of multiple sets of commonly used parameters for one-click recall.
  • Supports an optional film thickness monitoring unit for precise control of film thickness.
  • Highly modern and automated operation.
  • Applicable in fields such as materials science, biology, geology, semiconductors, nanotechnology, and failure analysis.
smart

2. Safety Precautions

Argon Gas Safety:

  • Ensure the operating environment is well-ventilated or install an oxygen concentration detector.

High-Voltage Electrical Risk:

  • Never open the cover or touch internal components during operation.

Vacuum Safety:

  • Always break the vacuum before opening the sample chamber.

Target Material Toxicity:

  • Wear gloves and a mask when replacing target materials.

Radiation:

  • A small amount of X-rays is generated during the sputtering process, but the equipment is shielded.

Prohibited Actions:

  • Never use oxygen or other active gases.
  • Do not place flammable, explosive, or strongly magnetic substances on the sample stage.
  • Do not leave the equipment unattended during operation.

Emergency Situations:

  • Immediately cut off the power supply, close the main argon gas valve, and evacuate personnel.

3. Technical Specifications

ItemSpecification Details
ModelMC1000
Sputtering MethodDC magnetron sputtering
Target Sizeφ50 mm × 0.5 mm
Sample StageStandard φ50 – 60 mm, rotatable; maximum sample height 20 mm
Target-Sample DistanceFixed at 30 mm
Ultimate Vacuum≤5×10⁻⁴ Pa
Working Vacuum5 – 10 Pa
Sputtering CurrentAdjustable from 0 – 40 mA
Sputtering VoltageAdjustable from 0 – 1.5 kV
Coating RateAu: ~35 nm/min; Au/Pd: ~25 nm/min; Pt: ~15 nm/min; Pt/Pd: ~20 nm/min
Film Thickness ControlTime control or optional film thickness meter
Vacuum PumpTurbo molecular pump + rotary mechanical pump
Operating GasHigh-purity argon (above 99.99%)
Gas Flow ControlAutomatic mass flow controller (MFC)
Display/Operation7-inch color LCD touch screen
Recipe StorageUp to 5 – 10 sets
Power SupplyAC 100 – 240 V, 50/60 Hz, single-phase, approximately 1.5 kVA
DimensionsApproximately 450 (W) × 391 (D) × 390 (H) mm
WeightMain unit approximately 25 kg, pump set approximately 28 kg
Operating EnvironmentTemperature 15 – 30℃, humidity ≤85% (no condensation)

4. Instrument Structure and Panel Description

Front View:

  • 7-inch touch screen
  • Sample chamber glass cylinder
  • Target height adjustment knob (present on some older models)
  • Main power switch

Rear Panel:

  • Argon gas inlet
  • Vacuum pump power and signal lines
  • Main power socket
  • Exhaust port

Internal Structure:

  • Magnetron target
  • Sample stage
  • Quartz crystal oscillator film thickness probe (optional)

5. Installation and First-Time Startup Preparation

  • Place the equipment on a stable laboratory bench, away from vibration sources.
  • Use a three-prong socket with a ground wire, with a grounding resistance ≤100 Ω.
  • Connect the argon gas cylinder and set the secondary pressure to 0.03 – 0.05 MPa.
  • Check the vacuum pump oil level.
  • Conduct an initial vacuum pumping test and observe whether it reaches the 10⁻³ Pa level.

6. Detailed Operation Steps

6.1 Startup and Preparation

  • Open the main valve of the argon gas cylinder and set the secondary pressure to 0.04 MPa.
  • Connect the main unit power.
  • The touch screen lights up, and the main interface is displayed.

6.2 Sample Placement

  • Ensure the chamber is vented to atmospheric pressure.
  • Lift the glass cylinder cover.
  • Secure the sample on the sample stage.
  • Adjust the target-sample distance.
  • Close the glass cylinder.

6.3 Parameter Setting

  • Click “Process” or “Recipe”.
  • Set parameters such as target material type, sputtering current, and sputtering time or film thickness.
  • Save as a Recipe.

6.4 Starting Coating

  • Click “START”.
  • The equipment automatically performs the coating process.

6.5 Sample Retrieval and Shutdown

  • After coating is complete, the equipment automatically breaks the vacuum.
  • Open the glass cylinder and remove the sample.
  • Close the glass cylinder, click “Vent” or long-press “STOP”.
  • Turn off the power switch and close the main valve of the argon gas cylinder.

7. Recommended Common Recipe Parameters

Application ScenarioTarget MaterialCurrent (mA)Time (s)Estimated Film Thickness (nm)Remarks
Conventional SEMAu20608 – 12Economical
High-resolution FE-SEMPt or Pt/Pd25905 – 10Finest particles
Biological SamplesAu/Pd15 – 2012010 – 15Low-temperature priority
EDS Energy-Dispersive Spectroscopy AnalysisCarbon evaporation (optional)10 – 20Avoid metal peak interference
Thick or Large SamplesAu3018020 – 30Requires optional large chamber

8. Target Replacement Steps

  • Completely break the vacuum and open the glass cylinder.
  • Wear gloves and use an Allen wrench to loosen the target pressure ring.
  • Remove the old target material.
  • Place the new target material.
  • Tighten the pressure ring.
  • Close the glass cylinder, pump down the vacuum, and check for leaks.
  • Run an empty coating process once.
  • Target Lifespan: An Au target can typically be used for approximately 500 – 800 coating sessions.

9. Daily Maintenance and Care

Maintenance ItemFrequencyMethod
Cleaning the Sample Chamber Glass CylinderAfter each useWipe with a lint-free cloth and isopropyl alcohol or acetone
Checking O-ringsWeeklyVisually inspect and lightly coat with silicone grease
Replacing Vacuum Pump OilEvery 300 – 500 hoursDrain the oil → Clean the oil tank → Add new oil
Molecular Pump MaintenanceEvery 1 – 2 yearsReturn to the factory or have a professional regenerate it
Cleaning the Target SurfaceWhen replacing the targetPolish the oxide layer with fine sandpaper
Overall Dust RemovalMonthlyClean with a vacuum cleaner and a soft brush
Checking the Argon Gas PipelineMonthlyCheck for leaks at the joints

10. Common Troubleshooting

Fault PhenomenonPossible CausesSolutions
Failure to IgniteInsufficient argon pressure / Target oxidation / Excessive vacuumCheck the argon pressure; perform an empty coating to remove oxidation; reduce the vacuum
Unstable or Low CurrentDepleted target material / Poor contactReplace the target material; check the tightness of the pressure ring
Inability to Achieve VacuumInsufficient pump oil / Leakage / Aging O-ringsAdd pump oil; check for leaks; replace O-rings
Discrepancy Between Coated Film Thickness and Set ValueDirty film thickness meter probe / Change in target material coating rateClean the quartz crystal oscillator; recalibrate the film thickness meter
Unresponsive Touch ScreenPower fluctuations / Software crashRestart the main unit; contact after-sales service
Sample Overheating or DamageExcessive current / Prolonged coating timeReduce the current; perform coating in multiple sessions

11. Optional Accessories Introduction

  • Film Thickness Monitoring Unit: Real-time measurement using a quartz crystal oscillator with an accuracy of ±0.1 nm.
  • Large Sample Chamber: Sample diameter up to 150 mm and height 30 – 50 mm.
  • Carbon Evaporation Attachment: Used for EDS analysis.
  • Various Target Materials: Pt, Au/Pd, Pt/Pd, etc.
  • Automatic Transformer: Supports a wide voltage range of 115 – 240 V.

12. Precautions and Best Practices

  • A new target material must undergo an empty coating process for 20 – 30 seconds during its first use.
  • For biological samples, it is recommended to use a Pt target with a low current.
  • When the equipment is not in use for an extended period, start it up and pump down the vacuum for 1 hour every week.
  • Record the coating parameters and SEM imaging results for each session.
  • For the complete official Chinese manual, please contact Hitachi High-Tech China or local agents.