
Introduction
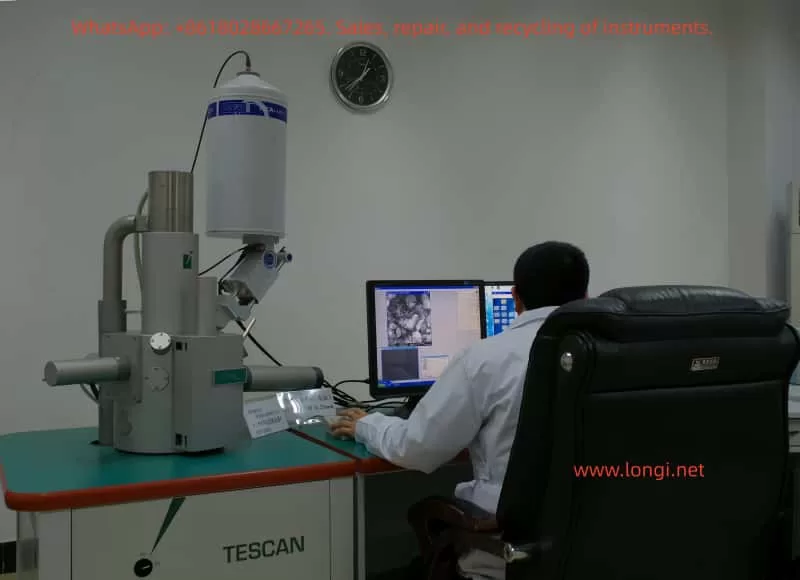
The TESCAN VEGA3 Scanning Electron Microscope (SEM) is a high-performance, multifunctional microscopic analysis tool widely used in materials science, geology, biology, and other fields. Its high-resolution imaging capabilities, diverse detector options, and flexible operating modes make VEGA3 an essential piece of equipment for scientific research and industrial testing. This guide aims to provide users with a comprehensive usage guide for the VEGA3 by synthesizing information from official manuals and operational guidelines, helping users quickly master VEGA3’s operational techniques and improve experimental efficiency and imaging quality.
I. Equipment Overview and Safety Operations
1.1 Equipment Overview
The TESCAN VEGA3 SEM integrates an advanced electron optical system, vacuum system, detector array, and a user-friendly software interface, supporting multiple operating modes including high vacuum, low vacuum, and environmental SEM (ESEM). Its core components include an electron gun, condenser lenses, objective lenses, scanning coils, a sample chamber, detector arrays (such as SE, BSE, CL, EDS, etc.), and a vacuum system.
1.2 Safety Operation Guidelines
Before using the VEGA3, it is crucial to strictly adhere to safety operation guidelines to ensure the safety of personnel and equipment.
- Personal Protection: Wear lab coats, gloves, and safety glasses when operating to avoid direct contact with the electron beam and samples.
- Electrical Safety: Ensure the equipment is properly grounded and avoid operating in damp or flammable environments.
- Vacuum System: Follow the proper procedures for evacuating and venting the chamber to prevent damage to samples and detectors.
- Sample Handling: Secure samples on the sample holder using conductive adhesive or carbon tape, ensuring the sample surface is clean and free of contaminants.
- Emergency Shutdown: Familiarize yourself with the location and use of the emergency shutdown button to quickly cut off power in case of emergencies.
II. Startup and Initialization
2.1 Startup Procedures
- Power Check: Confirm that the equipment’s power supply is connected and the voltage is stable at 220V.
- Computer Startup: Turn on the computer connected to the SEM and wait for the system to boot up.
- SEM Main Power: Turn the SEM main switch to the “ON” position and wait for the system to complete its self-check.
- Software Launch: Double-click the VEGA3 software icon on the computer to launch the control software.
- User Login: Enter the username and password as prompted to log in to the system.
2.2 System Initialization
- Hardware Self-Check: The system will automatically perform a hardware self-check upon startup, including the electron gun, detectors, and vacuum system.
- Software Configuration: Configure detector types, accelerating voltage, beam current, and other parameters in the software interface according to experimental requirements.
- Vacuum Evacuation: Click the “PUMP” button to begin evacuating the chamber, waiting for the vacuum level to reach the required level (typically less than 10^-5 Torr).
- Filament Heating: In the “Electron Beam” panel, click the “Heat” button to heat the filament and prepare for electron beam emission.
III. Sample Preparation and Loading
3.1 Sample Preparation
- Sample Selection: Choose appropriate samples based on experimental objectives, ensuring the sample surface is flat and clean.
- Conductive Treatment: For non-conductive samples, perform gold or carbon coating to improve conductivity.
- Sample Fixation: Secure the sample onto the sample holder using conductive adhesive or carbon tape, ensuring the sample remains stable during operation.
3.2 Sample Loading
- Venting: Click the “VENT” button to vent the chamber and open the sample chamber door.
- Sample Installation: Place the sample holder with the sample into the sample chamber, ensuring good contact between the holder and the chamber bottom.
- Evacuation: Close the sample chamber door and click the “PUMP” button to re-evacuate the chamber.
- Sample Positioning: Use the sample stage control panel in the software interface to adjust the sample position, centering it within the electron beam scan area.
IV. Imaging Modes and Parameter Settings
4.1 Imaging Mode Selection
The VEGA3 supports multiple imaging modes, including secondary electron imaging (SEI), backscattered electron imaging (BSEI), and cathodoluminescence imaging (CLI). Select the appropriate imaging mode based on experimental requirements.
- SEI Mode: Suitable for observing sample surface morphology with high resolution.
- BSEI Mode: Suitable for observing sample composition distribution, with contrast related to atomic number.
- CLI Mode: Suitable for observing sample luminescence characteristics, requiring a cathodoluminescence detector.
4.2 Parameter Settings
- Accelerating Voltage: Set the appropriate accelerating voltage (typically 5-30kV) based on sample type and imaging requirements.
- Beam Current: Adjust the beam current to control signal intensity and resolution; higher beam currents yield stronger signals but may reduce resolution.
- Working Distance: Adjust the working distance based on sample height and imaging requirements, affecting depth of field and resolution.
- Scan Speed: Adjust the scan speed based on signal intensity and imaging quality; slower scan speeds yield better image quality but longer acquisition times.
- Detector Selection: Select the appropriate detector based on the imaging mode, such as SE detector or BSE detector.
V. Image Acquisition and Optimization
5.1 Image Acquisition
- Focusing: Use the “WD” knob to adjust the working distance and achieve a clear image.
- Stigmation Correction: Click the “Stig” button to perform stigmation correction and eliminate astigmatism in the image.
- Contrast and Brightness Adjustment: Adjust contrast and brightness in the software interface to enhance image detail.
- Image Acquisition: Click the “Photo” button to acquire the image and save it in the specified format (e.g., TIFF, JPEG).
5.2 Image Optimization
- Noise Reduction: Use image processing software to reduce noise in the acquired images and improve image quality.
- Contrast Enhancement: Enhance image details by adjusting contrast and brightness.
- Filtering: Apply filtering algorithms such as Gaussian filtering or median filtering to reduce noise and artifacts in the image.
- Pseudocolor Processing: Apply pseudocolor processing to grayscale images to enhance visualization.
VI. Advanced Functions and Applications
6.1 Energy Dispersive Spectroscopy (EDS)
The VEGA3 SEM can be equipped with an energy dispersive spectrometer (EDS) for elemental analysis and quantitative determination of samples.
- Parameter Settings: Set acquisition time, beam current, and other parameters in the EDS software interface.
- Data Acquisition: Click the “Start” button to begin acquiring EDS data.
- Data Analysis: Use EDS analysis software to process and analyze the acquired EDS data, obtaining elemental composition and content information of the sample.
6.2 Electron Backscatter Diffraction (EBSD)
For VEGA3 SEMs equipped with an EBSD detector, electron backscatter diffraction analysis can be performed to study the crystal structure and orientation of samples.
- Sample Preparation: Ensure the sample surface is flat, stress-free, and properly polished.
- Parameter Settings: Set accelerating voltage, working distance, and other parameters in the EBSD software interface.
- Data Acquisition: Click the “Start” button to begin acquiring EBSD data.
- Data Analysis: Use EBSD analysis software to process and analyze the acquired data, obtaining crystal structure, orientation, and phase distribution information of the sample.
6.3 3D Reconstruction and Stereoscopic Imaging
The VEGA3 SEM supports 3D reconstruction and stereoscopic imaging functions, enabling 3D reconstruction of sample surface morphology.
- Series Image Acquisition: Acquire a series of images from different perspectives by adjusting the sample stage angle or position.
- Image Registration: Use image processing software to register the acquired images, ensuring precise alignment between images.
- 3D Reconstruction: Apply 3D reconstruction algorithms to process the registered images and generate a 3D model of the sample.
- Stereoscopic Display: Display the 3D model using stereoscopic display techniques (e.g., anaglyph, polarized stereoscopic) to enhance spatial perception.
VII. Maintenance and Troubleshooting
7.1 Routine Maintenance
- Chamber Cleaning: Regularly clean the interior of the sample chamber to remove dust and contaminants.
- Vacuum System Inspection: Regularly inspect the vacuum pump oil level and vacuum level to ensure proper operation of the vacuum system.
- Consumable Replacement: Replace consumables such as filaments and detector windows as needed based on usage.
- Software Updates: Regularly check for and install updates for the SEM control software and analysis software to ensure system stability and functionality.
7.2 Troubleshooting
- Inability to Evacuate: Check if the vacuum pump is operating normally, if there are leaks in the vacuum lines, and if the sample chamber door is properly closed.
- Poor Image Quality: Check if the electron gun is properly aligned, if the detectors are functioning correctly, and if the parameter settings are reasonable.
- System Errors: Follow the system error messages to identify and resolve issues, such as restarting the software or replacing hardware components.
- Unresponsive Operation: Check the connection between the computer and SEM, if the software is frozen, and try restarting the software or computer.
VIII. Conclusion and Future Prospects
The TESCAN VEGA3 Scanning Electron Microscope, as a high-performance and multifunctional microscopic analysis tool, plays a crucial role in various fields such as materials science, geology, and biology. Through this usage guide, users can quickly master the basic operational techniques, imaging mode selection, parameter settings, and advanced function applications of the VEGA3. In the future, with the continuous development of science and technology, the VEGA3 SEM will continue to upgrade and improve its functional performance, providing users with more convenient, efficient, and precise microscopic analysis solutions. We also anticipate that more researchers will fully leverage the advantages of the VEGA3 SEM to conduct innovative research work and drive scientific progress and development in related fields.