
Introduction
The HTC PAL autosampler produced by CTC Analytics AG is a highly flexible and powerful device widely used in fields such as chemical analysis, pharmaceuticals, and environmental monitoring. As a key tool for automated sample handling and injection, the HTC PAL not only enhances analytical efficiency but also ensures the accuracy and repeatability of results. This guide provides users with a comprehensive and practical manual covering aspects from device overview, pre-operation preparations, daily operations, maintenance, to troubleshooting.
Chapter 1 Device Overview
1.1 Introduction to the HTC PAL Autosampler
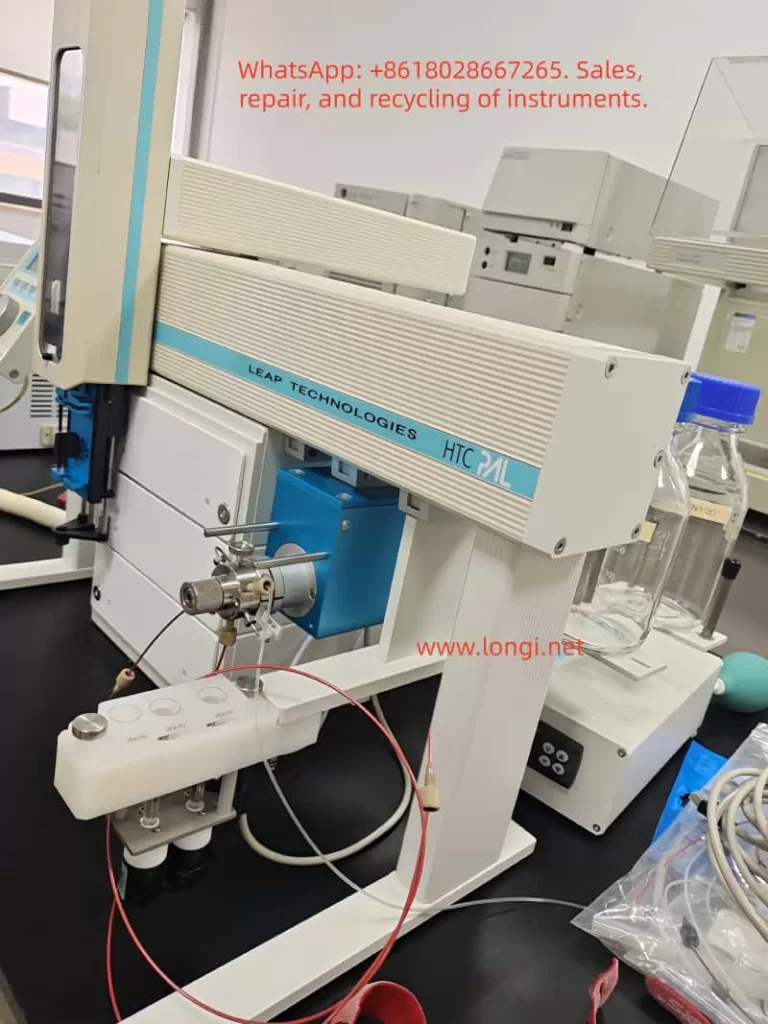
The HTC PAL autosampler is a robotic system based on X, Y, and Z-axis movements, specifically designed for chromatographic analyses (such as HPLC and GC). It can automatically complete sample picking, injection, and cleaning processes. Its highly customizable configurations and flexible operating modes enable it to adapt to a variety of analytical requirements.
1.2 Device Components
The HTC PAL autosampler mainly consists of the following parts:
- X, Y, and Z-axis motion system: Responsible for the precise picking and injection of samples.
- Injection unit: Includes syringes and needles for sample aspiration and injection.
- Liquid injection valve: Controls the path of sample entry into the chromatographic system.
- Rapid cleaning station: Used for cleaning syringes to prevent cross-contamination.
- Keypad terminal: The user interface for setting up and monitoring device operation.
- Safety shield: Protects operators from potential hazards.
1.3 Technical Specifications
- Sample capacity: Depending on the configuration, it can support various trays and microplates, with sample vial capacities ranging from a few milliliters to tens of milliliters.
- Injection volume range: 10 to 100 µL (standard configuration), with a minimum of 0.5 µL and a maximum of 5000 µL (through optional configurations).
- Accuracy and repeatability: <0.5% RSD (Relative Standard Deviation) for peak areas from 10 µL to 100 µL, and <1.0% RSD for volumes <10 µL.
- Injection cycle time: Typically 20 to 60 seconds, depending on plunger speed, injection volume, and cleaning cycle.
Chapter 2 Pre-Operation Preparations
2.1 Safety Precautions
- Electrical safety: Ensure the device is properly grounded to avoid electrical shocks. Do not use damaged power cords or sockets.
- Operational safety: During operation, avoid placing hands or other objects near moving parts to prevent injuries.
- Chemical safety: Understand and comply with the MSDS (Material Safety Data Sheets) for all chemicals used, and wear appropriate protective gear.
- Device protection: Do not modify the device structure or electrical connections without authorization, as this may affect device performance and safety.
2.2 Device Unboxing and Inspection
- Confirm that all accessories are complete and undamaged.
- Check the device exterior for any visible damage.
- Verify the packing list to ensure all accessories and documentation have been received.
2.3 Device Installation
2.3.1 Installation Environment Requirements
- Temperature and humidity: The device should operate within a temperature range of 4 to 40°C and a humidity environment below 75% RH.
- Workbench: A clean, flat, and stable workbench to ensure stable device operation.
- Power supply and grounding: Provide a stable power supply and ensure proper grounding of the device.
2.3.2 Installation Steps
- Place the device: Position the HTC PAL autosampler in the predetermined location, ensuring sufficient space for operation and maintenance.
- Install the injection unit: Carefully install the injection unit according to the illustrations and steps in the manual, ensuring all connections are secure and reliable.
- Install the keypad terminal: Mount the keypad terminal near the device for easy operator monitoring and setup.
- Connect the power supply: Plug the device power cord into a compliant power socket and ensure proper grounding.
- Electrical connections: Correctly connect all electrical lines, including those for the injection valve and cleaning station, according to the illustrations in the manual.
2.4 Device Initialization
- Power on: Turn on the device power, and the keypad terminal will display the initial menu.
- System self-check: The device will automatically perform a system self-check to verify the normal operation of all components.
- Parameter setup: Set the basic parameters of the device according to actual needs, such as language, date, and time.
- Object positioning: Follow the steps in the manual to position key objects of the device (such as the tray holder and injection valve) to ensure accurate identification of component positions by the device.
Chapter 3 Daily Operations
3.1 Sample Preparation
- Sample vial selection: Choose appropriate sample vials and caps based on sample properties and analytical requirements.
- Sample loading: Accurately load samples into the sample vials, avoiding cross-contamination.
- Sample tray configuration: Configure suitable sample trays and microplates according to the quantity and type of samples.
- Barcode labeling: Affix barcode labels to sample vials for automatic identification and tracking by the device.
3.2 Method Creation and Editing
Method Creation
- Select the “Method” menu on the keypad terminal to enter the method creation interface.
- Enter the method name and select the required syringe and cycle type (e.g., LC-Inj).
- Set method parameters, including sample volume, injection speed, and cleaning steps.
- Save the method for future use.
Method Editing
- Select the method to be edited from the method list.
- Modify method parameters, such as adjusting the injection volume or cleaning time.
- Save the modified method.
3.3 Task Queue Management
Task Creation
- Select the “Task Queue” menu on the keypad terminal to enter the task creation interface.
- Select the sample tray and sample range to be analyzed.
- Choose the analytical method and set task parameters (e.g., start time, priority).
- Add the task to the task queue.
Task Initiation
- Select the task to be started in the task queue interface.
- Click the “Start” button, and the device will automatically perform the analysis according to the task settings.
Task Monitoring
- View the task status (e.g., in progress, completed, canceled) in the task queue interface.
- Pause, resume, or cancel tasks as needed.
3.4 Daily Operation Precautions
- Sample order: Ensure that the order of samples in the tray matches the settings in the task queue.
- Syringe cleaning: Regularly clean syringes to prevent cross-contamination.
- Device status monitoring: Closely monitor the device operation status to promptly identify and resolve issues.
- Data backup: Regularly back up important data and methods on the device to prevent loss.

Chapter 4 Maintenance
4.1 Daily Maintenance
- Clean the device: Regularly clean the device exterior and internal components to prevent the accumulation of dust and dirt.
- Check syringes: Regularly inspect the sealing and flexibility of syringes and replace them if necessary.
- Lubricate moving parts: Lubricate moving parts according to the recommendations in the manual to ensure smooth device operation.
- Check electrical connections: Regularly inspect all electrical connections for firmness and reliability to avoid poor contact.
4.2 Periodic Maintenance
- Replace consumables: Regularly replace consumables (such as syringe needles and seals) according to the recommendations in the manual.
- Calibrate the device: Regularly calibrate the device to ensure the accuracy and repeatability of analytical results.
- Software upgrade: Promptly upgrade the device software according to notifications from CTC Analytics AG to obtain the latest features and improvements.
4.3 Maintenance Plan
- Daily maintenance: Clean the device exterior and check the syringe status.
- Weekly maintenance: Lubricate moving parts and check electrical connections.
- Monthly maintenance: Replace consumables and calibrate the device.
- Annual maintenance: Conduct a comprehensive inspection of device performance and perform a software upgrade (if necessary).
Chapter 5 Troubleshooting
5.1 Common Faults and Solutions
5.1.1 No Detector Signal
Possible causes:
- Syringe blockage or damage.
- Incorrect installation of the injection valve needle guide or seal.
- Incorrect connection of injection valve ports.
Solutions:
- Clean or replace the syringe.
- Reinstall the injection valve needle guide and seal.
- Check and reconnect the injection valve ports.
5.1.2 Sample Not Injected
Possible causes:
- Incorrect setting of the injection needle penetration depth.
- Insufficient sample volume.
- Incorrect installation of the injection valve rotor.
Solutions:
- Adjust the injection needle penetration depth.
- Increase the sample volume.
- Reinstall the injection valve rotor, ensuring the correct orientation.
5.1.3 Injection Unit Collision
Possible causes:
- Incorrect object positioning.
- Incorrect setting of the injection needle Z-axis coordinate.
Solutions:
- Reposition objects to ensure accurate positioning.
- Adjust the injection needle Z-axis coordinate.
5.2 Advanced Troubleshooting
For more complex faults, technical support from CTC Analytics AG may be required:
- Contact technical support: When unable to resolve the fault independently, promptly contact the technical support team of CTC Analytics AG, providing a detailed fault description and device information.
- Remote assistance: Under the guidance of the technical support team, perform remote fault diagnosis and repair.
- On-site service: For faults requiring on-site repair, arrange for technicians from CTC Analytics AG to visit the site for maintenance.
Chapter 6 Advanced Features and Applications
6.1 Synchronous and Output Signals
The HTC PAL autosampler supports synchronous and output signal functions, enabling synchronous operation with other devices (such as chromatographs and data acquisition systems):
- Synchronous signals: Used to control the device to wait or continue executing sample processing steps at specific time points.
- Output signals: Used to send status or completion signals to external devices, indicating the completion of specific processing steps.
6.2 Custom Cycles and Macros
The HTC PAL autosampler supports user-defined cycles and macro functions to meet more complex analytical requirements:
- Custom cycles: Users can create custom sample processing cycles according to actual needs, including specific injection, cleaning, and movement steps.
- Macro functions: Through macro functions, users can combine multiple operation steps into a single macro command to simplify the operation process.
6.3 Multitasking and Priority Settings
The HTC PAL autosampler supports multitasking functionality, enabling the simultaneous management of multiple sample analysis tasks:
- Task priority: Users can set priorities for different tasks to ensure that important tasks are executed first.
- Task scheduling: The device automatically schedules the execution order of tasks based on task priority and start time.
Chapter 7 Conclusion and Outlook
7.1 Conclusion
This guide provides a detailed introduction to the user manual of the CTC Analytics AG HTC PAL autosampler, covering aspects from device overview, pre-operation preparations, daily operations, maintenance, to troubleshooting. Through the guidance in this guide, users can better understand and use the HTC PAL autosampler, improving analytical efficiency and result accuracy.
7.2 Outlook
With the continuous development of analytical technology, the HTC PAL autosampler will continue to play an important role in fields such as chemical analysis, pharmaceuticals, and environmental monitoring. In the future, the HTC PAL autosampler is expected to further integrate intelligent and automated functions, providing a more convenient and efficient user experience. Meanwhile, with the application of new materials and technologies, the performance and stability of the HTC PAL autosampler will also be further enhanced.