
Preface: Overview of Dissolved Oxygen Measurement Technology and Instruments
Dissolved oxygen (DO) is a crucial parameter in water quality monitoring, reflecting the self-purification capacity of water bodies and the health of ecosystems. The Hach Sension6 portable dissolved oxygen meter employs polarographic sensor technology, offering a measurement range of 0-20 mg/L (ppm) and 0-200% saturation, with an accuracy of 0.01 mg/L and 0.1% saturation. It supports dual power supply options (6-12V adapter or 4 AA alkaline batteries), complies with an IP67 protection rating, and features built-in data storage functionality. Data can be transferred to a computer or printer via an RS232 interface. This guide aims to assist users in comprehensively mastering the instrument’s operation, maintenance, and troubleshooting methods.
Chapter 1: Instrument Structure and Function Details
1.1 Instrument Composition and Standard Accessories
Standard Configuration:
- Main unit (including electrode holder)
- Dissolved oxygen electrode
- Power adapter (Product No.: 9185600)
- 4 AA alkaline batteries
- Data transfer cable (RS232 port, black)
- Operation manual and certificate of conformity
Optional Accessories:
- BOD measurement kit (Product No.: 51971-00)
- 100 mg/L dissolved oxygen standard solution (100 mL, Product No.: 21503-42)
- Citizen PN60 micro-printer (Product No.: 26687-00)
- Spare dissolved oxygen electrode membrane (4/pkg, Product No.: 27584-00)
1.2 Instrument Technical Specifications
Measurement Performance:
- Measurement range: 0~20 mg/L (ppm), 0~200% saturation
- Resolution: 0.01 mg/L, 0.1% saturation
- Accuracy: ±0.1 mg/L or ±1.5% of reading (whichever is greater)
- Response time: <30 seconds to reach 90% of final value (at 25°C water sample)
Environmental Adaptability:
- Operating temperature: 0~50°C
- Storage temperature: -20~60°C
- Protection rating: IP67 (dust-tight and waterproof)
- Power supply: 6-12V DC adapter or 4 AA alkaline batteries
- Battery life: Approximately 6 months (under normal use)
Physical Characteristics:
- Dimensions: 21.2 × 8.7 × 4.2 cm
- Weight: Approximately 500 g (including batteries)
- Display: 4-digit LCD, 1.5 cm character height
1.3 Keyboard Function Details
Main Function Keys:
- SETUP/CE: Enter setup menu or clear current input
- READ/ENTER: Confirm selection or start measurement
- EXIT: Exit current menu or cancel operation
Auxiliary Function Keys:
- CONC%: Switch between concentration (mg/L) and saturation (%) display
- STORE: Store current measurement data
- RECALL: Retrieve historically stored data
- TIME/DATE: View or set time and date
- PRINT: Print data via RS232 interface
Navigation Keys:
- ▲/▼: Move up or down in the menu to select items
Chapter 2: Initial Instrument Setup and Calibration
2.1 Power Management and Battery Installation
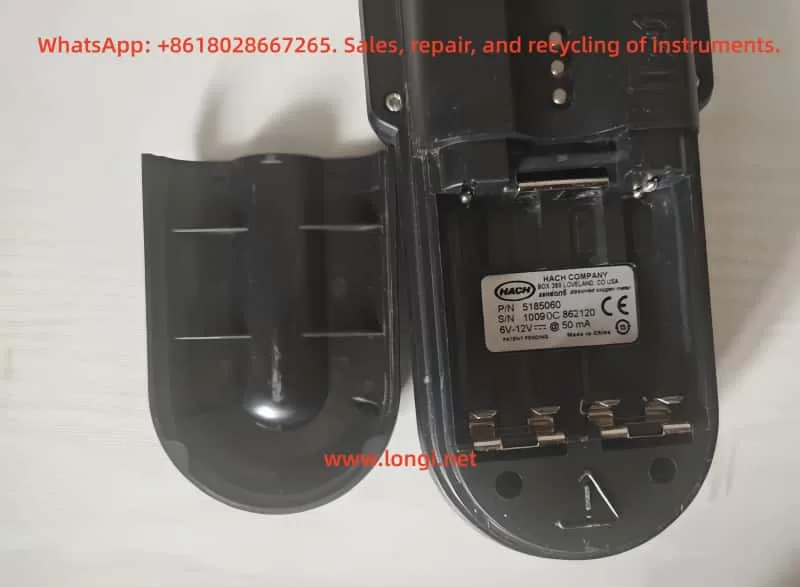
Battery Installation Steps:
- Place the instrument upside down on a soft pad.
- Open the battery compartment cover at the bottom.
- Insert 4 AA alkaline batteries according to the marked direction (do not use Ni-Cd rechargeable batteries).
- Close the battery compartment cover.
Notes:
- The display will show “LOW BATTERY” when the battery level is low.
- It is recommended to remove the batteries if the instrument is not in use for an extended period.
- After replacing the batteries, the time and date need to be reset.
2.2 Basic Parameter Settings
Date Setting:
- Press the SETUP/CE key to enter the setup menu.
- Select the “Date” option.
- Enter the current date (format: MM/DD/YY).
- Press READ/ENTER to confirm.
Time Setting:
- In the setup menu, select “Time”.
- Enter the time in 24-hour format (e.g., 14:00).
- Press READ/ENTER to confirm.
Unit Setting:
- Enter the setup menu and select “Units”.
- Choose mg/L or % saturation as the default display unit.
- Press READ/ENTER to confirm.
2.3 Sensor Installation and Preparation
Dissolved Oxygen Electrode Installation:
- Insert the electrode into the electrode socket on the top of the instrument.
- Rotate the locking ring clockwise to secure the electrode.
- Ensure the electrode is firmly connected to the instrument.
Electrode Activation:
- For initial use or after long-term storage, immerse the electrode in water for at least 2 hours.
- Regularly check if the electrode membrane is intact, without damage or contamination.
- Keep the surface of the electrode membrane clean and avoid scratching it.
Chapter 3: Dissolved Oxygen Measurement Operation Process
3.1 Zero Calibration (Zero Oxygen Calibration)
Preparation of Zero Oxygen Solution:
- Take 250 mL of distilled water and add 0.25 g of anhydrous sodium sulfite.
- Stir until completely dissolved (to create a zero-oxygen environment).
Calibration Steps:
- Immerse the electrode in the zero-oxygen solution.
- Press the SETUP/CE key to enter the setup menu.
- Select “Calibration” → “Zero Cal”.
- Wait for the reading to stabilize (about 3-5 minutes).
- Press READ/ENTER to confirm the zero point.
- Press EXIT to exit the calibration mode.
3.2 Full-Scale Calibration (100% Saturation Calibration)
Preparation of Saturated Oxygen Water:
- Take 150 mL of distilled water and shake vigorously for 5 minutes.
- Alternatively, use a specially prepared saturated dissolved oxygen standard solution.
Calibration Steps:
- Immerse the electrode in the saturated oxygen water.
- Press the SETUP/CE key to enter the setup menu.
- Select “Calibration” → “100% Cal”.
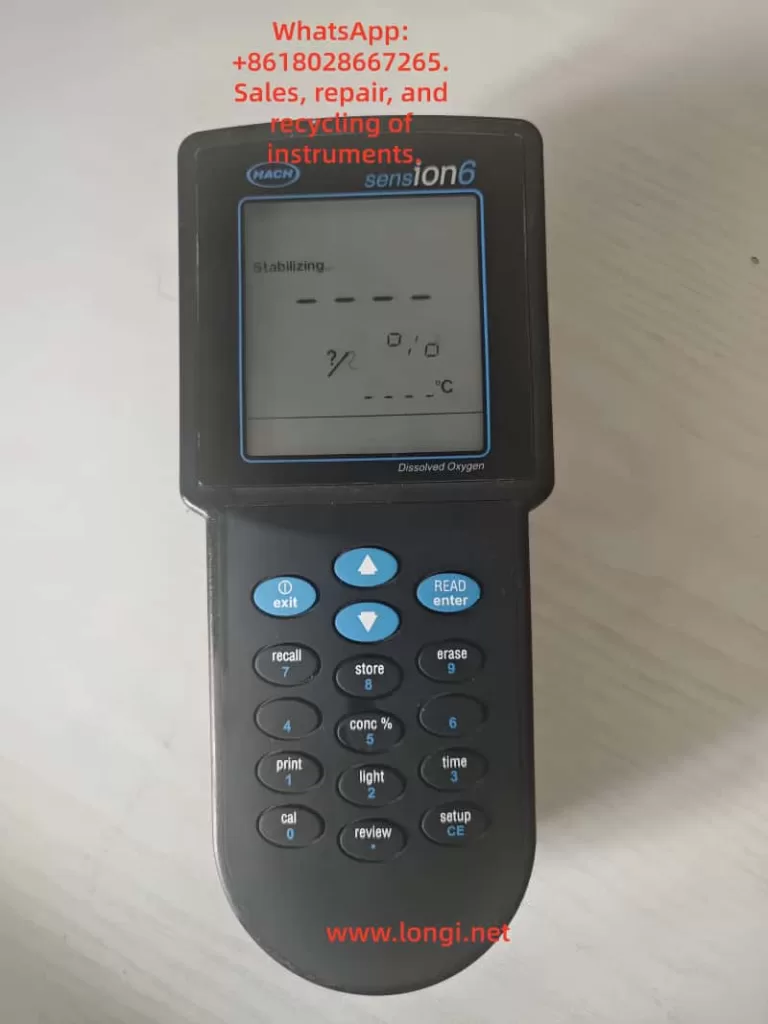
- Wait for the reading to stabilize (display “Stabilizing…”).
- Press READ/ENTER to confirm the full-scale value.
- Press EXIT to exit the calibration mode.
3.3 Sample Measurement
Standard Measurement Process:
- Immerse the electrode in the water sample to be tested.
- Gently stir the electrode to keep the water sample flowing (avoid generating bubbles).
- Wait for the reading to stabilize (about 30-60 seconds).
- Press the CONC% key to switch between mg/L and % saturation display.
- Record the measurement result.
Notes:
- Avoid direct sunlight on the sample during measurement.
- Keep the temperature of the water sample stable (temperature changes affect dissolved oxygen).
- For high-salinity samples, set the salinity compensation.
3.4 Salinity and Barometric Pressure Compensation
Salinity Compensation Setting:
- Press SETUP/CE to enter the setup menu.
- Select the “Salinity” option.
- Enter the salinity value of the sample (0-42 ppt).
- Press READ/ENTER to confirm.
Barometric Pressure Compensation Setting:
- Enter the setup menu and select “Barometer”.
- Enter the local atmospheric pressure value (mmHg or inHg).
- Or select “Auto” to automatically obtain barometric pressure data.
- Press READ/ENTER to confirm.
Chapter 4: Advanced Function Applications
4.1 BOD Measurement Mode
BOD Measurement Steps:
- Prepare a 300 mL BOD sample bottle.
- Initially measure the DO value of the sample and record it.
- Place the sample bottle in a 20°C incubator for 5 days.
- After 5 days, measure the DO value again.
- Calculate the BOD value (initial DO – final DO).
Notes:
- Use a dedicated BOD bottle cap to prevent gas exchange.
- Keep the incubation temperature constant at 20 ± 1°C.
- For high-BOD samples, appropriate dilution may be required.
4.2 Data Storage and Retrieval
Data Storage:
- After the measurement result is displayed, press the STORE key.
- Enter the sample number (automatically or manually).
- Press READ/ENTER to confirm storage.
Data Retrieval:
- Press the RECALL key to enter the data review menu.
- Use the ▲/▼ keys to select the sample number.
- Press READ/ENTER to view detailed data.
- Press TIME/DATE to view the storage time.
Data Management:
- Can store up to 99 sets of measurement data.
- Supports deleting a single set of data by number.
- Can delete all stored data at once.
4.3 Data Output and Printing
RS232 Interface Connection:
- Use the dedicated data cable to connect the instrument to a computer/printer.
- Set the communication parameters (9600 baud rate, 8 data bits, no parity).
- Press the PRINT key to send data.
Printing Options:
- Print the current measurement value.
- Print specified stored data.
- Print all stored data.
Computer Connection:
- Install the HachLink™ software.
- Set up a hyperterminal to receive data.
- Enable automatic data collection and storage.
Chapter 5: Instrument Maintenance and Troubleshooting
5.1 Daily Maintenance Points
Electrode Maintenance:
- Regularly replace the electrolyte and membrane (recommended every 1-2 months).
- Clean the electrode surface to avoid contamination.
- Keep the electrode moist during short-term storage.
- Store the electrode dry during long-term storage.
Instrument Cleaning:
- Wipe the outer shell with a damp cloth.
- Avoid using organic solvents.
- Keep the keyboard and interface dry.
Calibration Recommendations:
- Perform zero calibration before using the instrument each day.
- Perform full-scale calibration once a week.
- Recalibrate after replacing the electrolyte or membrane.
5.2 Common Faults and Troubleshooting
Display Problems:
- No display: Check battery installation and power connection.
- Blurry display: Adjust the contrast or replace the batteries.
- “LOW BATTERY”: Replace all 4 batteries.
Measurement Abnormalities:
- Unstable readings: Check the electrode connection and clean the electrode.
- Slow response: Replace the electrolyte and membrane.
- Calibration failure: Check the calibration solution and confirm the electrode status.
Error Codes:
- Err 1: Sensor failure, check the electrode connection.
- Err 2: Out of measurement range, dilute the sample.
- Err 3: Calibration error, recalibrate.
Chapter 6: Safety Regulations and Quality Assurance
6.1 Safety Operation Regulations
Danger Warnings:
- Do not use Ni-Cd rechargeable batteries as there is a risk of explosion.
- Avoid contact of the electrode with strong acid and alkali solutions.
- Do not immerse the instrument in water (although it has an IP67 protection rating).
Operation Precautions:
- Wear protective equipment when handling chemical reagents.
- Use standard solutions according to the instructions.
- Dispose of used electrolyte as hazardous waste.
6.2 Quality Assurance and Service Support
Warranty Policy:
- Standard warranty period is 1 year (from the date of shipment).
- Covers material and workmanship defects.
- Unauthorized disassembly will void the warranty.
Maintenance Services:
- Users are not allowed to repair any parts other than the batteries by themselves.
- Contact an authorized service center for handling.
- Provide the instrument model and serial number when requesting maintenance.
Chapter 7: Practical Application Tips
7.1 Tips for Improving Measurement Accuracy
Sample Handling:
- Avoid vigorous shaking to prevent bubble generation.
- Keep the sample temperature stable.
- Allow the electrode to acclimate to the sample temperature before measurement.
Electrode Maintenance:
- Regularly replace the electrolyte and membrane.
- Keep the membrane moist during storage.
- Clean the electrode gently with a soft cloth.
Environmental Control:
- Avoid strong electromagnetic interference.
- Keep the measurement environment temperature stable.
- Set the correct salinity compensation for high-salinity samples.
7.2 Handling Special Application Scenarios
Low Dissolved Oxygen Measurement:
- Use zero calibration to improve accuracy at the low end.
- Extend the stabilization time.
- Avoid contact between the sample and air.
High-Salinity Water Samples:
- Accurately set the salinity compensation value.
- Consider using a dedicated high-salinity electrode.
- Increase the calibration frequency.
Flowing Water Body Measurement:
- Ensure sufficient contact between the electrode and the water.
- Use a flow cell attachment.
- Avoid measurement positions with eddies or bubbles.
Conclusion
The Hach Sension6 portable dissolved oxygen meter is a fully functional and easy-to-operate professional water quality analysis instrument. Through the systematic introduction in this guide, users should be able to proficiently master all functions of the instrument, from basic operations to advanced applications. Correct operation methods and regular maintenance can not only ensure the accuracy of measurement data but also extend the service life of the instrument. When encountering problems that cannot be resolved, promptly contact the professional technical service personnel of Hach Company to avoid improper operation causing instrument damage or data loss.
Dissolved oxygen monitoring plays an irreplaceable role in water environment protection, aquaculture, and sewage treatment. It is hoped that this guide can help users fully leverage the performance advantages of the Sension6 portable dissolved oxygen meter, providing reliable technical support for water quality monitoring work and jointly safeguarding the health of our water environment.