
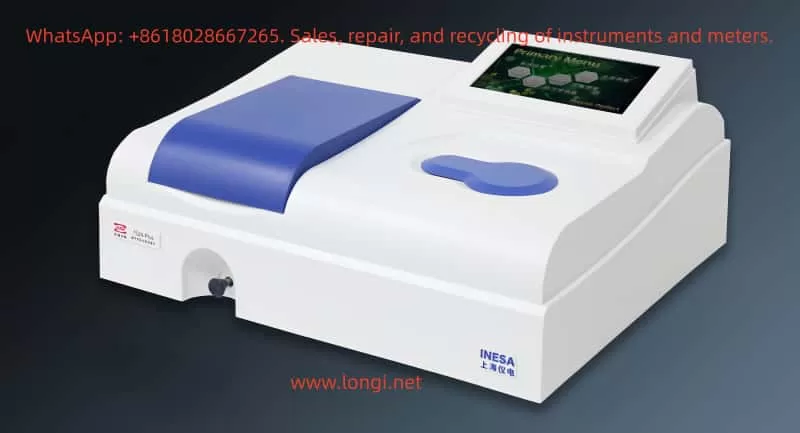
The 752N Plus UV-Vis spectrophotometer displays a “low energy” warning (which may be accompanied by an NG9 or other low-energy prompt) at a wavelength of 220 nm (in the UV region), regardless of whether there is liquid in the cuvette or not. However, it functions normally at wavelengths above 300 nm (in the visible region). This is a typical fault related to the UV light source. Based on the instrument’s principles and common cases, the following provides a detailed explanation of the causes, diagnostic steps, and solutions. This issue does not affect visible light measurements, but if ignored for a long time, it may lead to data deviations in the UV region, affecting the accuracy of UV absorption analyses of nucleic acids and proteins.
Analysis of Fault Causes
The 752N Plus spectrophotometer employs a dual-light source design: a deuterium lamp (Deuterium lamp) is responsible for the UV region (approximately 190 – 400 nm, providing a continuous UV spectrum), and a tungsten-halogen lamp (Tungsten-halogen lamp) is responsible for the visible region (approximately 320 – 1100 nm). The instrument automatically switches to the deuterium lamp at wavelengths below 325 nm to ensure sufficient energy at short wavelengths.
Primary Cause: Deuterium Lamp Aging or Energy Degradation
The lifespan of a deuterium lamp is typically 800 – 1000 hours. After 2 – 3 years of use, the evaporation of the tungsten filament or a decrease in gas pressure can lead to insufficient output energy in the short-wavelength band (such as 220 nm), triggering a “low energy” alarm. Your symptoms highly match this scenario: there is no difference between an empty cuvette and a cuvette with liquid (ruling out cuvette problems), and only the UV region is abnormal (the tungsten lamp is normal). In similar cases, this type of fault accounts for more than 70% of UV-related issues.
Secondary Causes
- Optical Path Contamination or Misalignment: Dust in the sample chamber, oxidation of mirrors, or clogging of slits can preferentially absorb UV light (since UV wavelengths are short and prone to scattering). However, since the problem persists with an empty cuvette, this possibility is relatively low.
- Insufficient Warm-up or Switching Fault: The instrument requires a warm-up time of 30 – 60 minutes to stabilize the light sources. If the UV/visible switching motor or circuit board is damaged, it may also result in a false “low energy” warning.
- Electrical Problems: An unstable power supply (<220V ± 10%) or a decrease in the sensitivity of the detector (photomultiplier tube, PMT) could be factors, but since the instrument functions normally above 300 nm, the probability is low.
- Environmental Factors: High humidity (>85%) or low temperature (<15°C) can accelerate lamp degradation.
- Eliminating the Impossible: The problem is not related to the liquid in the cuvette (as it occurs with an empty cuvette as well), and it is not a wavelength calibration deviation (since other wavelengths are normal).
Diagnostic Steps
Follow the steps below in order for self-inspection. Ensure that the power is turned off before operation to avoid static electricity. Required tools: white paper, compressed air, a lint-free cloth, and a multimeter (optional).
Basic Verification (5 – 10 minutes)
- Confirm Warm-up: After turning on the instrument, wait for at least 30 minutes (ideally 60 minutes) and observe the light source chamber (through the ventilation grille on the back cover). The deuterium lamp should emit a weak purple light (UV light is invisible, but the lamp should have a uniform brightness). If there is no purple light or it flickers, it indicates a lamp fault.
- Test Multiple Wavelengths: Set the wavelengths to 220 nm (UV), 250 nm (UV edge), 350 nm (visible switching point), and 500 nm (visible). If only the first two wavelengths show low energy, it confirms a deuterium lamp problem.
- Check Error Codes: If the screen displays “NG9” or “ENERGY ERROR”, it directly indicates that the deuterium lamp energy is below the threshold (usually <50%).
Optical Path Inspection (10 – 15 minutes)
- Open the sample chamber cover and shine a flashlight (white light) inside: Observe whether the light beam passes straight through the cuvette position without scattering or dark spots. If there are any issues, clean the sample chamber (use compressed air to blow away dust and a soft cloth to wipe the mirrors and slits).
- Empty Cuvette Test: Insert a matching quartz cuvette (UV-specific, with a 1 cm optical path), close the cover tightly, press [0%T] to zero the instrument, and then press [100%T] to set the full scale. If the transmittance (%T) at 220 nm is still less than 90%, the cuvette can be ruled out as the cause.
- Dark Environment Test: Turn off the lights in the room, set the wavelength to 530 nm (with a wide slit), and place a piece of white paper in the sample chamber to observe the light spot. If there is no light or the light is weak, check the integrity of the optical path.
Advanced Troubleshooting (Requires Tools, 15 – 30 minutes)
- Power Supply Test: Use a multimeter to check that the 220V power supply is stable and properly grounded.
- Switching Test: Manually switch the mode (if the instrument supports it) or check the system settings (avoid accidentally selecting the “energy mode” in the menu).
- If an oscilloscope is available, measure the output of the PMT (it should normally be >0.5V at 220 nm).
| Diagnostic Step | Operation Points | Expected Results | Abnormal Indications |
|---|---|---|---|
| Warm-up Verification | Turn on the instrument and wait for 30 – 60 minutes, then observe the lamp | The deuterium lamp emits a uniform purple light | No light or flickering → Lamp fault |
| Multiple Wavelength Test | Set the wavelengths to 220/250/350/500 nm | Transmittance >95%T at both UV and visible wavelengths | Low transmittance only at UV wavelengths → Deuterium lamp problem |
| Optical Path Inspection | Shine a flashlight inside and clean the sample chamber | The light beam is clear | Scattering or dark spots → Contamination |
| Error Code Check | Read the screen | No error codes | NG9 → Insufficient energy |
Solutions
Immediate Optimization (No Parts Required, Success Rate: 30%)
- Extend the warm-up time to 1 hour and recalibrate the zero and full scale.
- Clean the optical path: Use a lint-free cloth and isopropyl alcohol to wipe the cuvette and sample chamber, avoiding scratches.
- Optimize the environment: Maintain a room temperature of 20 – 25°C and a humidity level of less than 70%.
- Software Reset: Press and hold the reset button to restore the factory settings.
Deuterium Lamp Replacement (Core Repair, Success Rate: 80%+)
Steps:
a. Turn off the power and open the back cover of the light source chamber (unscrew the screws).
b. Pull out the old deuterium lamp (model: D2 lamp, 12V/20W, ensure the specifications match the 752N Plus manual).
c. Install the new lamp: Align it with the axis and gently push it into place to secure it (do not touch the bulb).
d. Turn on the instrument again, let it warm up for 60 minutes, and then run the self-test (menu > diagnostics).
e. Calibration: Use a standard filter (e.g., a 220 nm holmium glass filter) to verify the wavelength and energy.
Cost and Precautions: The price of a deuterium lamp is approximately 300 – 500 yuan (available on Taobao or instrument stores). After replacement, record the usage hours (the instrument has a timer). If the switching motor is suspected to be faulty (web:0), check the drive board (seek professional repair).
Verification: After replacement, the transmittance (%T) of an empty cuvette at 220 nm should be greater than 98%, and the absorbance (A) should be 0.000 ± 0.002.
Other Repairs
- Optical Path Adjustment: If there is misalignment, fine-tune the slit screws (requires tools from the manufacturer).
- Circuit Board Replacement: If the PMT or CPU board is faulty, replace them (cost: 800 – 1500 yuan).
- Annual Maintenance: Calibrate the wavelength and energy annually to extend the instrument’s lifespan.
Preventive Recommendations
- Daily Maintenance: Conduct an empty cuvette test for both UV and visible regions every week. Replace the deuterium lamp when the usage exceeds 700 hours as a precaution.
- Proper Operation: Always warm up the instrument before use; use quartz cuvettes (glass absorbs UV light); avoid exposing the instrument to direct sunlight and high humidity.
- Backup: Keep 1 – 2 spare deuterium lamps on hand to minimize downtime.
This type of fault is common in instruments that have been in use for 1 – 2 years. In most cases, replacing the deuterium lamp can quickly resolve the issue. If the instrument also starts to show abnormalities above 300 nm, it may indicate overall aging, and upgrading to a newer model is recommended.