I. Principles, Functions, and Features
1.1 Principles of Field Emission Scanning Electron Microscope
The JSM-7610F belongs to the Field Emission Scanning Electron Microscope (FE-SEM) family. It generates a highly bright electron beam using a field emission gun, focuses the beam onto the specimen surface, and scans point by point. Detectors collect signals such as secondary and backscattered electrons to form images. Compared to conventional tungsten filament SEMs, the FEG provides higher brightness and coherence, enabling imaging with sub-nanometer resolution.
Its core components include:
- Electron Gun (In-lens Schottky FEG): Long lifetime, high brightness, and excellent stability.
- Semi-in Lens Objective Lens: Reduces aberrations and improves resolution.
- Aperture Angle Control Lens (ACL): Maintains small probe diameter even under high beam current.
- Detector System: Includes SEI, LABE, STEM, etc., supporting morphology observation, compositional and structural analysis.
- Vacuum System: Combination of turbo molecular pump and mechanical pump ensures high-vacuum chamber conditions.
1.2 Main Functions and Specifications
The JSM-7610F offers the following key specifications:
- Resolution: 1.0 nm (15 kV), 1.5 nm (1 kV, GB mode); the upgraded JSM-7610FPlus achieves 0.8 nm at 15 kV.
- Accelerating Voltage Range: 0.1 – 30 kV.
- Magnification: ×25 – ×1,000,000 (up to 3,000,000 display magnification).
- Gentle Beam Mode: Applies specimen bias to decelerate incident electrons, enabling surface imaging at ultra-low landing energies, suitable for non-conductive samples.
- Analytical Functions: Compatible with EDS, WDS, EBSD, CL, providing high spatial resolution compositional analysis.
- Specimen Stage: Fully motorized five-axis eucentric goniometer stage with ±70° tilt and 360° rotation.
1.3 Application Areas
- Materials science (nanoparticles, composites, ceramics, metallurgy).
- Semiconductor research (thin films, multilayers, defect analysis).
- Biological samples (after conductive coating).
- Nanotechnology and energy materials research.
II. Installation, Calibration, and Adjustment
2.1 Installation Requirements
- Power Supply: Single-phase 200 V, 50/60 Hz, ~4 kVA.
- Environment: Temperature 15–25 °C, humidity ≤ 60%.
- Interference Control: AC magnetic field ≤ 0.3 μT, vibration ≤ 3 μm (≥ 5 Hz), noise ≤ 70 dB.
- Space: Room ≥ 3 m × 2.8 m, height ≥ 2.3 m.
After installation, the following must be verified:
- Vacuum performance: Chamber pressure < 10⁻³ Pa.
- Electron gun tuning: Verify emission current and stability.
- Stage calibration: Confirm X/Y/Z/R/T ranges and homing accuracy.
2.2 Calibration Items
- Electron Optics Calibration: Beam alignment, astigmatism correction, gun centering.
- Working Distance (WD) Calibration: Ensure Z-axis displacement corresponds with WD readouts.
- Detector Calibration: Gain adjustment and spectrum calibration for SE/BSE and EDS/WDS.
- Stage Eucentric Calibration: Guarantee that rotation keeps the sample within the focus plane.
III. Operating Procedures
The JSM-7610F operation is divided into sample loading, imaging setup, image acquisition, and sample unloading.
3.1 Sample Loading
- Confirm stage is in Exchange Position, loadlock vacuum is stable.
- Open loadlock and insert sample. Ensure specimen height is flush or measure offset if protruding.
- Close loadlock and evacuate until pressure < 10⁻³ Pa.
- Use transfer rod to move the sample into chamber and lock onto stage.
3.2 Imaging Preparation
- Turn on electron gun, set accelerating voltage (commonly 5–15 kV).
- Select detector: SEI for surface morphology, BSE for compositional contrast.
- Adjust working distance (commonly 8 mm, or 10–15 mm for EDS).
- Start with low magnification to locate region of interest.
3.3 Imaging and Adjustment
- Set beam current, align electron beam, correct astigmatism.
- Adjust focus, brightness, and contrast.
- Switch to higher magnification for detailed imaging.
- For analysis, activate EDS or WDS.
3.4 Image Acquisition and Storage
- Select scan mode: Quick-1/2 for preview, Fine-1/2 for high quality.
- Freeze and save image in JPEG/TIFF/BMP format.
- Saved images can restore beam and stage settings.
3.5 Sample Unloading
- Turn off electron gun, return stage to Exchange Position.
- Open loadlock, retrieve sample.
- Return system to standby mode.
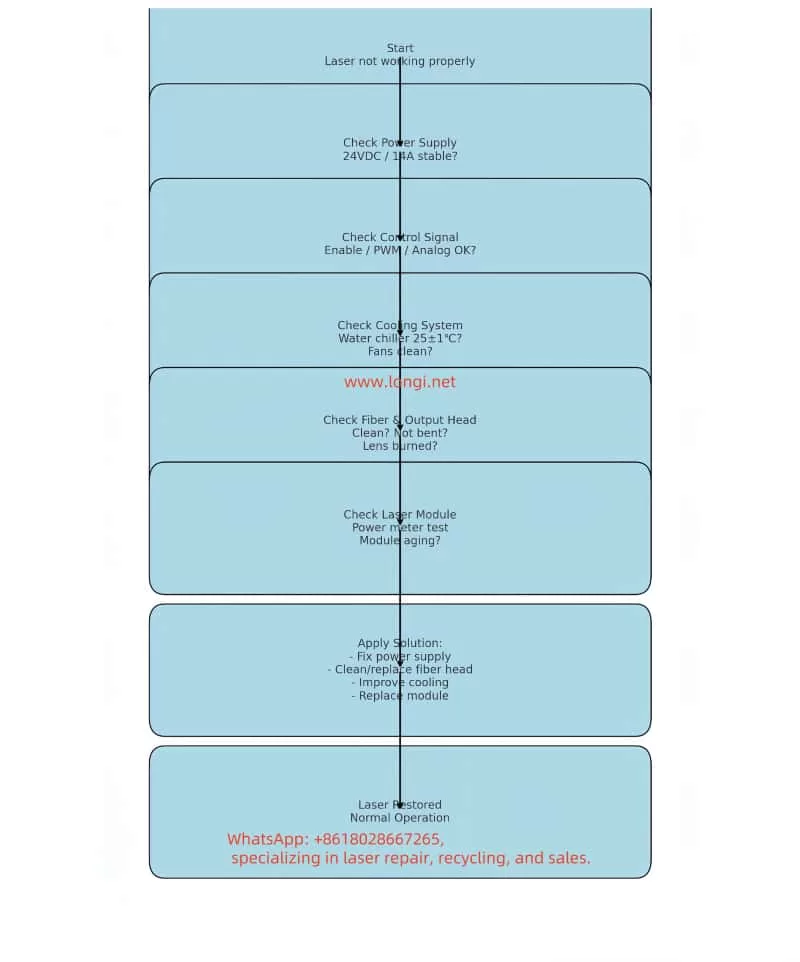
IV. Common Faults and Troubleshooting
4.1 High Voltage Error
- Cause: Abnormal gun power supply or insufficient vacuum.
- Solution: Check high voltage supply and vacuum conditions.
4.2 Vacuum Error
- Cause: Chamber leakage, faulty pump.
- Solution: Inspect O-rings, pump oil, and turbo pump.
4.3 Image Drift or Noise
- Cause: Electromagnetic interference, sample charging, grounding issues.
- Solution: Improve grounding, apply conductive coating, stabilize beam current.
4.4 Stage Initialize Error (Case Example)
This is a frequent issue reported by users: the stage moves but fails to home.
- Symptom: XY motors move, but home sensor is not triggered, initialization fails.
- Causes:
- Sensor damage from water or humidity.
- New driver board (e.g., GBD-5F30V1) DIP switch mismatch.
- Poor cable connection or oxidation.
- Solutions:
- Verify 5 V supply and sensor output signal.
- Compare DIP switch settings with the original driver board.
- Inspect connectors for oxidation, reseat or replace if necessary.
- Replace home sensor if defective.
- Temporary Workaround: Manually set current position as zero point in software, though long-term solution requires restoring sensor function.
V. Conclusion
The JSM-7610F series, as a high-end FE-SEM from JEOL, provides sub-nanometer resolution, wide accelerating voltage range, Gentle Beam mode, and versatile analytical capabilities. It has become a vital instrument in materials science, semiconductor research, and nanotechnology.
To fully utilize its potential, users must understand the installation requirements, calibration procedures, standard operating steps, and common troubleshooting methods. Familiarity with the user manual, combined with practical experience, ensures safe operation and long-term performance.
The JSM-7610F manual is not only a technical reference but also a critical guide for safe, efficient, and reliable operation, enabling researchers and engineers to maximize the benefits of this powerful instrument.