
Abstract
The BioSpectrum AC Chemi HR 410 is a versatile gel and chemiluminescence imaging platform widely used in molecular biology and biochemistry laboratories. This article synthesizes hardware specifications, software capabilities, common applications, troubleshooting methodologies, market pricing, installation considerations, and support resources into a coherent, step-by-step guide. Whether you’re commissioning a new system, refurbishing a second-hand unit, or diagnosing intermittent black-frame issues, this document provides the logical framework and detailed procedures to keep your imaging workflow running smoothly.

1. System Overview
The BioSpectrum AC Chemi HR 410 (often abbreviated “HR 410”) is manufactured by Analytik Jena (formerly UVP). It combines a fully enclosed dark chamber, interchangeable light sources, a high-sensitivity cooled CCD camera, and the user-friendly VisionWorks software. Typical applications include:
- DNA/RNA electrophoresis imaging with EtBr or SYBR dyes
- Protein blot detection via chemiluminescence (ECL) or fluorescence
- Quantitative analysis of band densities (1D) and area densities (2D)
- Plate and dish imaging using transmitted or reflected light
Key advantages are its modular optical design, precise filter-wheel control, and advanced image-processing algorithms. The system supports both manual and automated modes, making it suitable for single-user labs up to core facilities.
2. Hardware Components and Operating Principles
- Dark Chamber
- Dimensions: ~445 mm (W) × 445 mm (D) × 813 mm (H). Completely light-tight to prevent ambient interference.
- Illumination Module (T-Lum Platform)
- Houses ultraviolet (254 nm, 302 nm) or white LED arrays. Enables rapid switch-out of lamp assemblies.
- Models labeled “Without T-Lum” require separate procurement of the light-source kit.
- Filter Wheel and Shutter
- Motorized carousel holds multiple excitation and emission filters for fluorescence; includes an interlock shutter to block or permit light.
- CCD Camera (Chemi HR 2 MP)
- High quantum-efficiency, Peltier-cooled CCD. Cooling reduces dark current, enabling long exposures (seconds to minutes) with minimal noise.
- Interface and Control
- 230 VAC power input, USB and Ethernet ports. Can be tethered to a dedicated workstation or shared network PC.
- Chassis and Ergonomics
- Top-mounted camera head with adjustable focus; front door for sample insertion; side vents for cooling airflow.
This modular architecture allows each component to be serviced or upgraded independently—critical for maintaining peak performance over years of operation.
3. VisionWorks Software Features
VisionWorks is the proprietary acquisition and analysis suite for HR 410. Major modules include:
- Acquisition Modes:
- Preview: Real-time low-exposure view for focusing and framing.
- Capture: Manual control of exposure time, gain, and shutter.
- Auto-Exposure: Algorithmic calculation of optimal exposure based on selected template (e.g., DNA, chemiluminescence).
- Image Management:
- Zoom, pan, ROI selection, frame stacking, and pixel averaging to enhance weak signals.
- Quantitative Analysis:
- 1D Analysis: Automated lane/band detection, background subtraction, area integration.
- 2D Area Density: Intensity heatmaps and contour plots for flat samples.
- Template System:
- Save and recall complete acquisition and analysis parameters for reproducible experiments.
- Calibration Utilities:
- Dark Reference Acquisition: Captures a baseline image with shutter closed to subtract sensor noise.
- Flat Field Adjustment: Corrects for uneven illumination or vignetting across the field of view.
Intuitive menus and clear graphical feedback make VisionWorks accessible to both novice and expert users.
4. Common Application Workflows
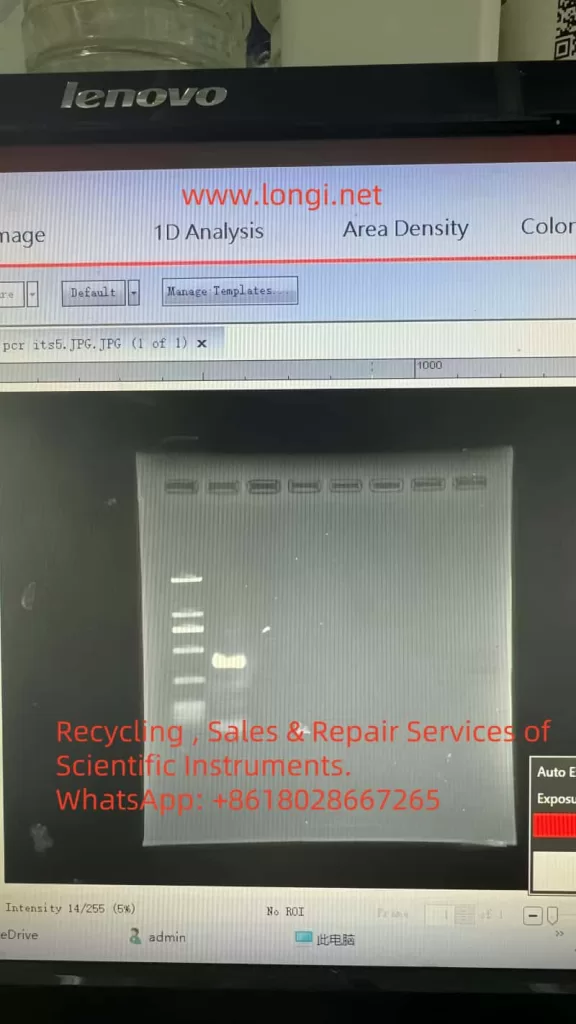
- Nucleic Acid Gel Imaging
- Stain with Ethidium Bromide or SYBR dye; select appropriate excitation filter and emission barrier filter.
- Use Preview to position the gel, then Auto-Exposure or manual exposure (0.5–10 s) depending on band brightness.
- Western Blot Chemiluminescence
- Mount blot on trans-illumination tray, close door, then select “Chemiluminescence” template.
- Exposures may range from 30 s to several minutes for low-abundance proteins.
- Quantitative Band Analysis
- After capture, launch 1D Analysis: draw lanes, verify band boundaries, subtract local background, and export intensity values.
- High-Throughput Plate Imaging
- Use white LED for trans-illumination of microplates; flat-field correction ensures uniform signal across wells.
These workflows can be chained in batch mode for unattended overnight acquisition.
5. Fault Phenomena and Root Cause Analysis
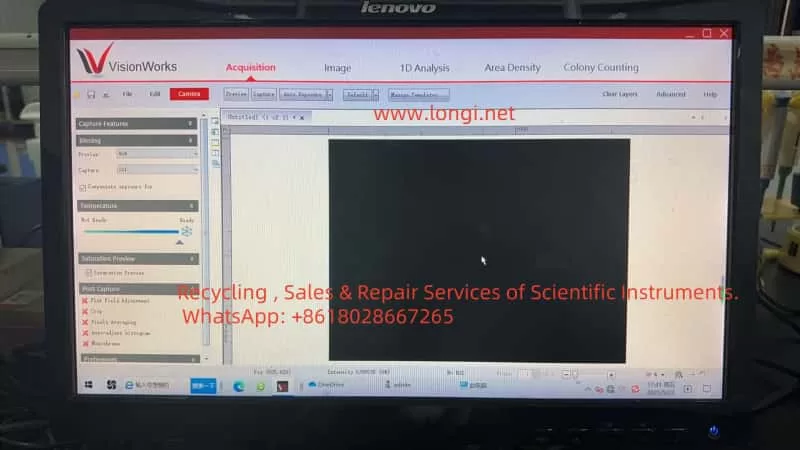
5.1 Completely Black Frames
- Missing Illumination Module: Units sold “Without T-Lum” lack any light source; image is always black.
- Lamp or LED Failure: Old or damaged bulbs/LEDs fail to ignite, leaving no excitation light.
- Unready CCD Cooling: Camera not cooled to setpoint; software suspends exposure to avoid noise.
- Filter or Shutter Misalignment: Filter wheel stuck in blank position or shutter never opens.
5.2 Intermittent Weak Signal
- Lamp Aging: Mercury-arc bulbs degrade over time; sometimes they ignite, sometimes they don’t.
- Calibration Expiry: Dark or flat references become outdated, leading to improper noise subtraction and vignetting artifacts.
- Auto-Exposure Limitations: Default algorithms optimize for bright samples, missing faint chemiluminescence signals.
Understanding these categories allows targeted troubleshooting rather than trial-and-error.
6. Step-by-Step Troubleshooting and Maintenance Workflow
- Verify Illumination Presence
- Check rear panel or documentation for T-Lum module; if absent, acquire and install the correct kit.
- Test and Replace Lamps/Ballasts
- Preheat lamp for 5–10 min; observe light output. Measure ballast voltage. Replace any bulb nearing 800–1 000 h lifetime.
- Ensure CCD Cooling and Calibration
- Wait for “Temperature: Ready” indicator. In the software, navigate to Image → Calibration and Acquire Dark Reference. Then enable Flat Field Adjustment.
- Optimize Exposure Settings
- Run Auto-Exposure in the “Chemiluminescence” template. If still dim, manually increase exposure to 60–300 s. Disable “Compensate exposure for” to test pure manual mode.
- Maintain Filter Wheel and Shutter
- Cycle through all filter positions in software; listen for smooth motor sounds. Clean filter edges and apply micro-drops of non-oil lubricant to bearings as needed.
- Update Software and Firmware
- Download the latest VisionWorks patches and camera firmware from the manufacturer’s website. Reboot system to apply changes.
- Clean Optical Path and Sample Holders
- Wipe lenses, trays, and windows with lint-free wipes and 70% ethanol. Verify that sample trays align with the camera’s field of view.
By following this structured workflow, most “black frame” or “fluctuating signal” issues can be resolved without resorting to full system teardown.
7. Market Selection and Pricing Reference
| Configuration | Typical Second-Hand Price (USD) | New Unit MSRP (USD) | Notes |
|---|---|---|---|
| Dark Chamber Only (no camera, no software) | 800 – 1 500 | N/A | For UV fluorescence only, no chemiluminescence |
| Refurbished Complete System (HR 410 + Software) | 5 000 – 6 000 | N/A | Often sold with limited warranty |
| Brand-New Complete System (HR 410 + License + T-Lum) | N/A | 8 000 – 12 000 | Official distributor pricing |
Recommendation:
- Budget-Conscious Labs: Opt for a fully refurbished unit with warranty coverage.
- Core Facilities or High-Throughput Settings: Invest in a brand-new system for guaranteed support, full warranty, and latest firmware.
8. Installation Footprint and Environmental Requirements
- Dark Chamber Dimensions: 445 mm × 445 mm × 813 mm
- Overall Footprint (including camera head): 623 mm × 463 mm × 915 mm
- Space Planning: Reserve at least 300 mm clearance front and back, 500 mm on sides for maintenance access.
- Ambient Conditions:
- Temperature: 18 °C – 25 °C
- Relative Humidity: ≤ 60%
- Avoid direct sunlight or strong fluorescent lighting near the sample door.
Proper environmental control reduces temperature fluctuations on the CCD and extends component life.
9. Supporting Documentation and Technical Assistance
- Official Manual: BioSpectrum Imaging System Instruction Guide (Part 81-0346-01 Rev J) contains detailed hardware schematics, software installation, calibration procedures, and maintenance guidelines.
- Key Chapters to Review:
- Hardware Setup and Power Connections
- VisionWorks Installation and License Activation
- Acquisition Modes and Template Management
- Dark/Flat Reference Procedures
- Advanced Troubleshooting (lamp, ballast, cooling system)
- Technical Support Channels:
- Contact Analytik Jena’s regional distributor for spare parts (lamps, filters, shutters).
- Access online firmware updates and knowledge-base articles via the official website.
- Enroll in extended service contracts for on-site preventive maintenance.
10. Conclusion and Best Practices
The BioSpectrum AC Chemi HR 410 combines optical versatility, sensitive detection, and powerful analysis software to serve a broad range of life-science imaging applications. By adhering to the systematic maintenance workflow outlined above, users can:
- Prevent Downtime: Regular lamp replacement, calibration refreshes, and filter-wheel lubrication.
- Ensure Data Quality: Proper dark/flat corrections and exposure optimization guarantee reproducible results.
- Extend System Life: Keeping software and firmware up to date, cleaning optical components, and controlling environmental factors.
When selecting a unit, balance budgetary constraints against the need for warranty and technical support. For intermittent imaging issues—such as occasional black frames or weak signals—follow the seven-step troubleshooting procedure before involving service engineers. In doing so, your laboratory will realize maximum uptime, consistent image quality, and reliable quantitative data for years to come.